
|
|
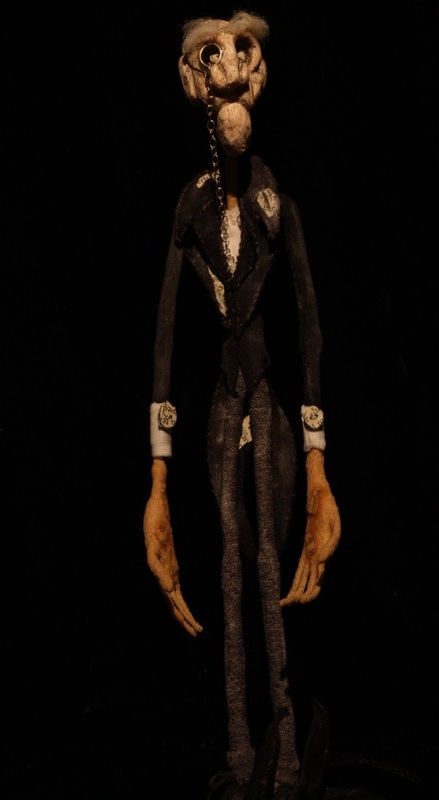
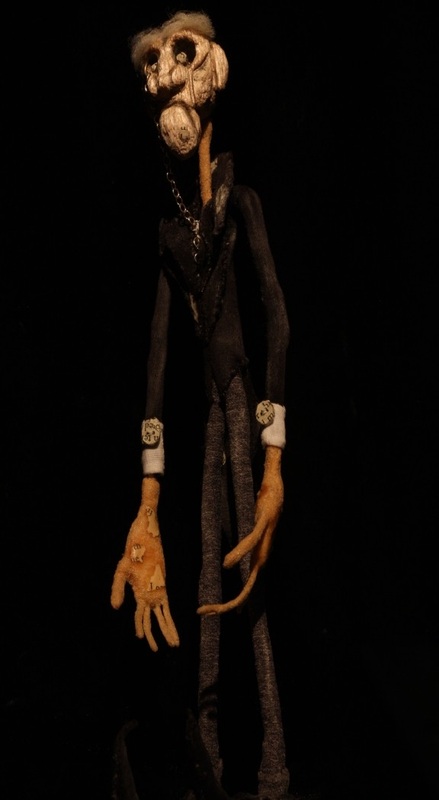
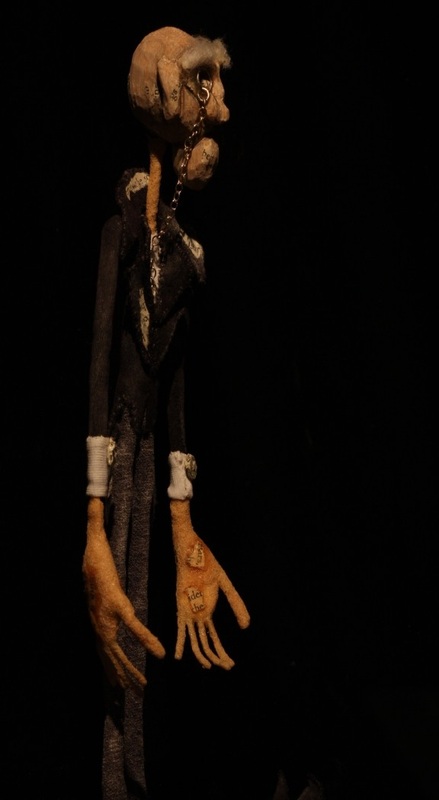
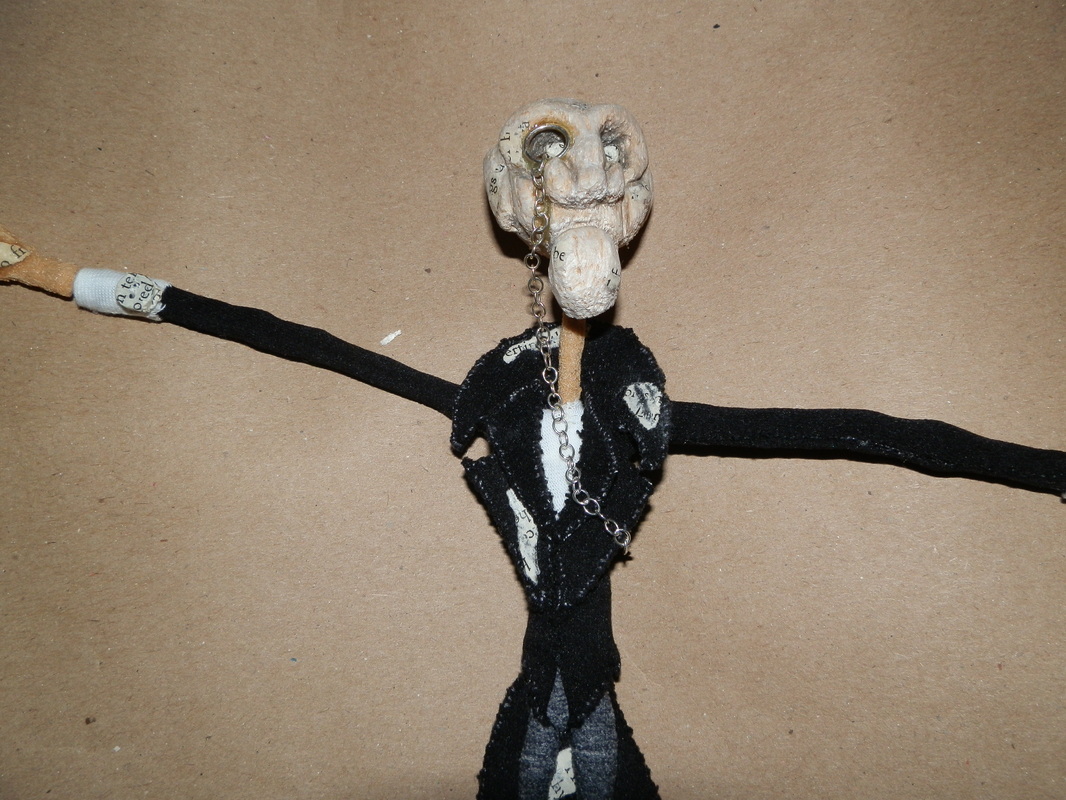
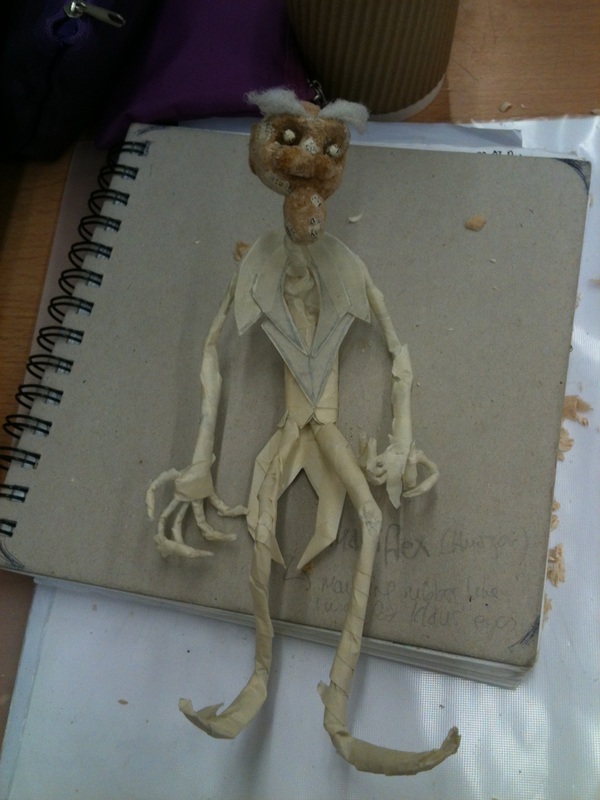
I dusted his clothes with talcum powder to give them an aged and worn look:
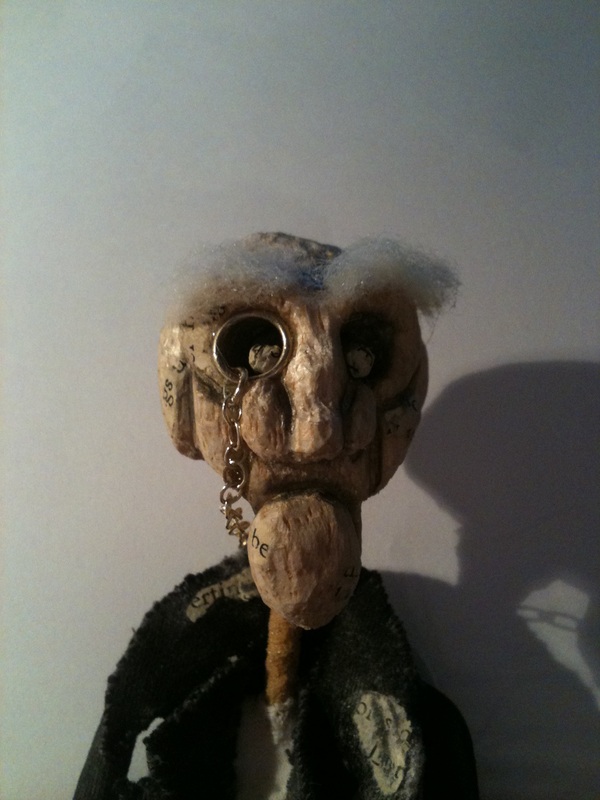
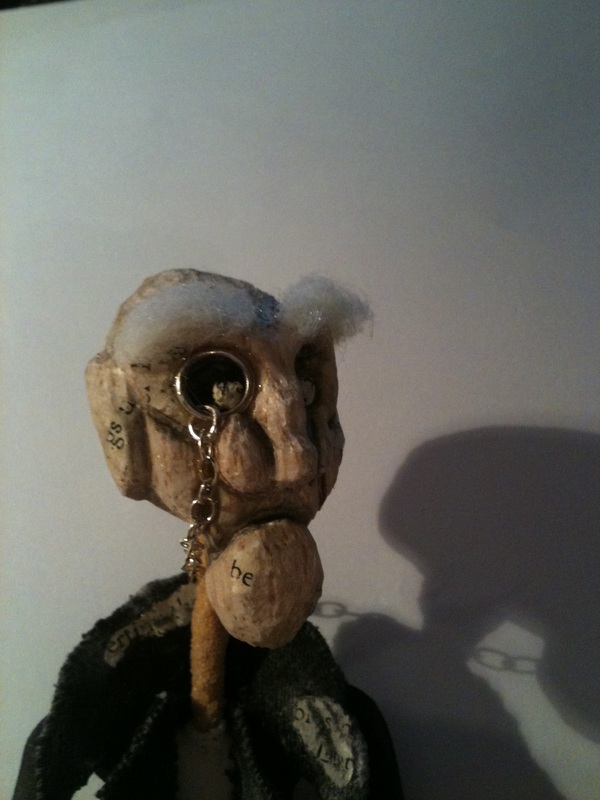
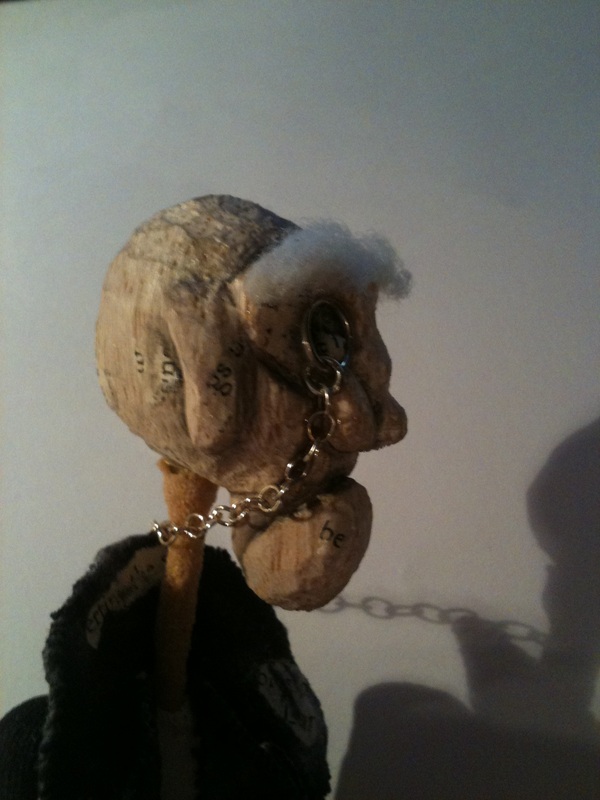
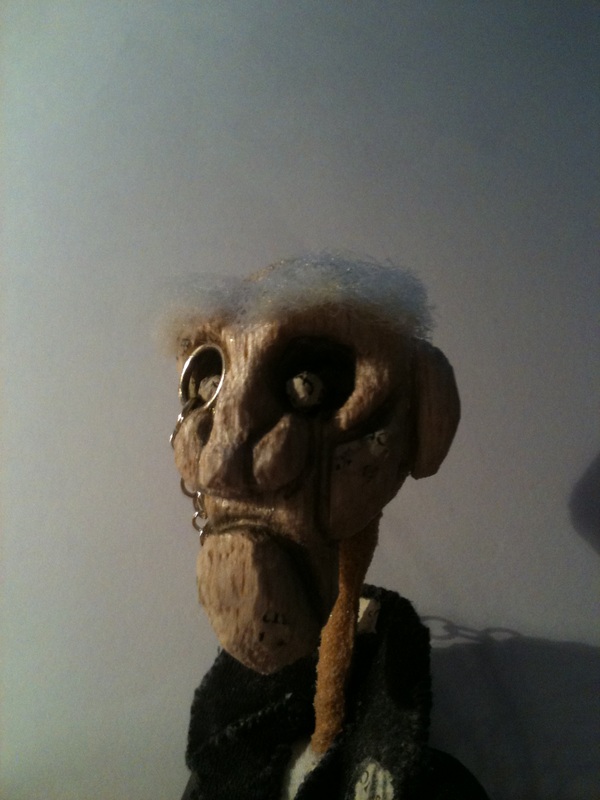
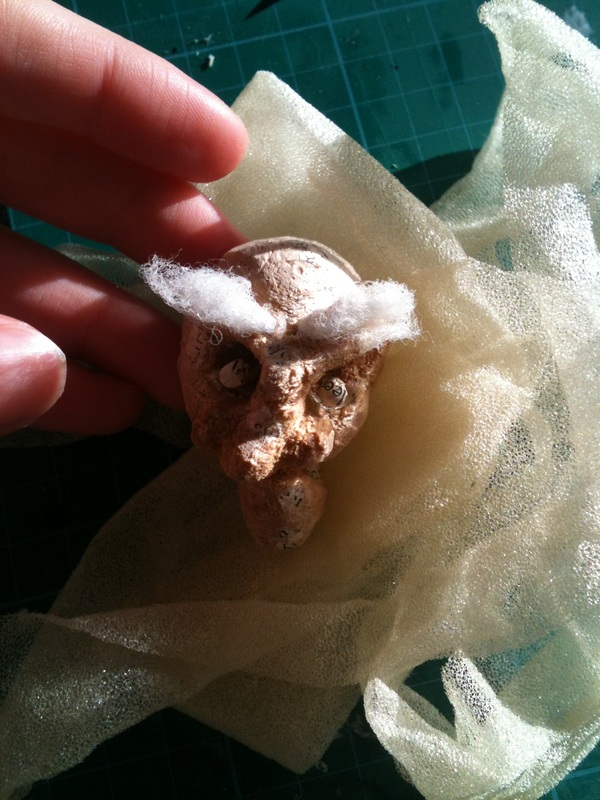
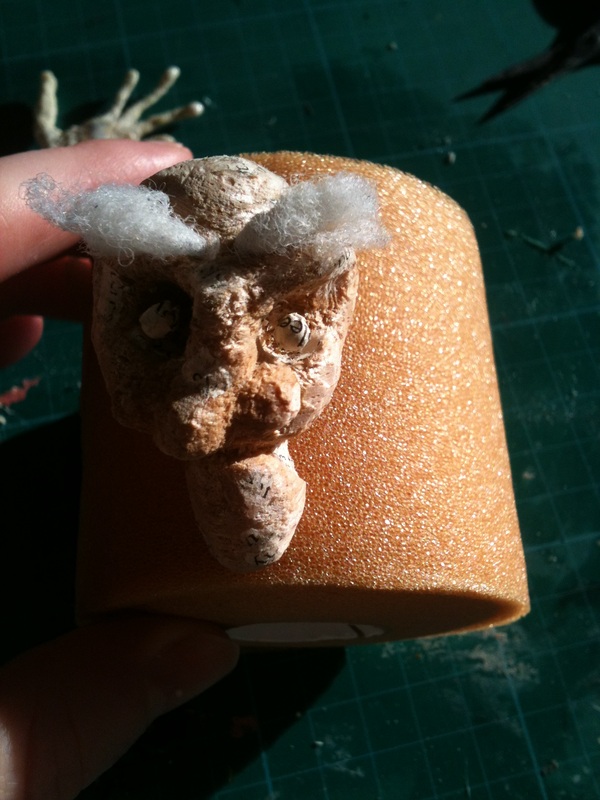
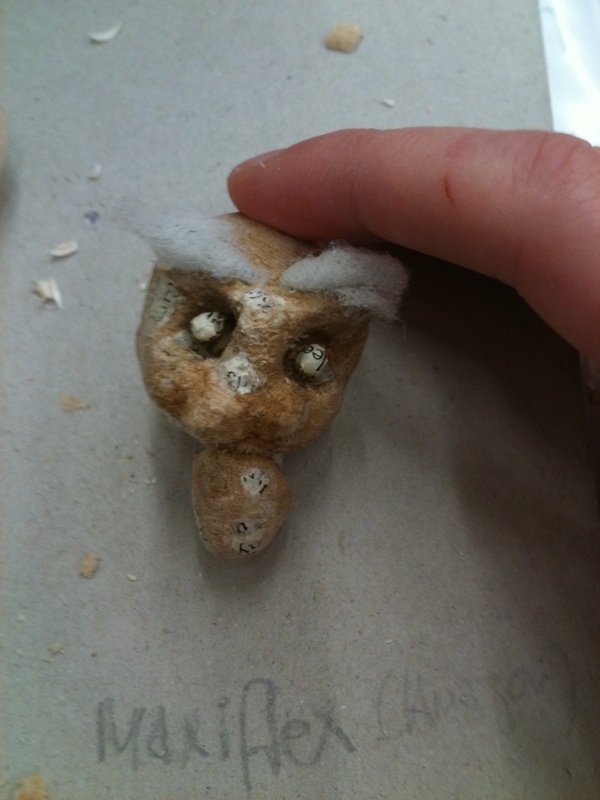
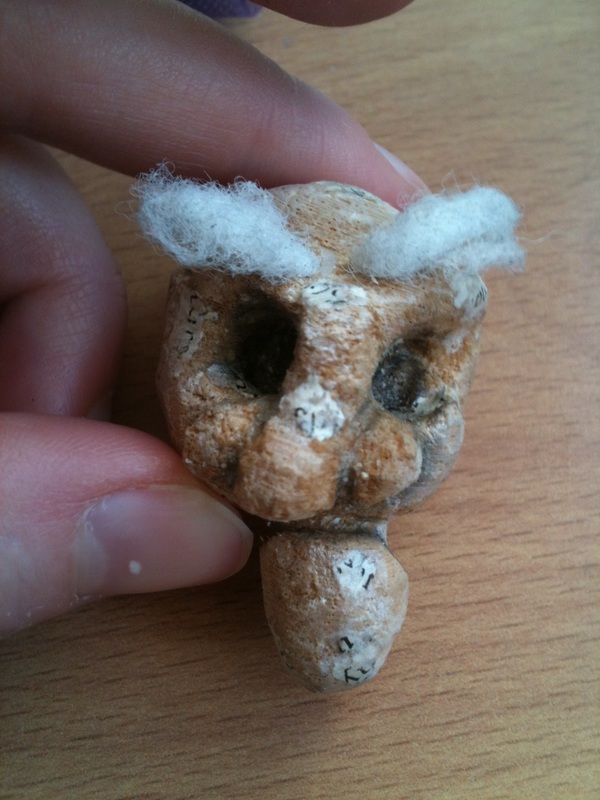
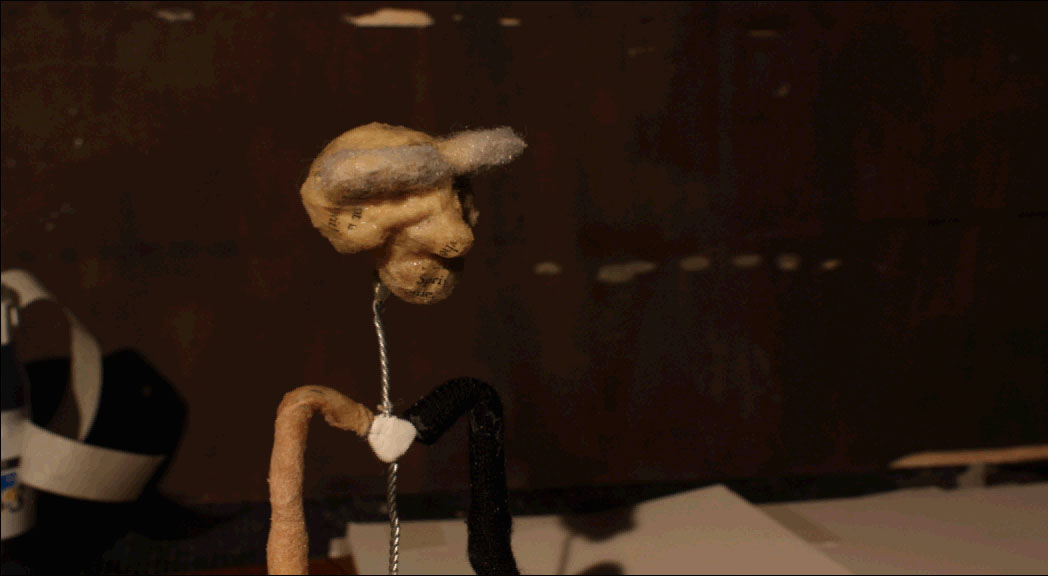
I gave him some eyebrows made of wadding and attached his monocle:
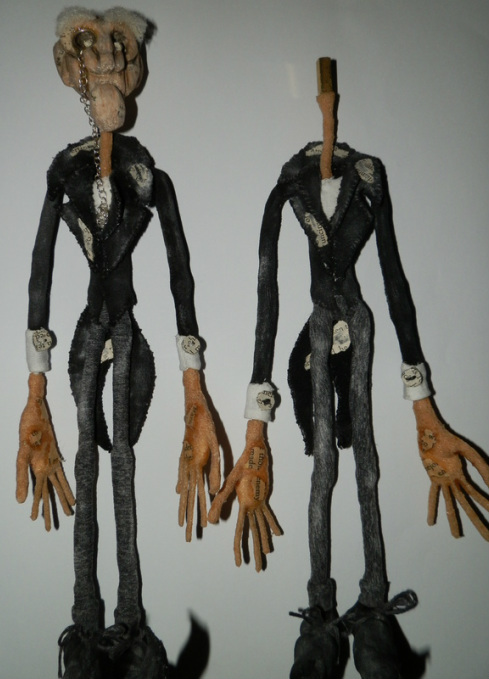
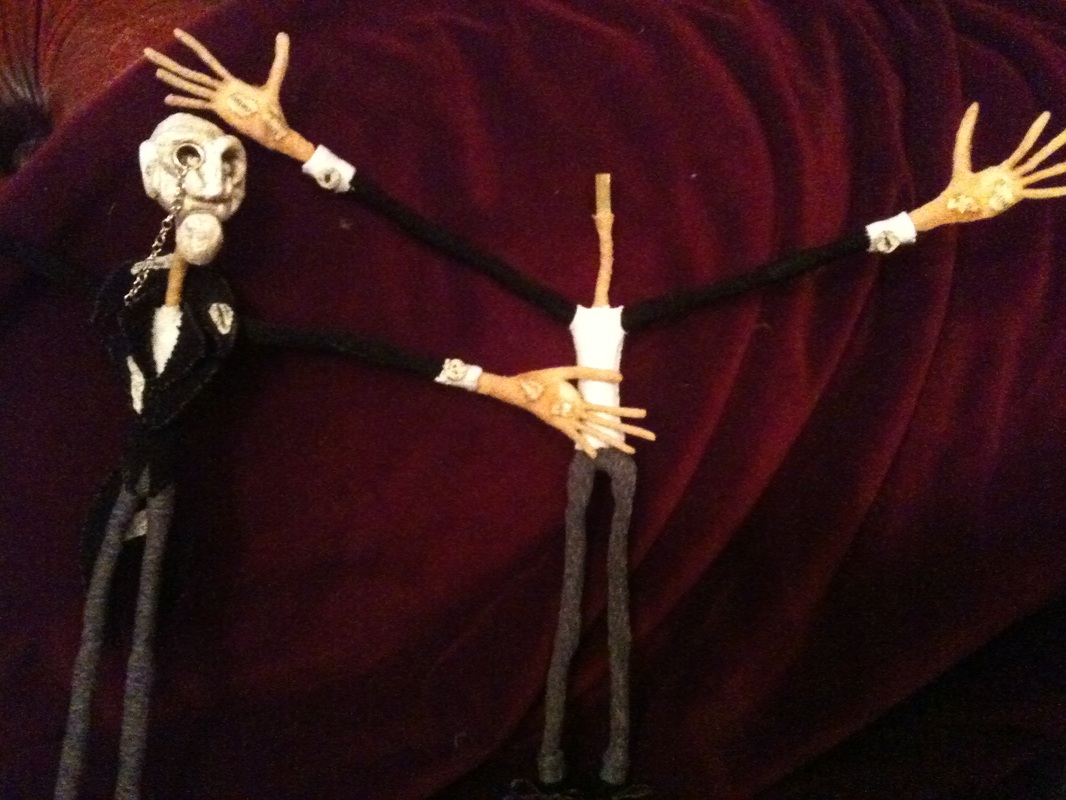
Double Trouble!
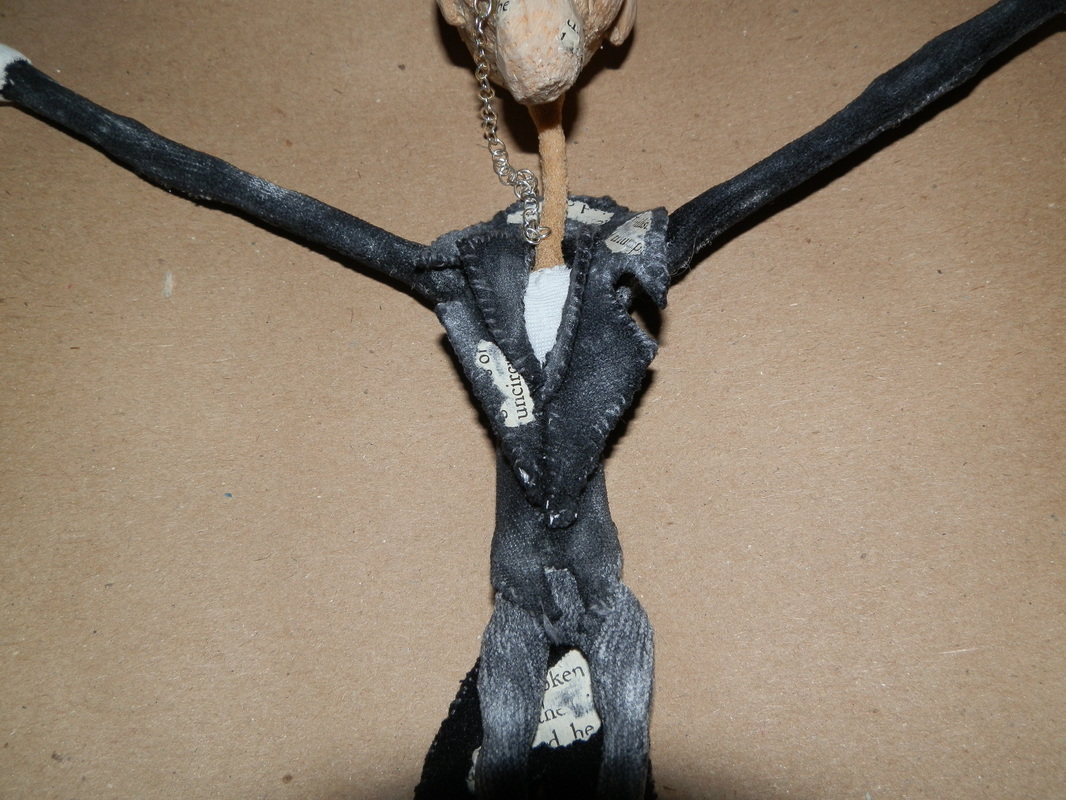
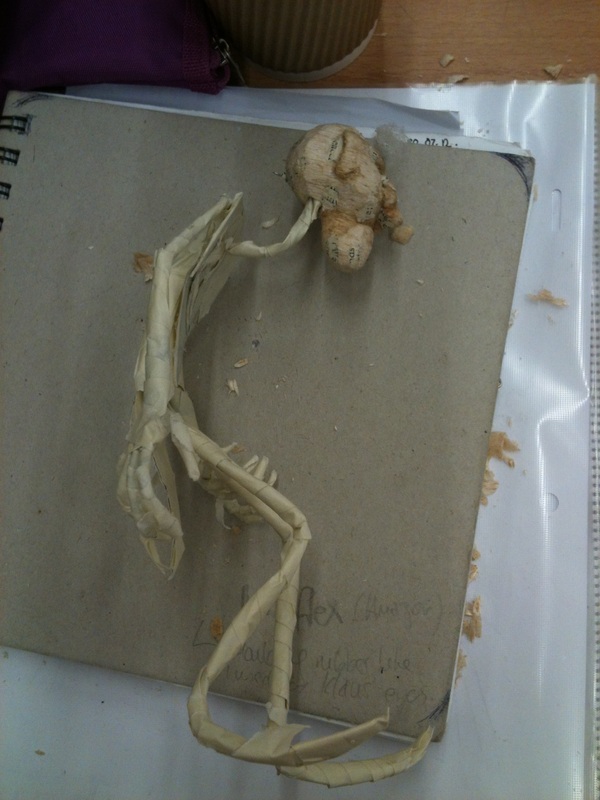
I have finished the clothing on both puppets. hooray!! I first stitched on the layer that is 'skin tight' which included his shoes, trousers, shirt and jacket sleeves (see below): 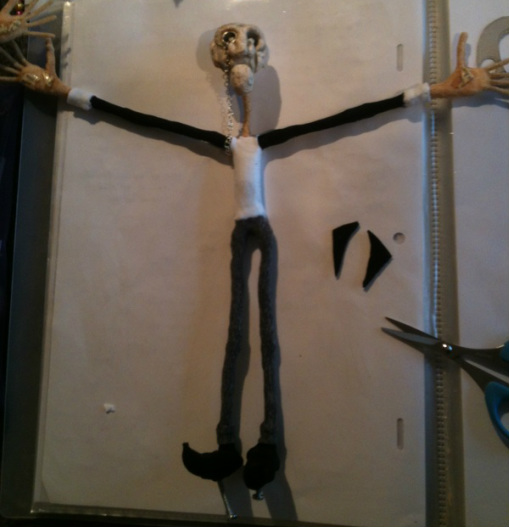
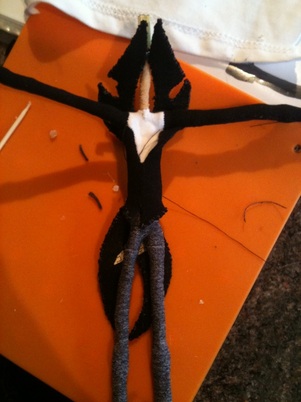
Next I made his jacket, which started out as triall and error, I had to discard the first one but then I worked out a good way of doing it. I'm not sure what it's called, but I used a stiff iron on material ironed onto a large panel of the tights material I was using for his jacket, placed at carefully measured points. I then cut slits at the top of the jacket and tail piece meaning I could cover the backs of these sections but leaving them connected to the middle piece. I then cut neatly round these shapes and stitched around them in a grey thread with keeps the seam together but is also a part of the aesthetic design. I then measured the middle section to just fit around his waist and, hey presto we have a jacket! A few buttons and bits of book pages later it is ready to be stitched onto the puppets body.
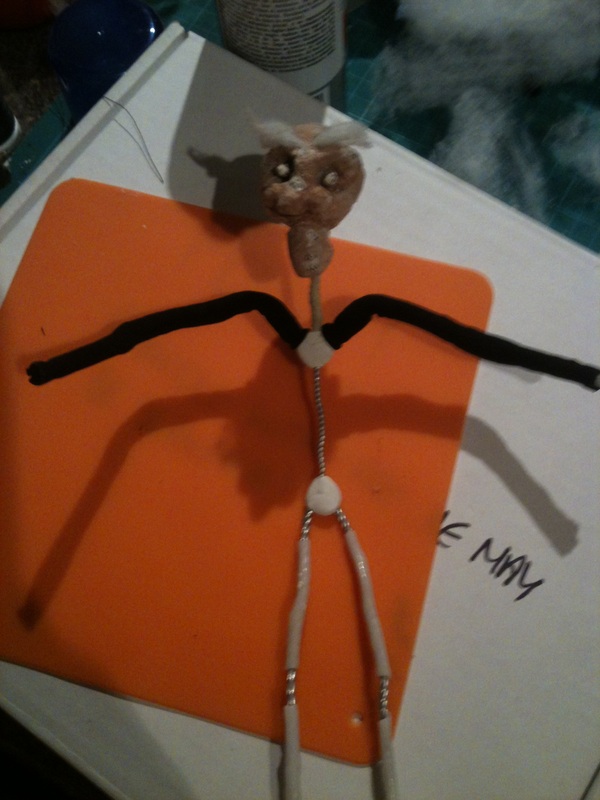
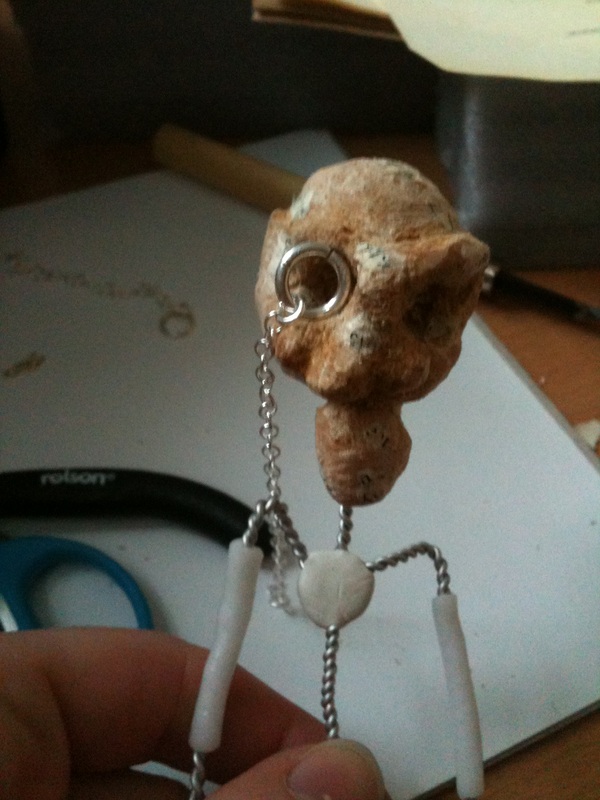
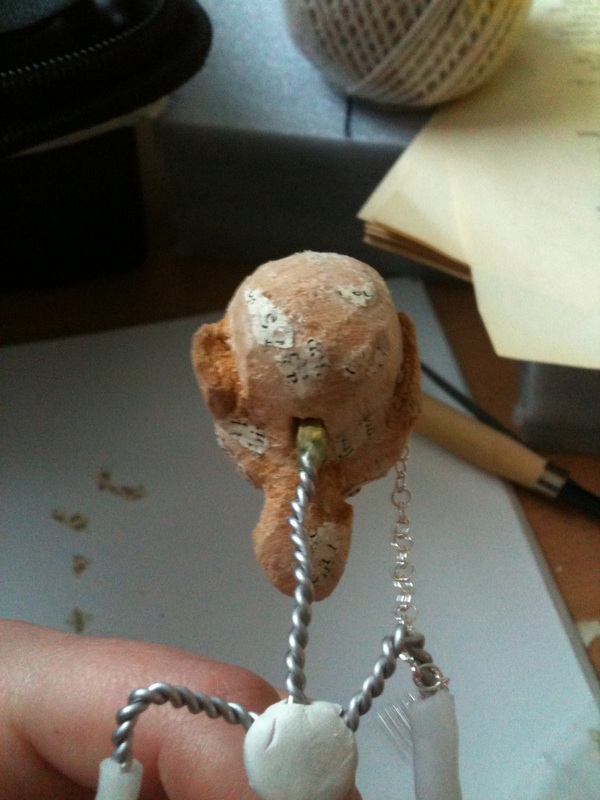
I have started to make the two final armatures for the puppets that I will use in the film. I decided on two puppets being enough as they don't have to do any excessive movements or wild positions, but if one decides to break then I do have a spare! Wire, bones, K&S and tie-downs all in place: 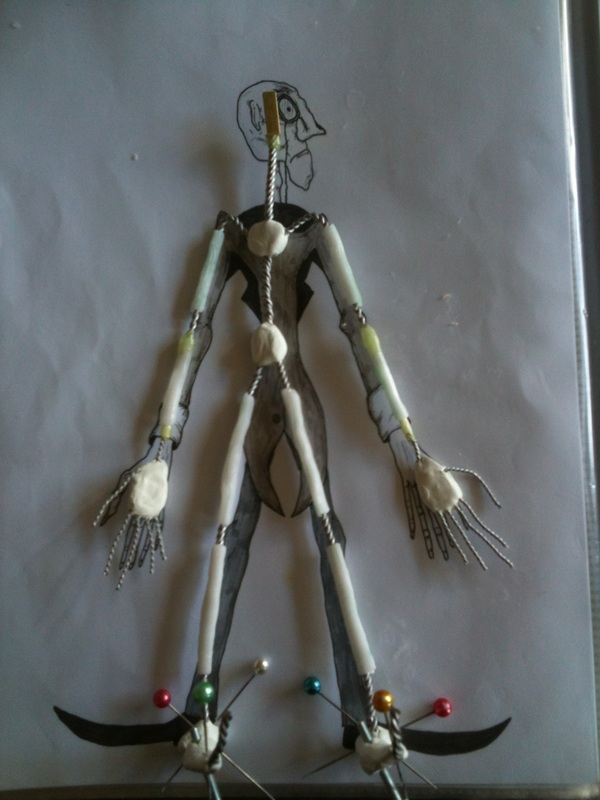
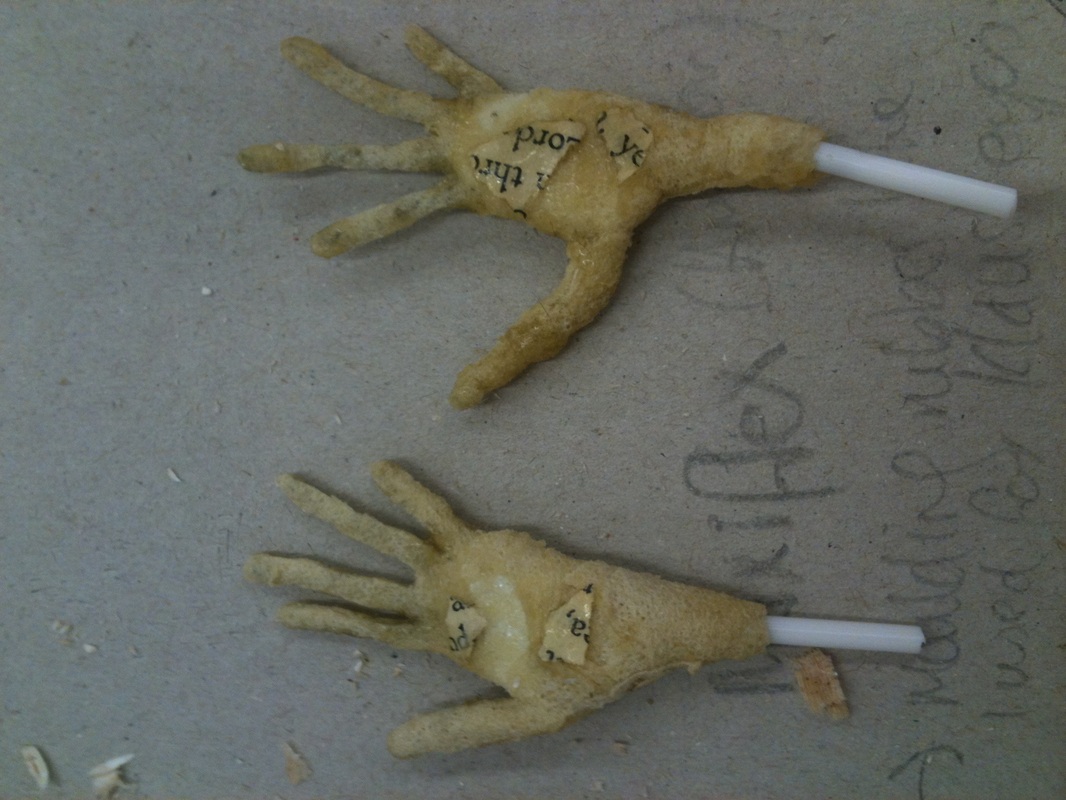
Against the scale drawing: (I decided to make the hands slightly bigger for better screen presence and for ease of holding the books.) 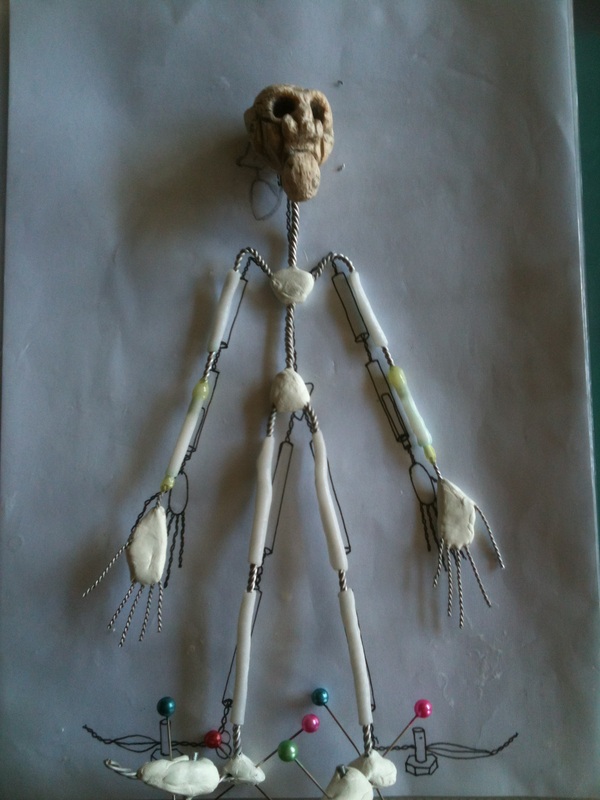
With skinned hands: 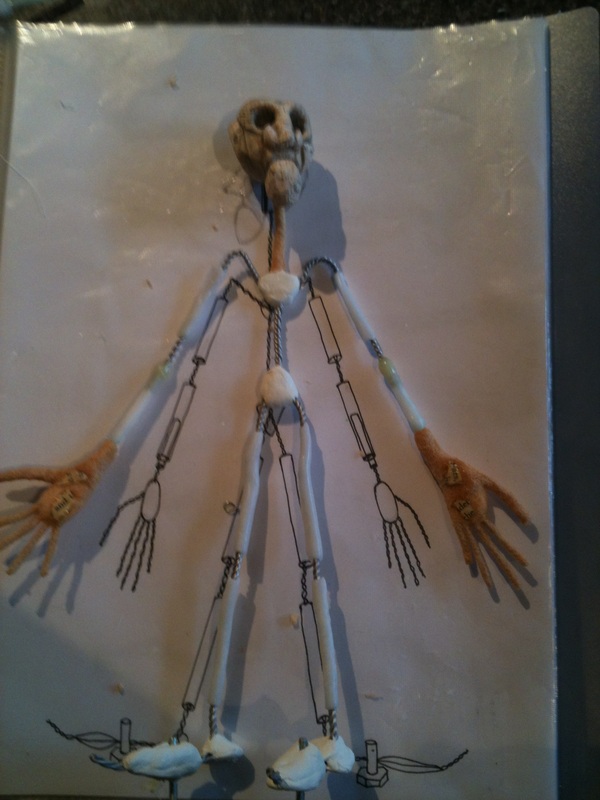
Wadding applied to the joints: 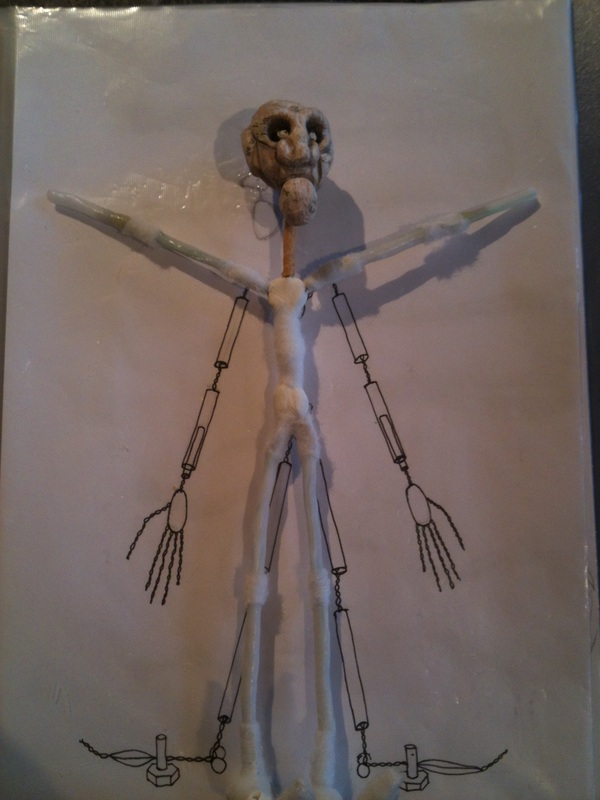
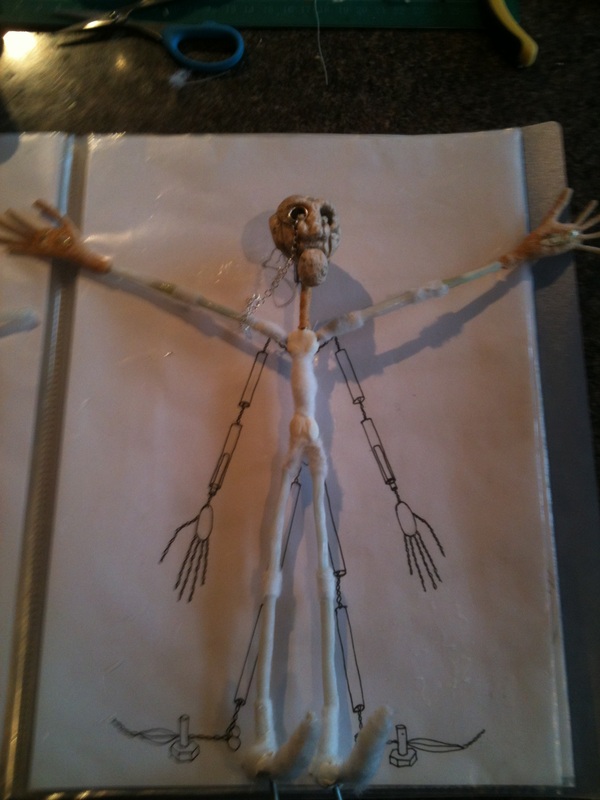
Hey presto! Time to start skinning...
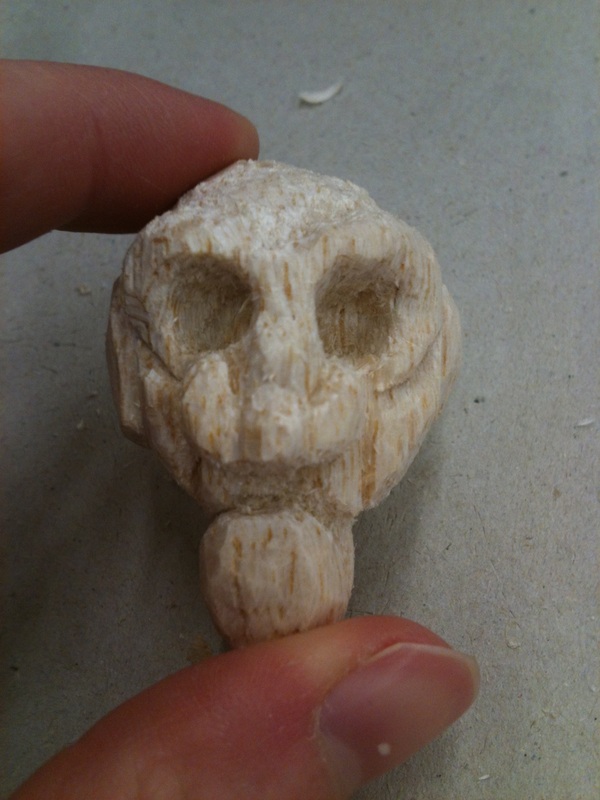
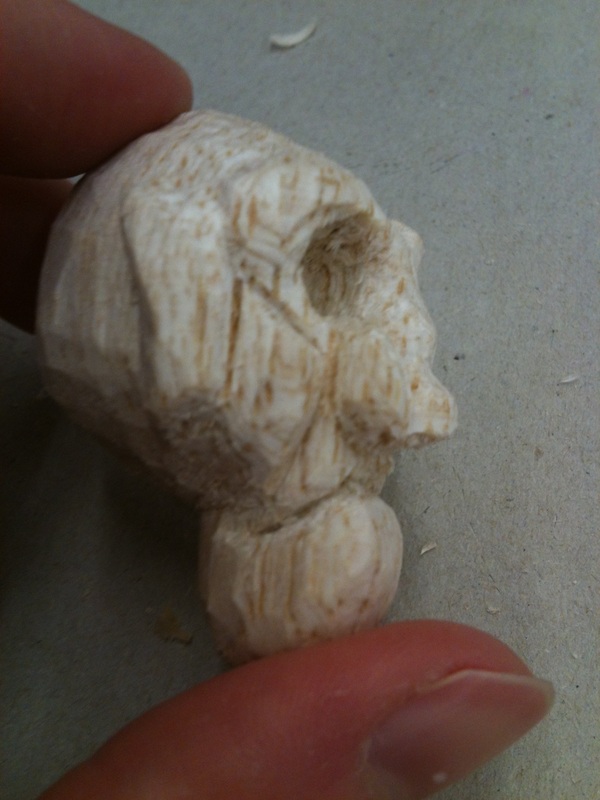
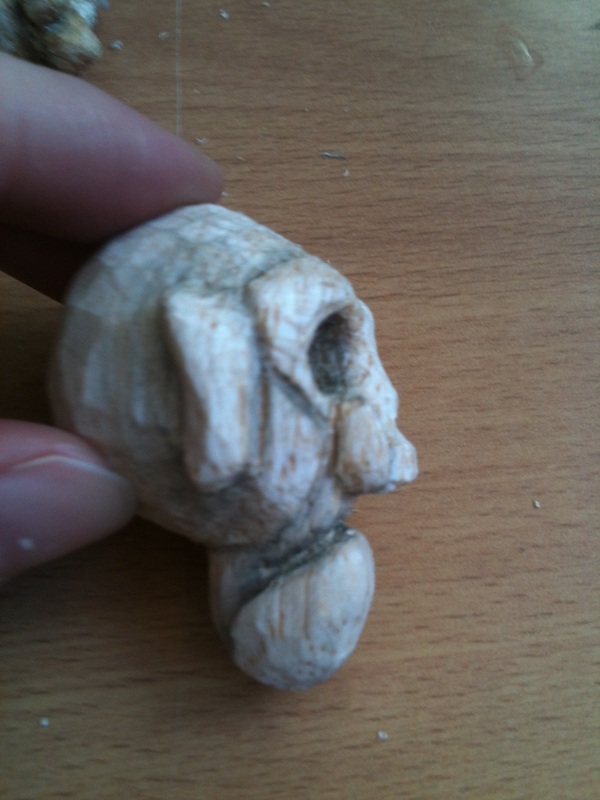
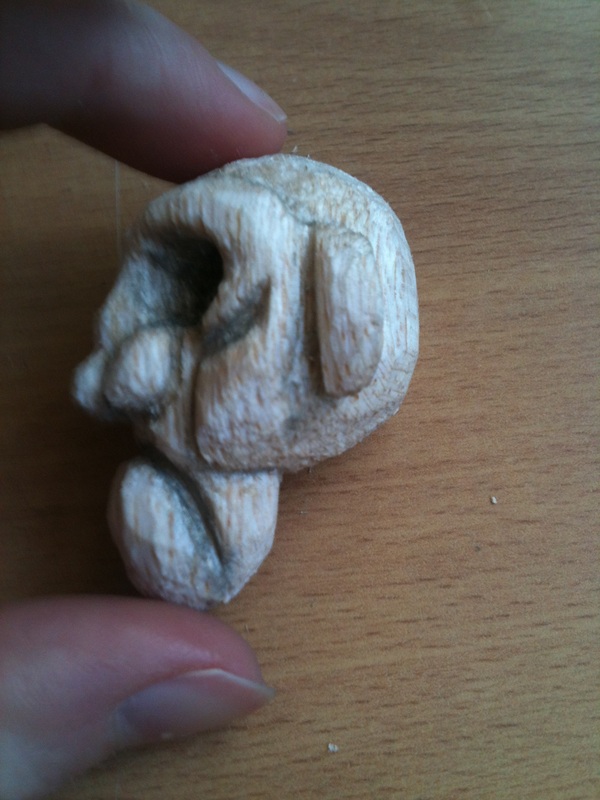
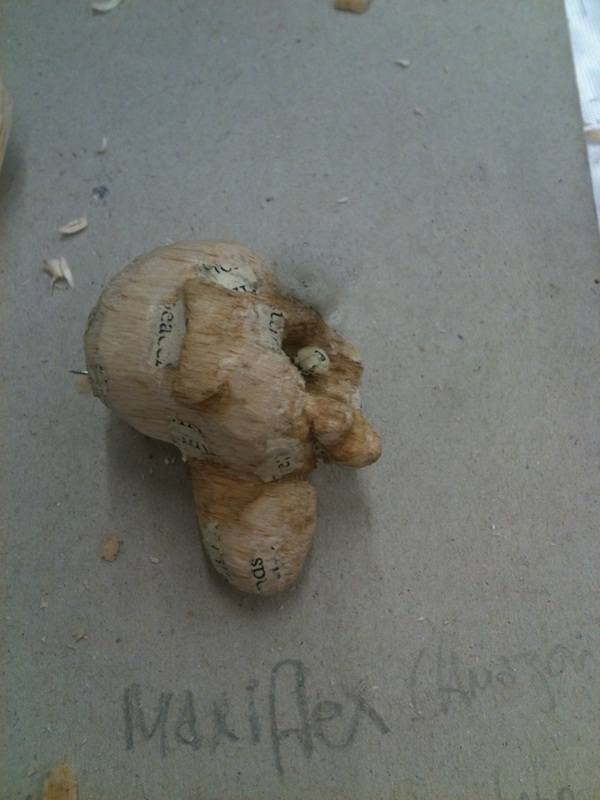
I made sure with this sculpt to have the grain of the wood running from the top of the head to the bottom of the chin so that it was easier to carve the detailing into the face. It worked! I was able to control the tools alot better and create something which looked a lot more like my designs!
Once I was happy with the sculpt, I stained it roughly with coffe and then added pencil to the deeper crevices in the wood.
Perfect size!: 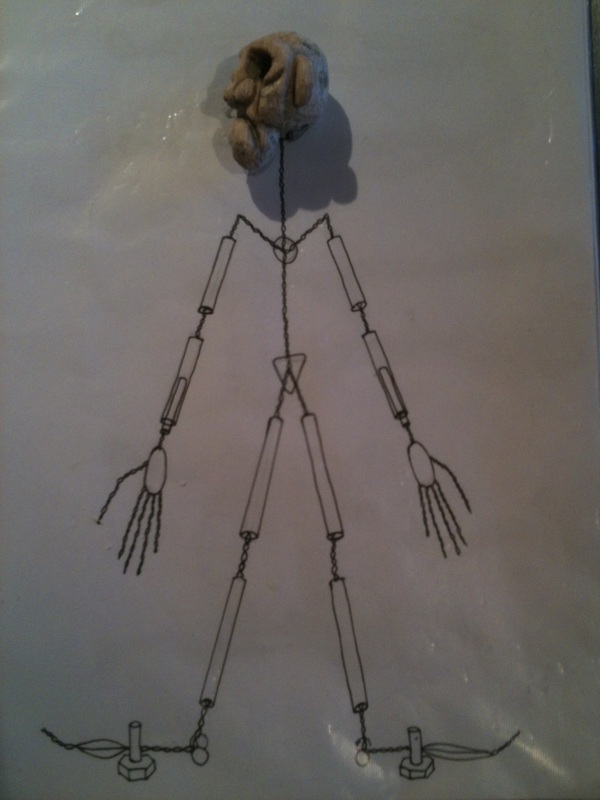
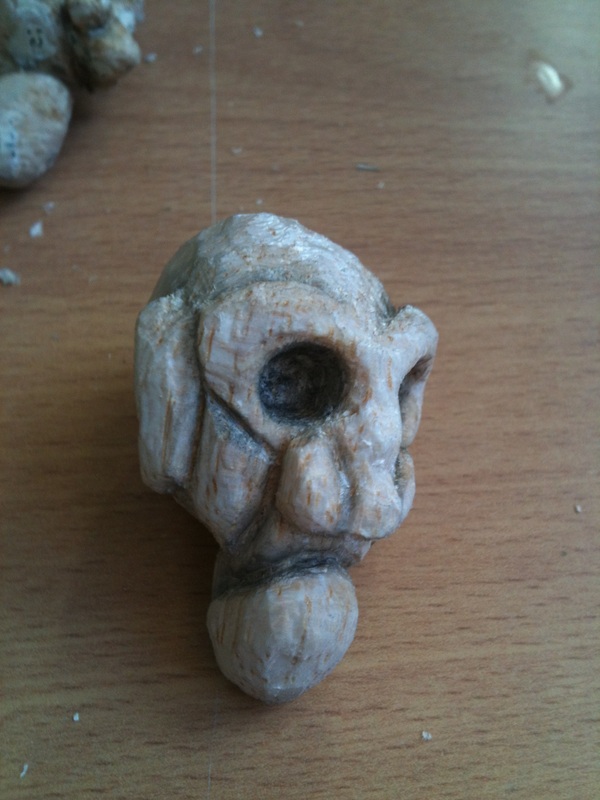
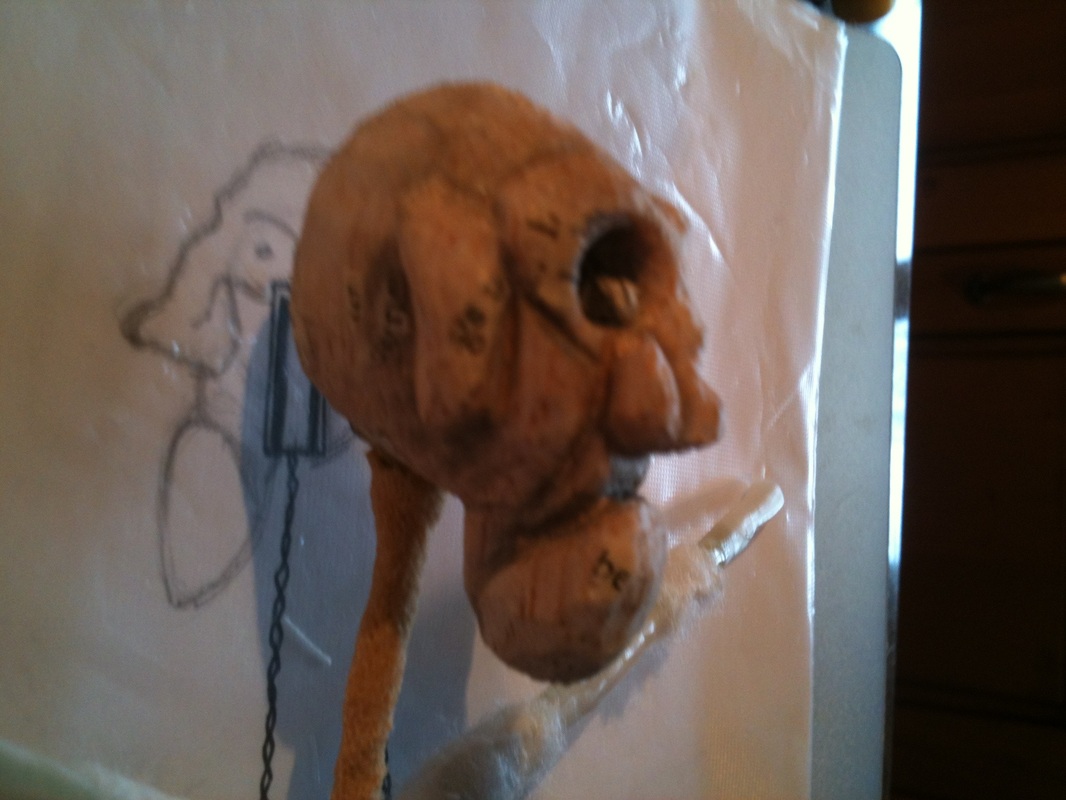
I then added pins for his eyes and glued on the book pages which I then filed away roughly again. Et voila! 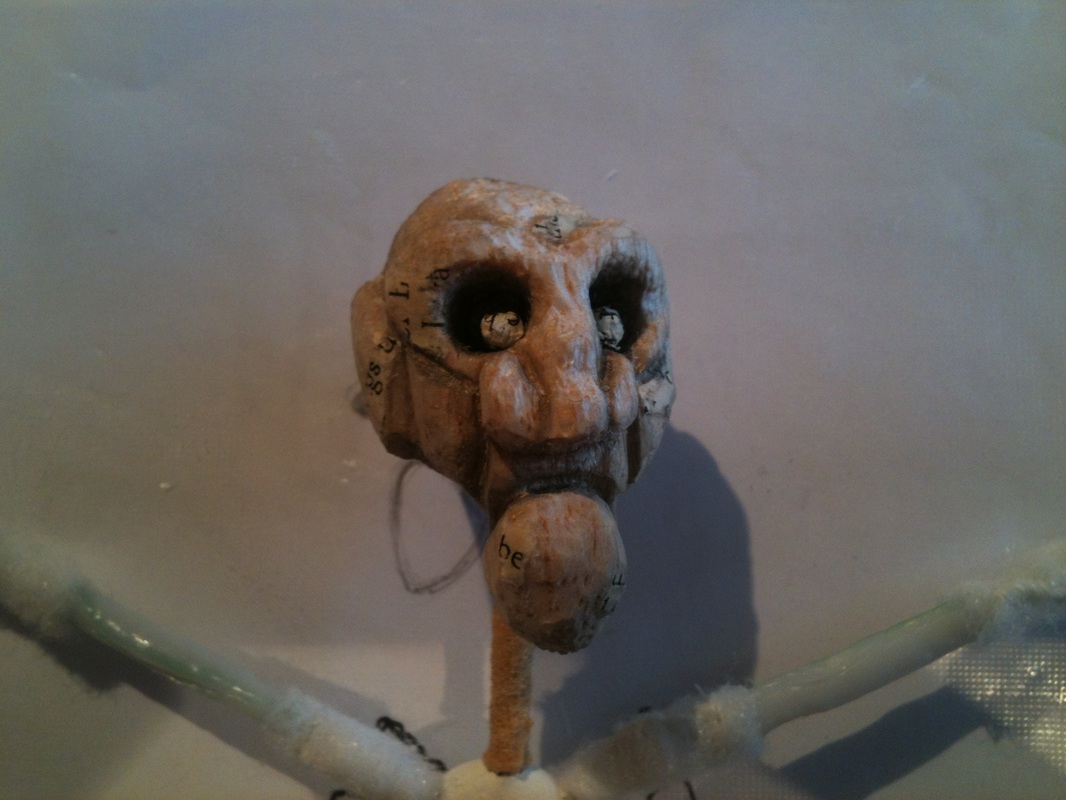
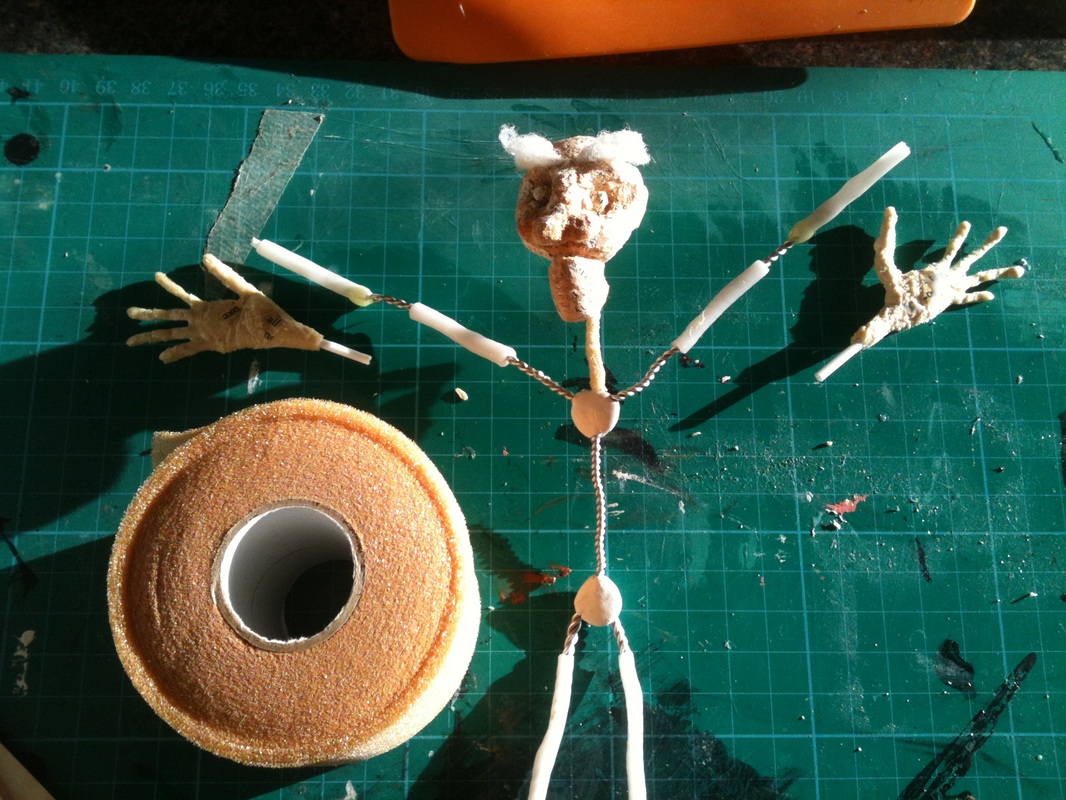
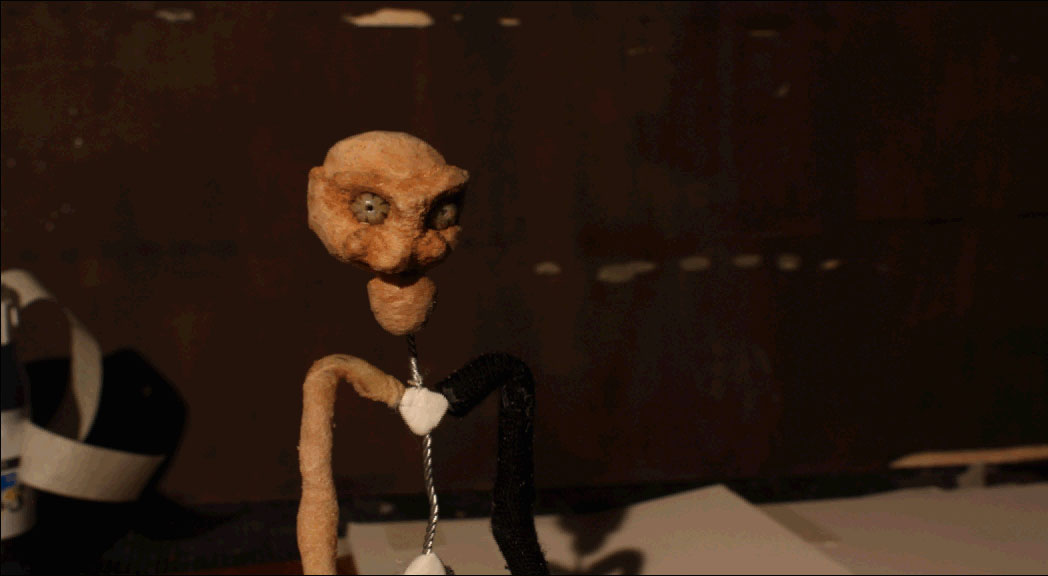
I did an animation test for the moving eyebrows that I was planning on using on the puppets head. If anything I thought it made him look quite comedic which is not what I want in the slightest so I am going to scrap this idea. I will probably still give him eyebrows on the final head, just not ones that move! I have mocked up really quickly a new marquette so I can visualise the new body shape, which was altered alongside the new storyboard, in 3D.
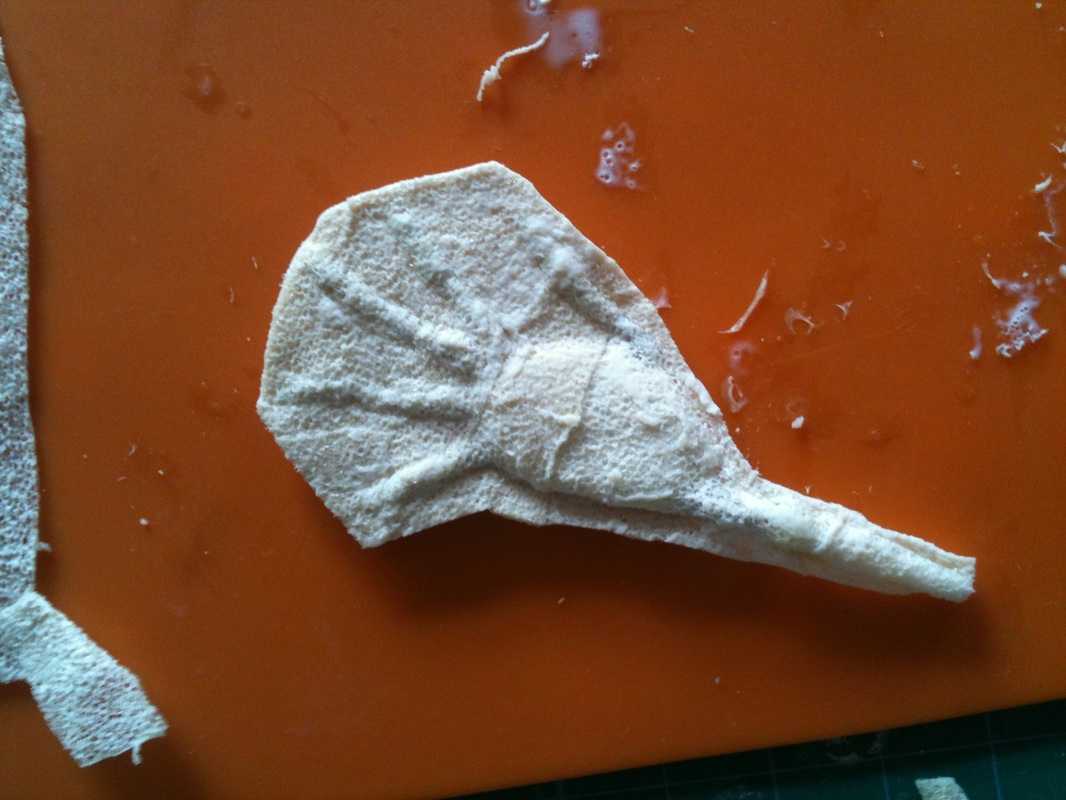
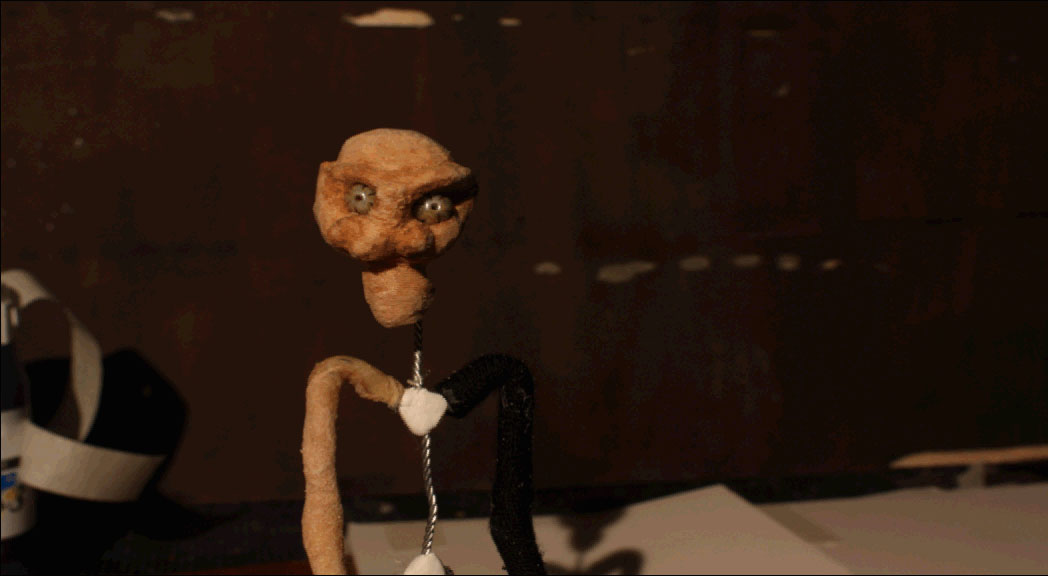
I then tested this under camera to make sure it worked well, and that the shape of the body wasn't difficult to read on screen. I am happy with this marquette. I made up some hand armatures with wire and milliput and then skinned them with fine sporting injury foam dipped into latex. I didn't dip them in latex, but left the texture of the foam exposed as I didn't want a shiney quality to them and then added bits of ripped up book pages alike to the head. If I had the time I would have made the hands out of balsa wood to be inkeeping with the head, however this would require lots of replacement hands as I need them to move, so this is a much quicker alternative and will hopefully not look too alien to each other under camera.
For the hands that you can see above, I used the lighter colour foam (left image), however when I make them for the final puppet I will be using the darker foam as seen in the right image as it matches the colour of the wood better.
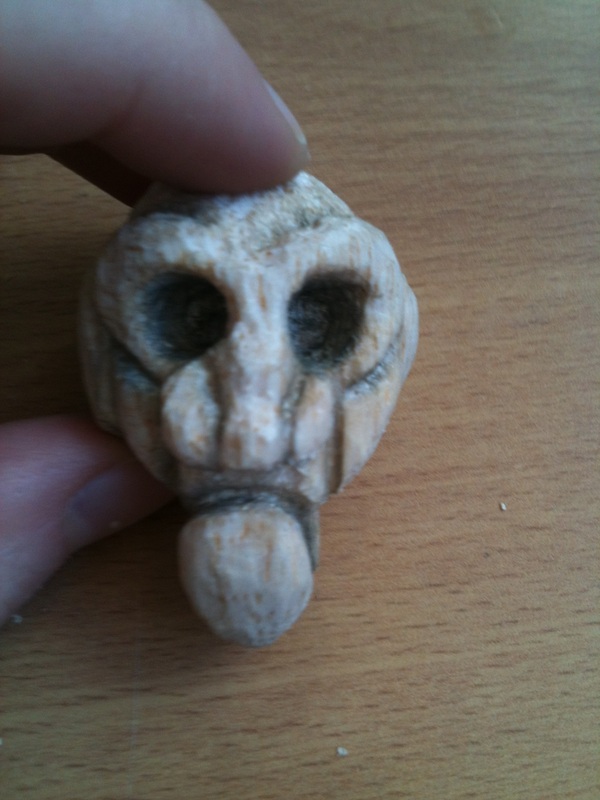
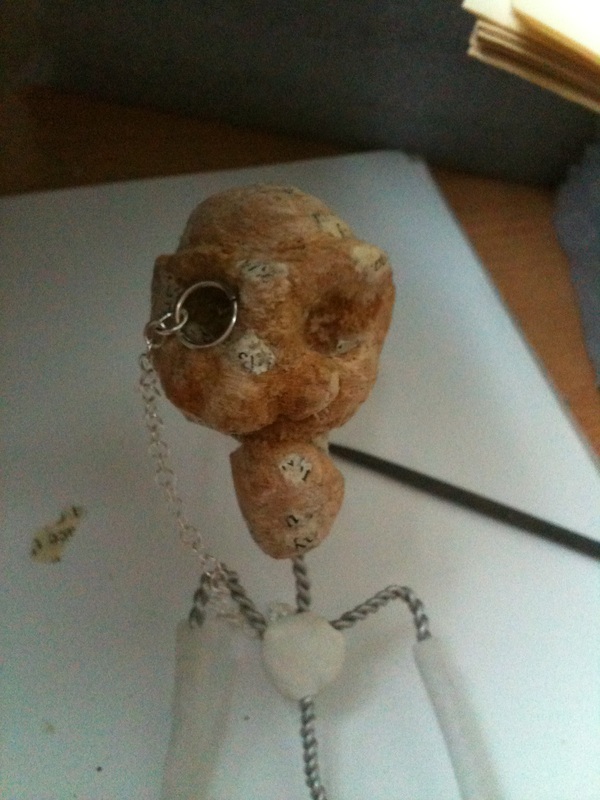
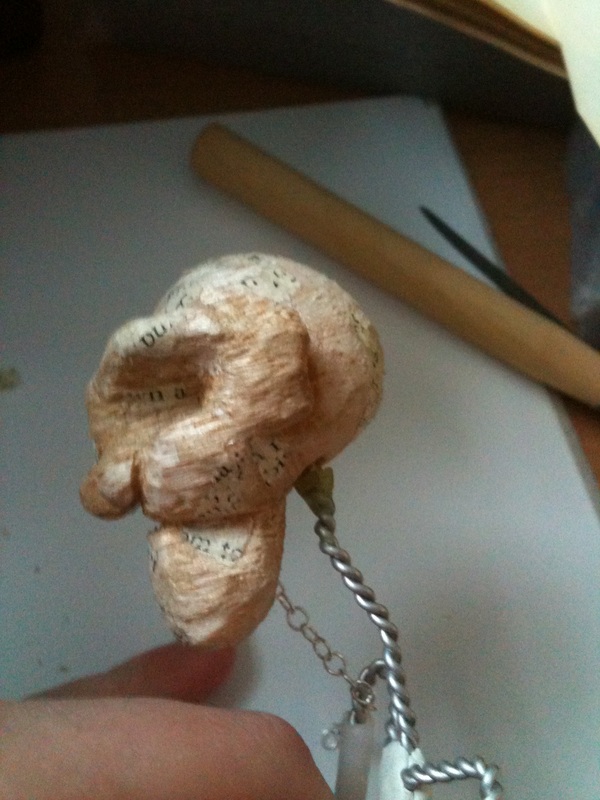
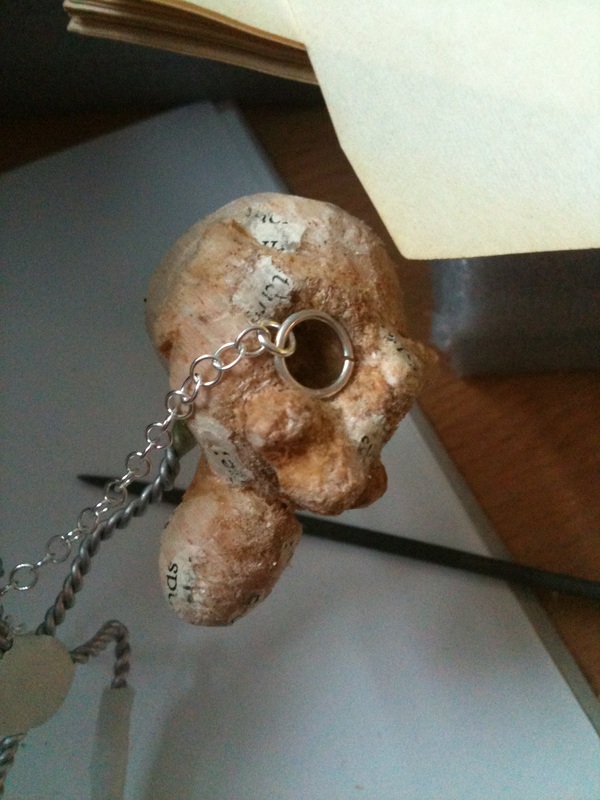
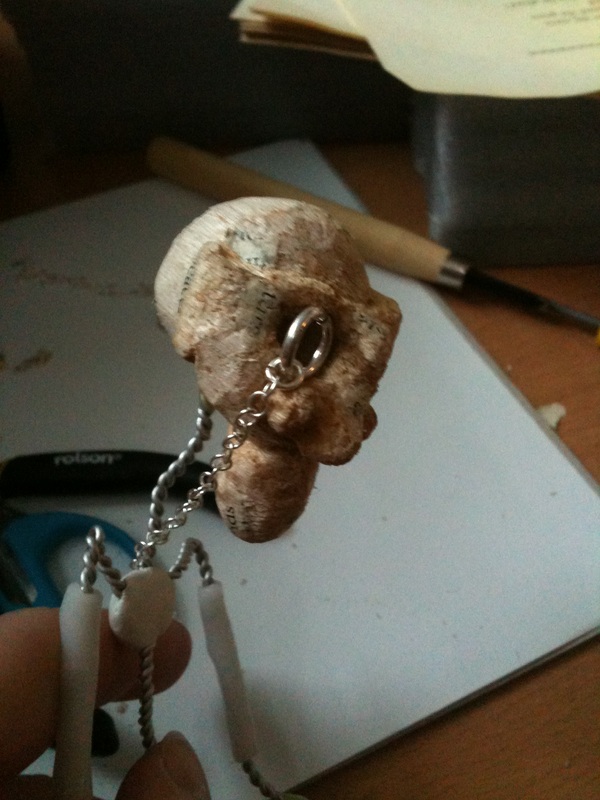
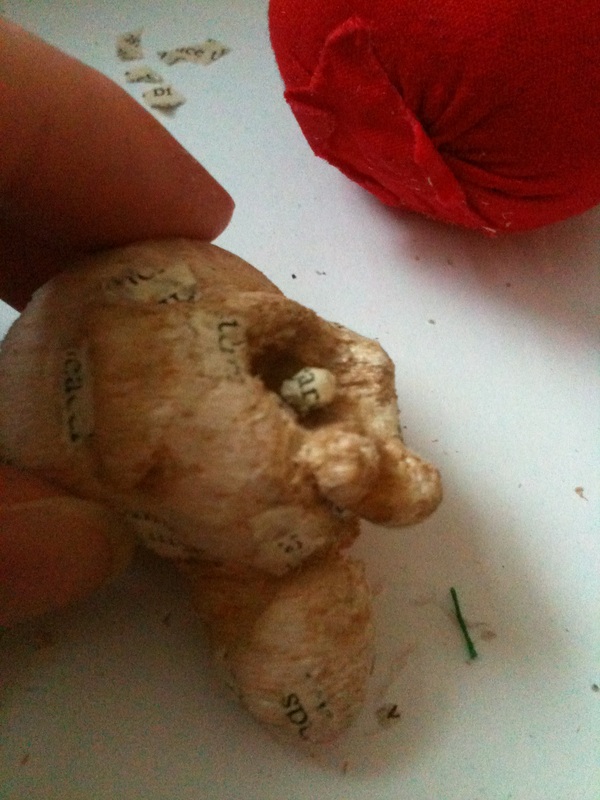
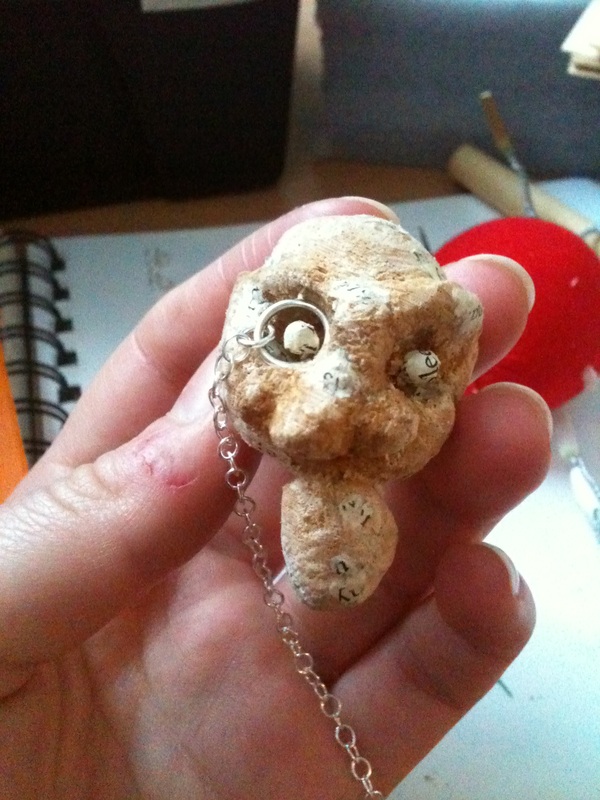
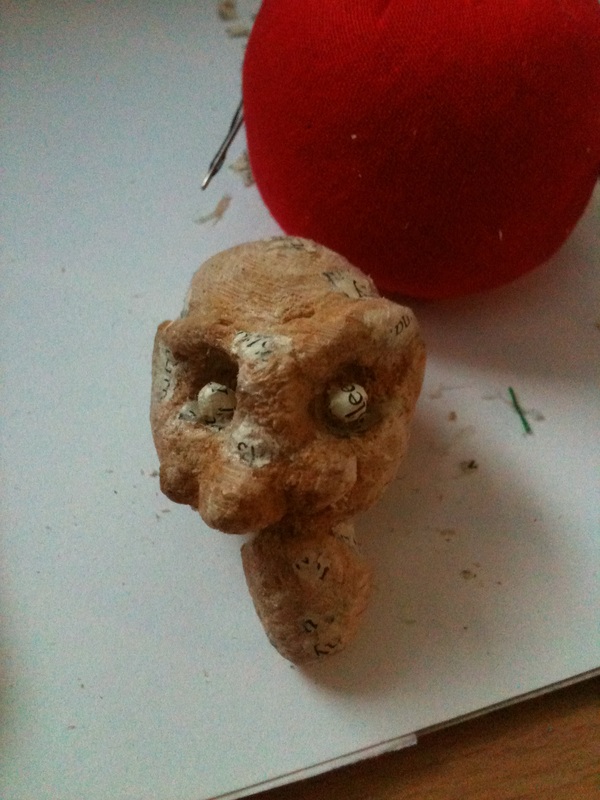
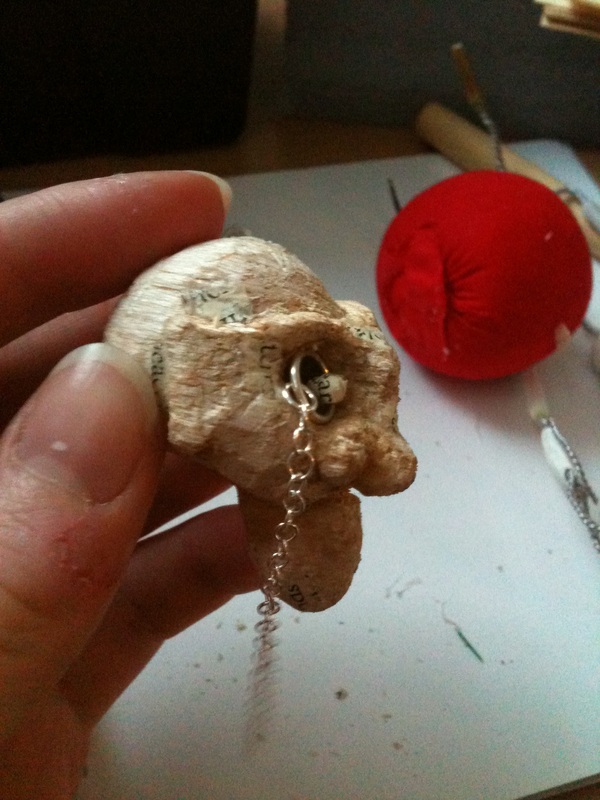
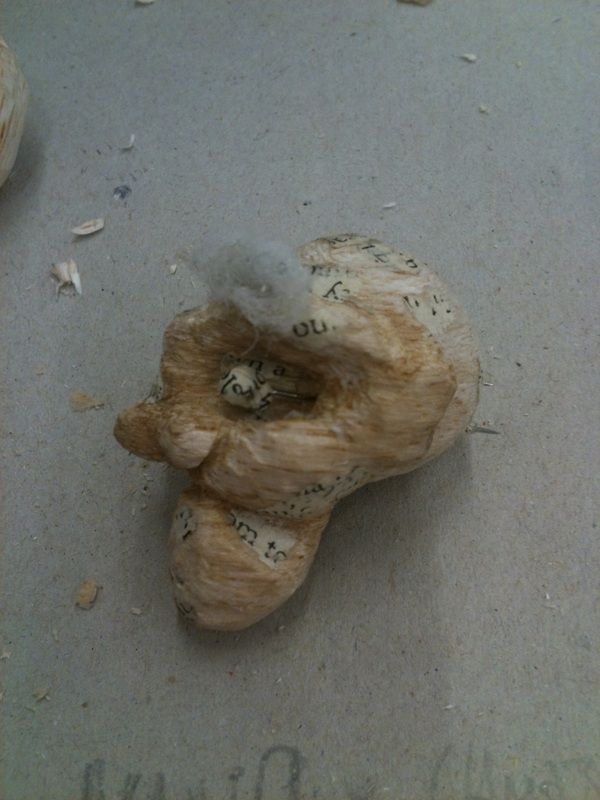
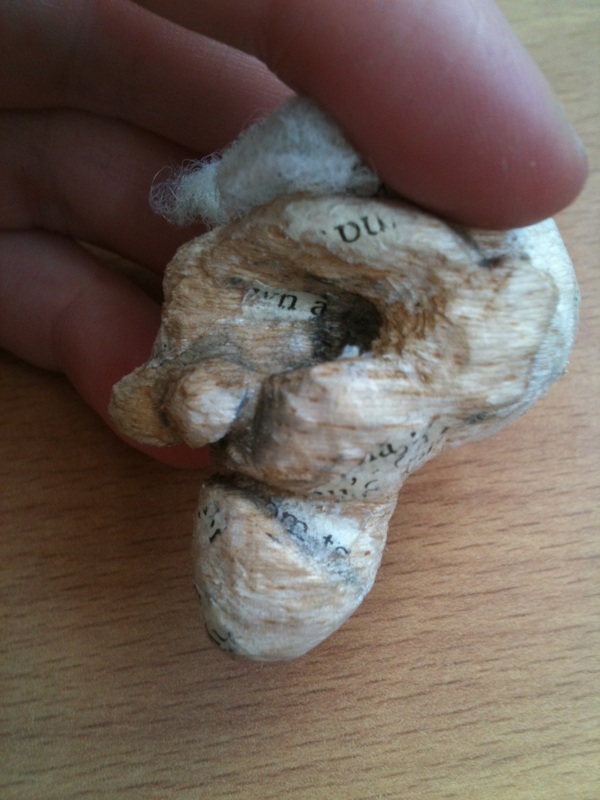
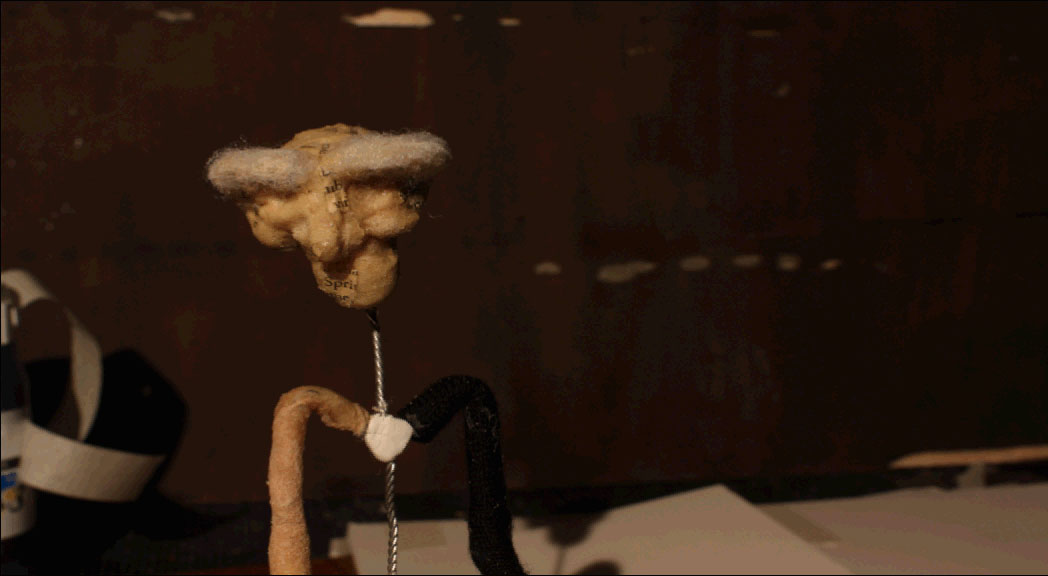
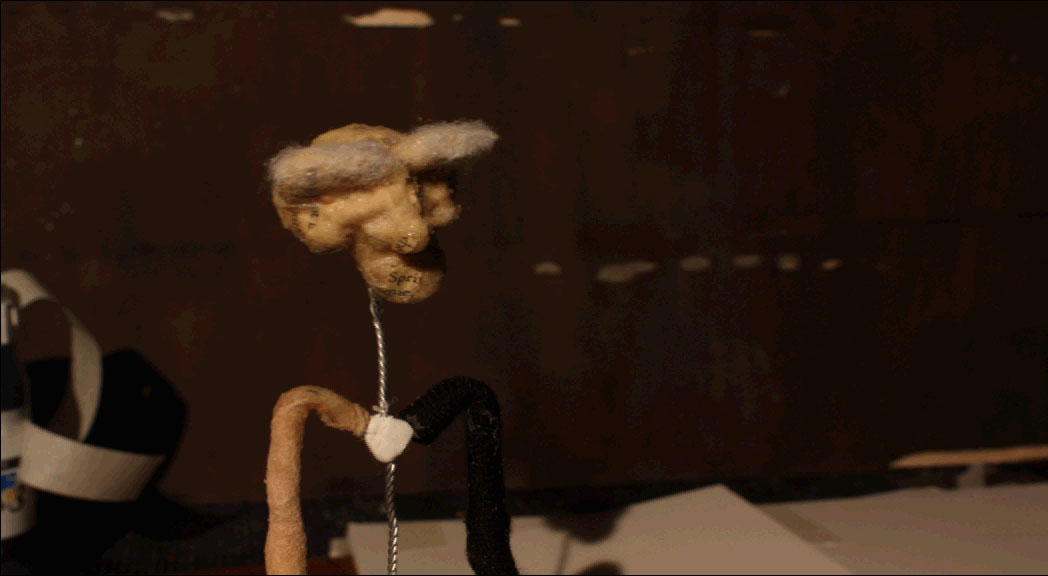
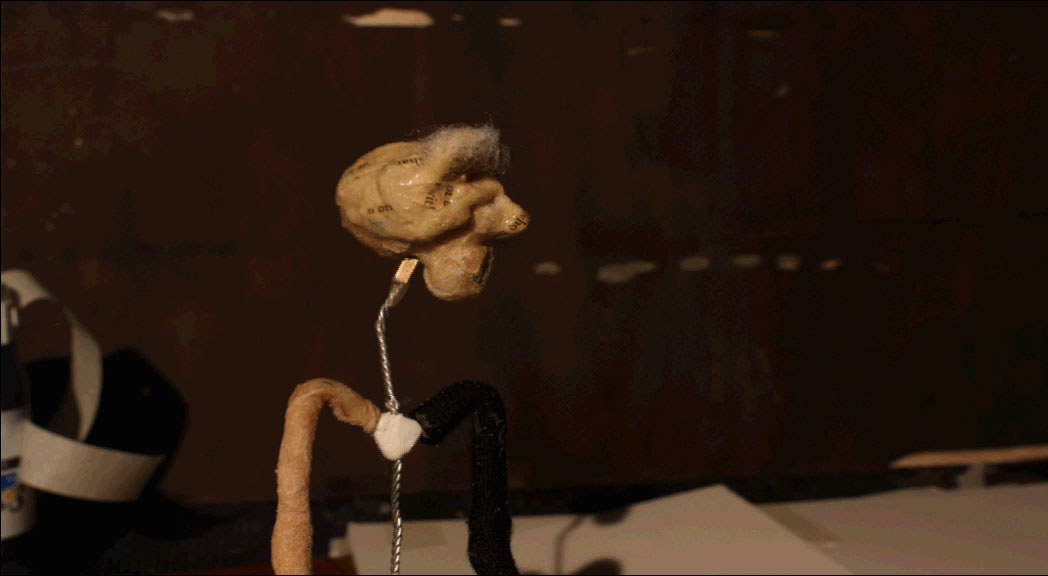
I decided to add bits of torn up book pages to the wood here and there and then sanded them back a bit to make it look like it is growing naturally ontop of the wood. I didn't want to hid the wood and it's texture completely so this technique works well. I had also bought two jump rings in different sizes with extension chains to try and create a monocle. This works quite well but I will decide on the size when I have made the final head.
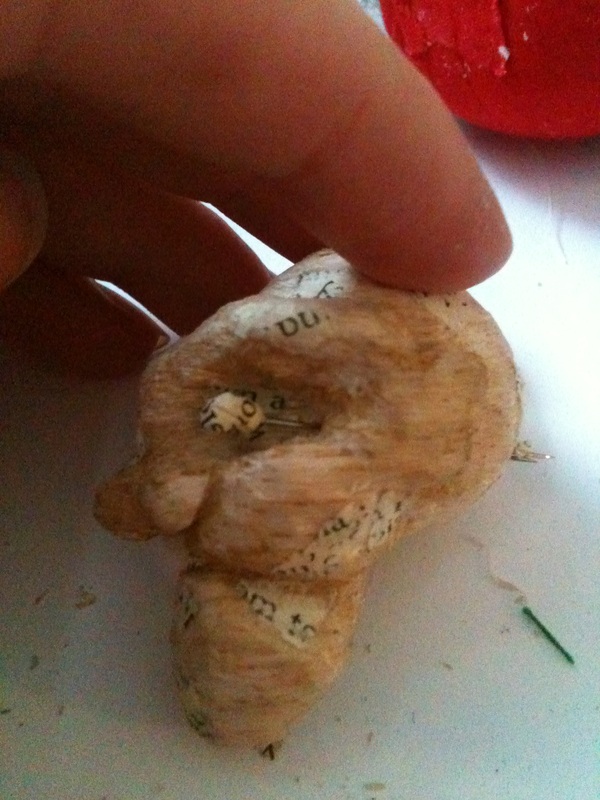
I decided to stick with the pins for eyes but thought they needed something to make them look more like they belonged to the puppet so I covered them in book pages as well.
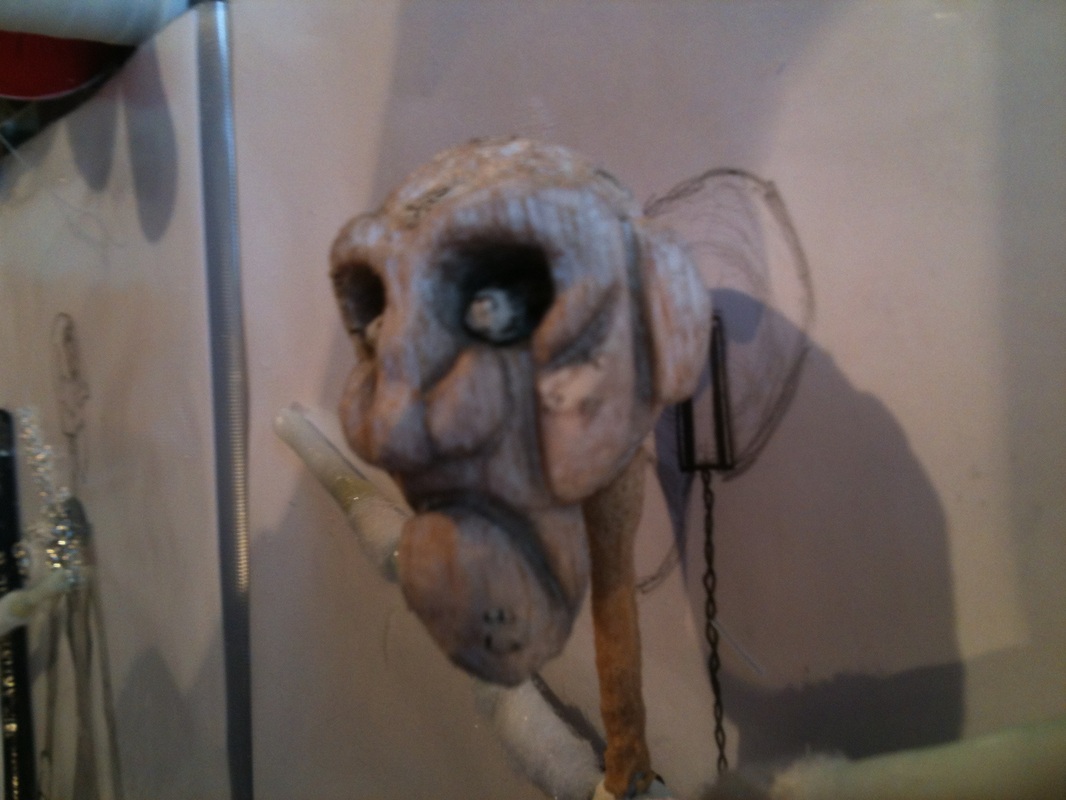
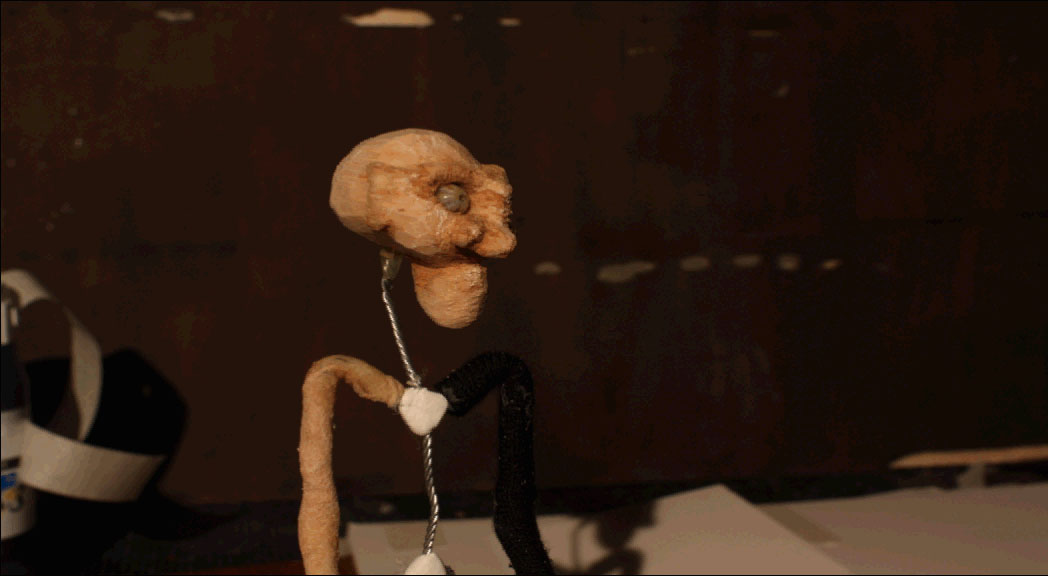
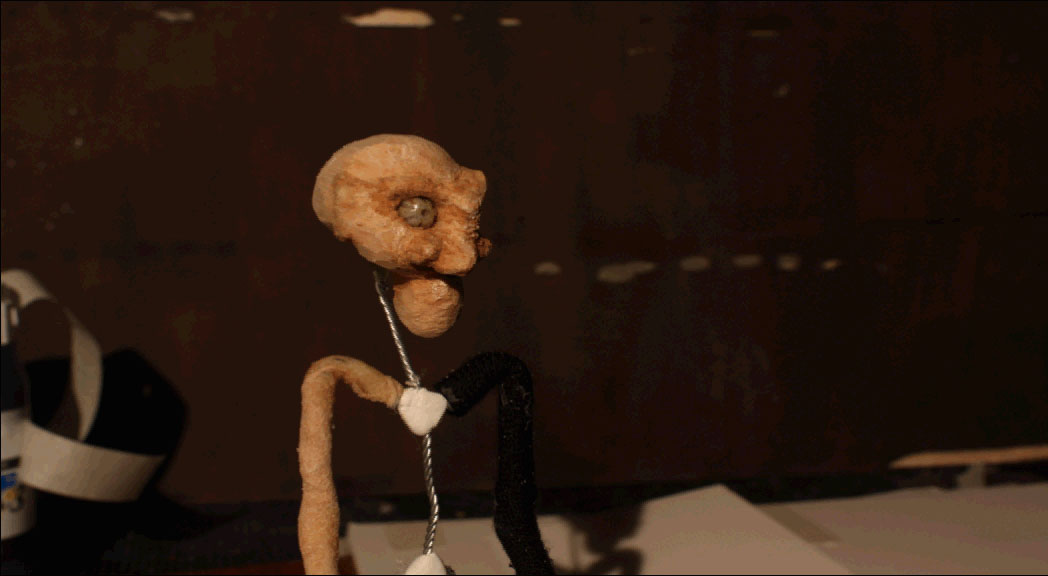
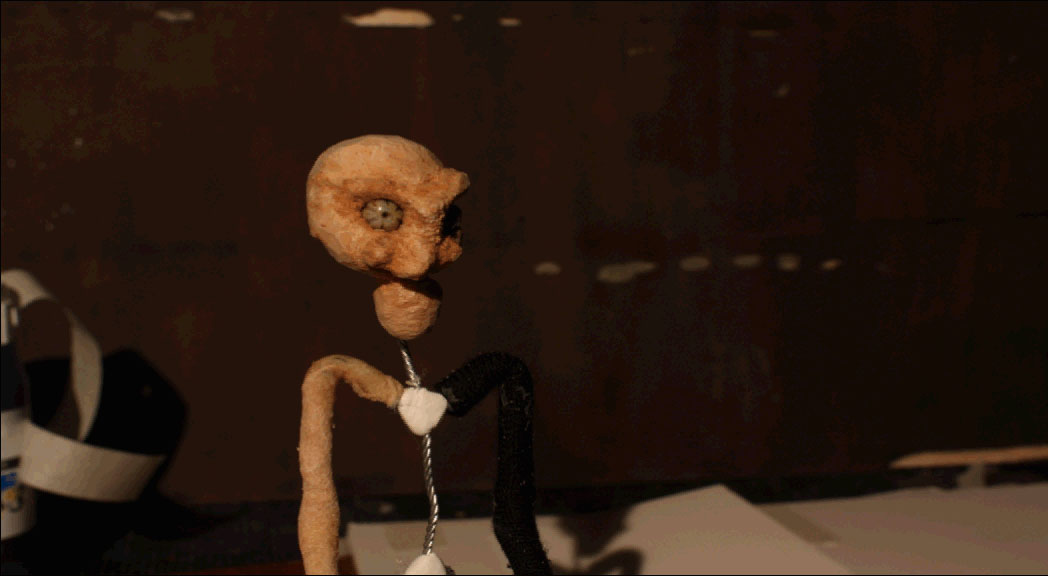
I wanted to see whether eyebrows would work on this head like I tried on the foam latex one, so twisted two very fine bits of wire and glued these into the head. I then wrapped wadding around them to give the eyebrow effect, I was considering more book pages but thought this might be a bit of overkill on the book page front!
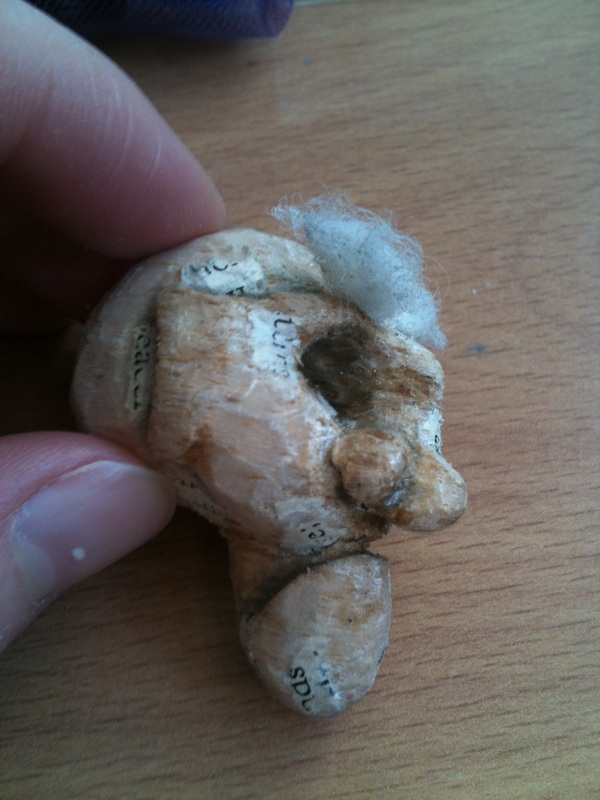
Finally I had a go at darkening the crevices of the face with a pencil and thought this worked quite well. I had experienced with the coffee that the wood was just going to soak up anything liquid that I applied to it but the pencil obviously stayed put and I was able to blend and smudge it aswell.
I tested the two head that worked well under camera and lighting to see how they looked on screen. Balsa Wood: Sculpey, foam and latex: I thought they both worked well on screen. I do slightly prefer the balsa wood for a few reasons, the main one being that it is a really light material and doesn't affect the movement of the body armature. It is also really nice to work with and the definition of the face showed up a lot better than I thought it would. The sculpey, foam and latex head does look really visually nice, however it is really quite heavy and had an impact on the body armature. It was also shiney in places because of the latex and I want to try and avoid this.
What I want to try next is adding book pages to the balsa wood, like I did to the foam and see if this adds the nice textural quality that the foam head has. | Bringing the Librarian to Life
This is where I will be posting any design work I do towards the development of the Librarians character and physical puppet designs as well as the making of the puppet itself. ArchivesApril 2013 CategoriesAll |


 RSS Feed