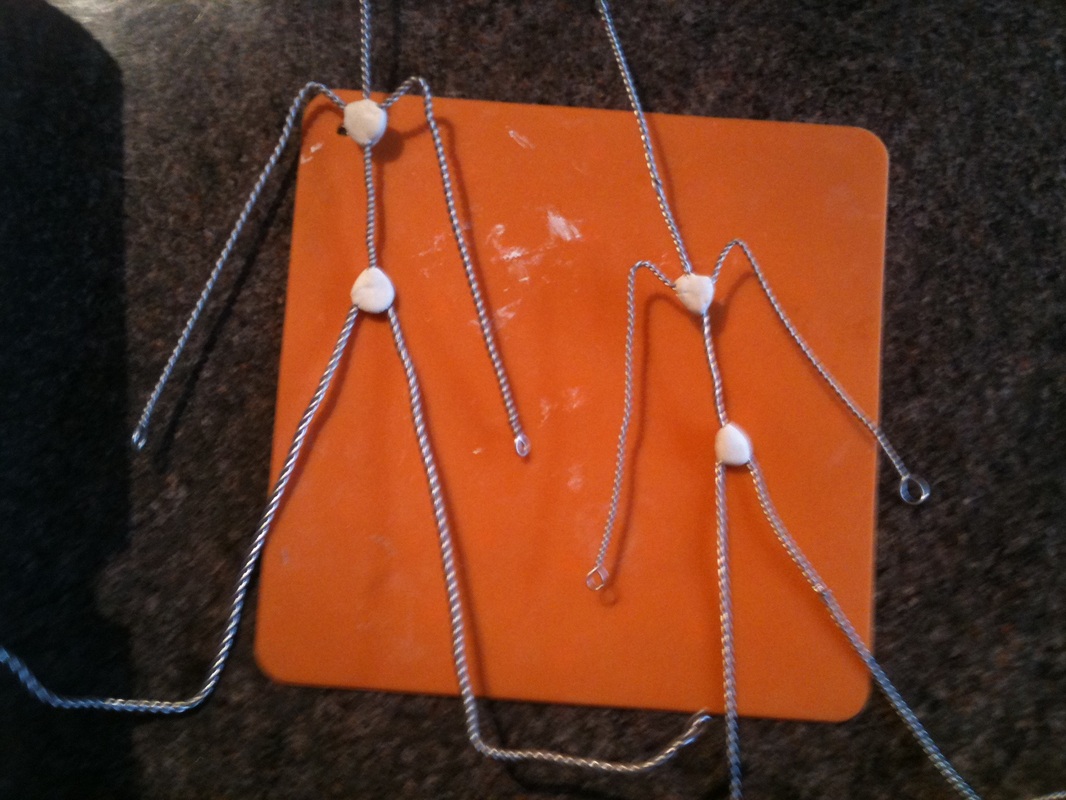
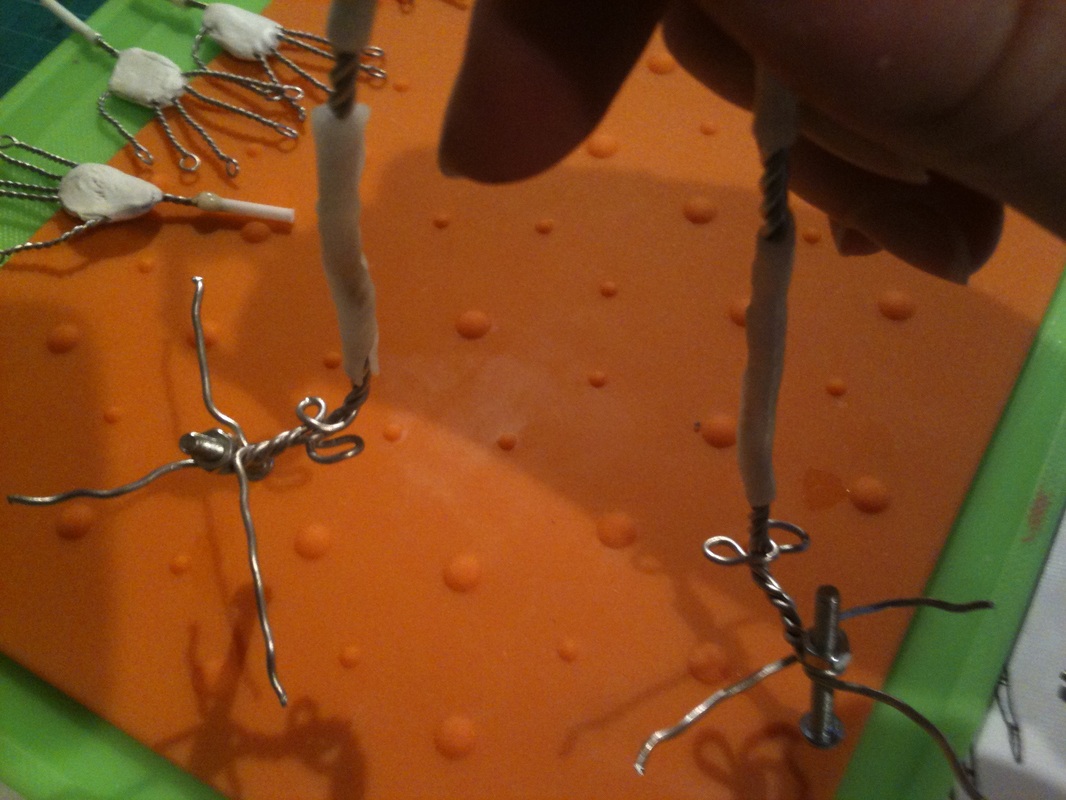
I have started to make the two final armatures for the puppets that I will use in the film. I decided on two puppets being enough as they don't have to do any excessive movements or wild positions, but if one decides to break then I do have a spare!
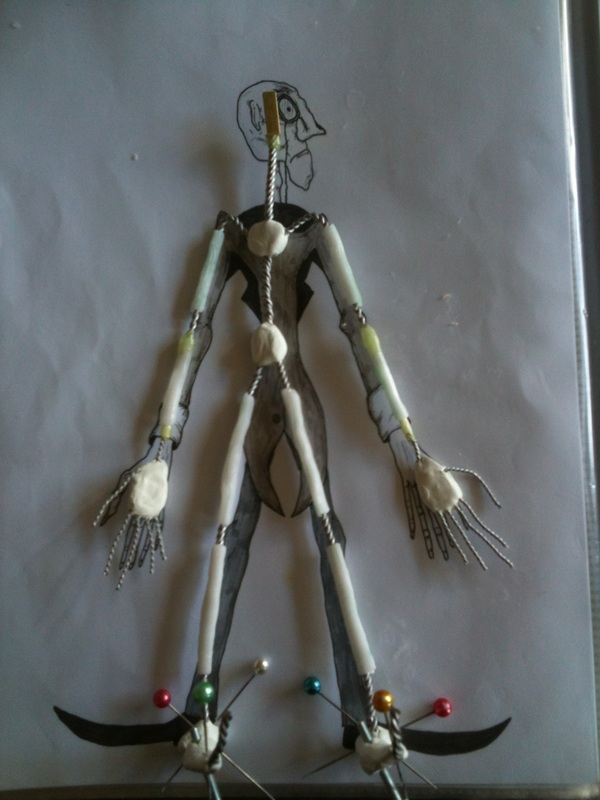
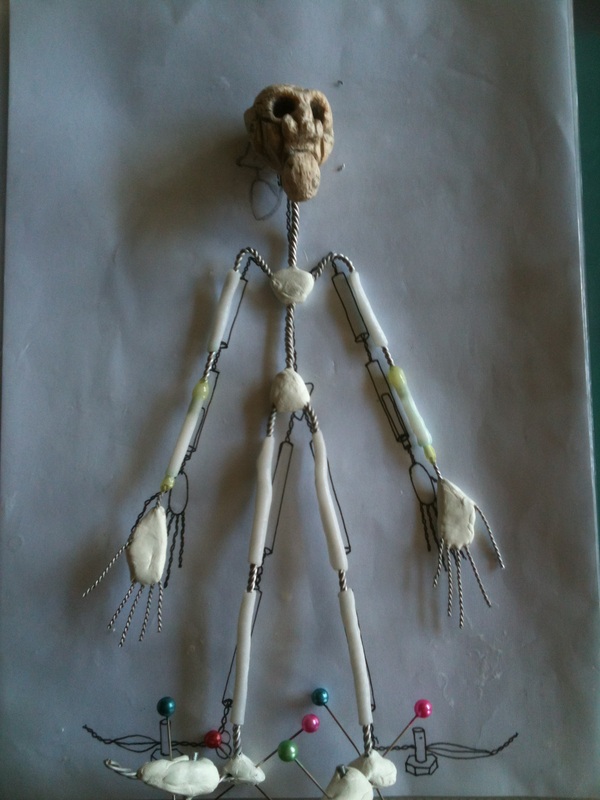
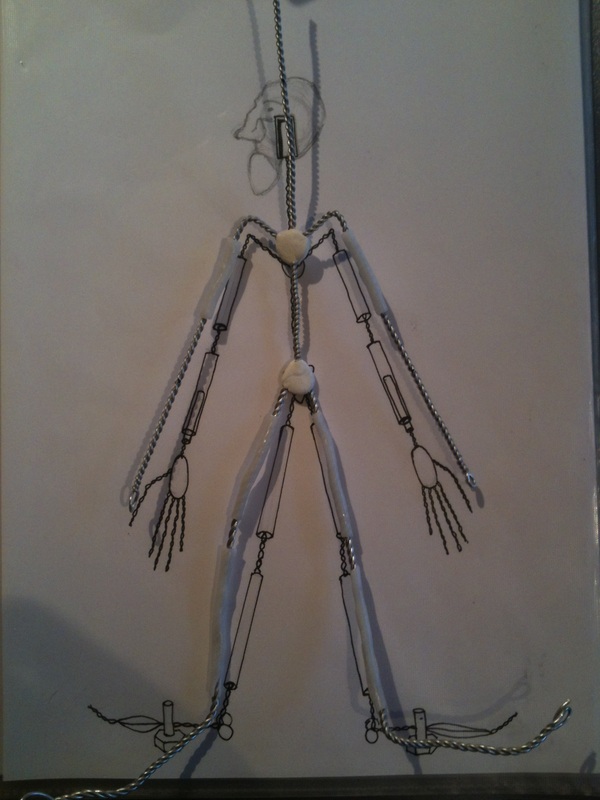
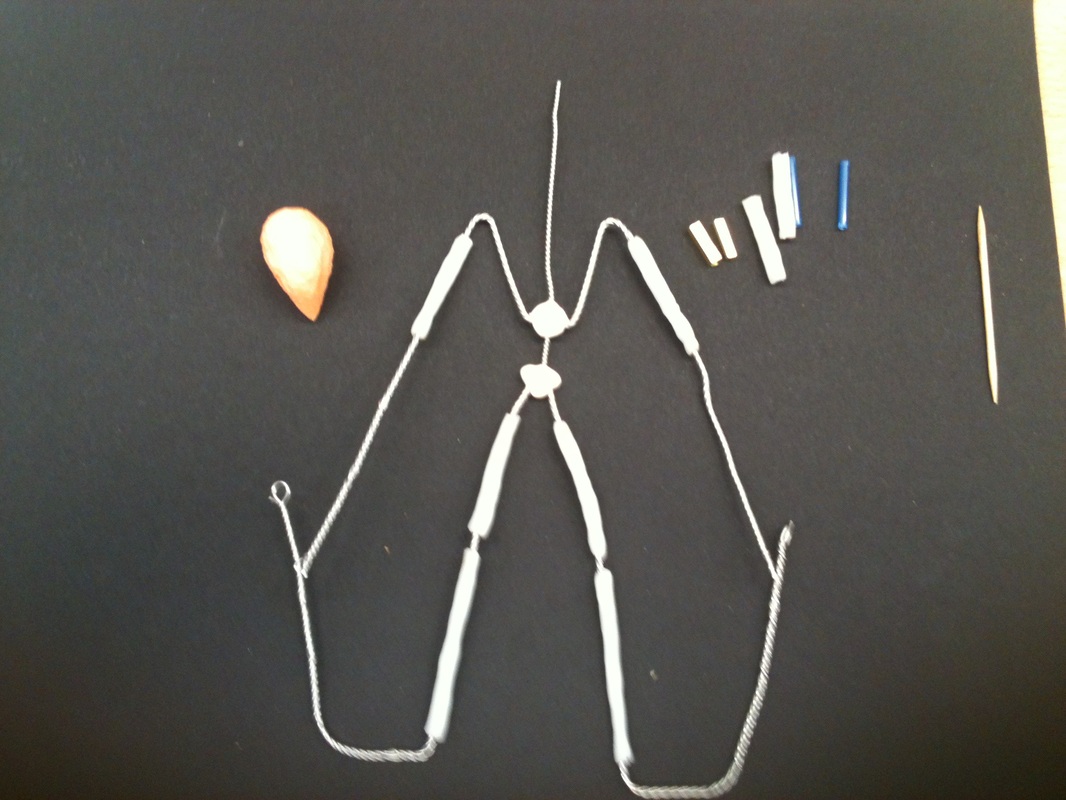
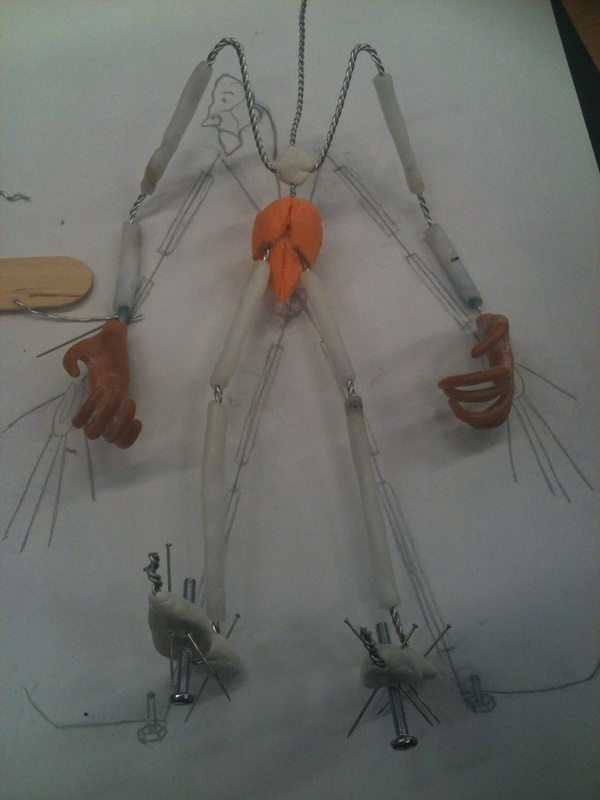
Wire, bones, K&S and tie-downs all in place:
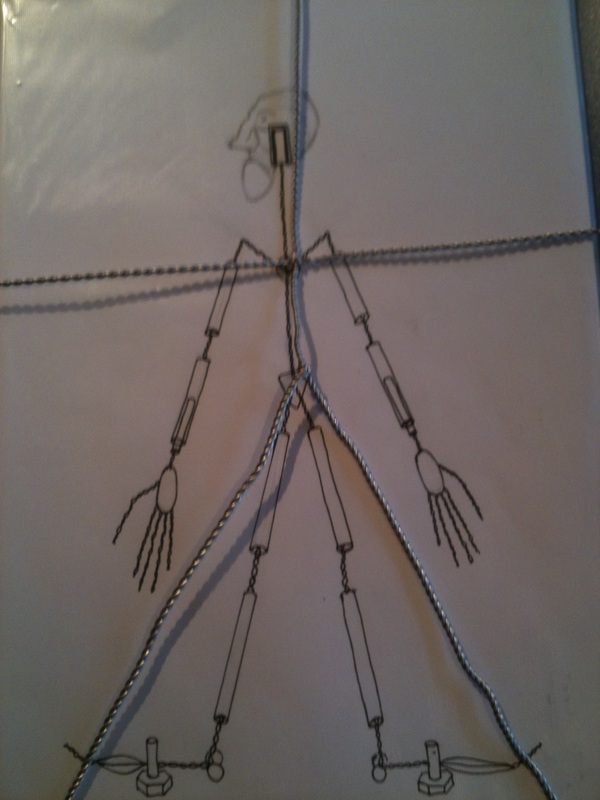
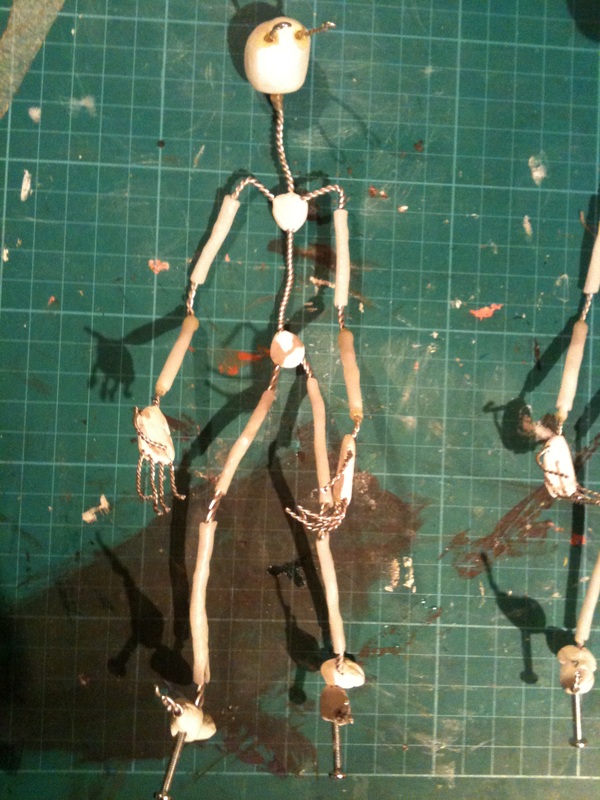
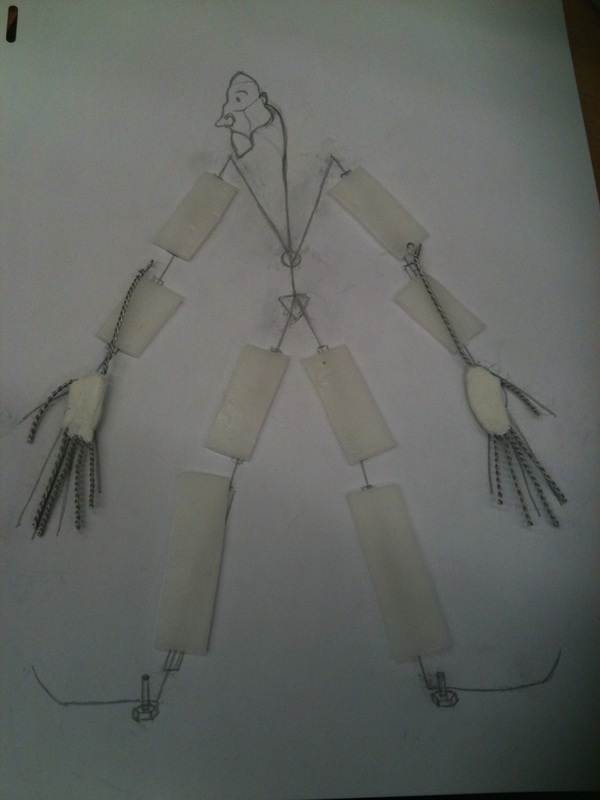
Against the scale drawing:
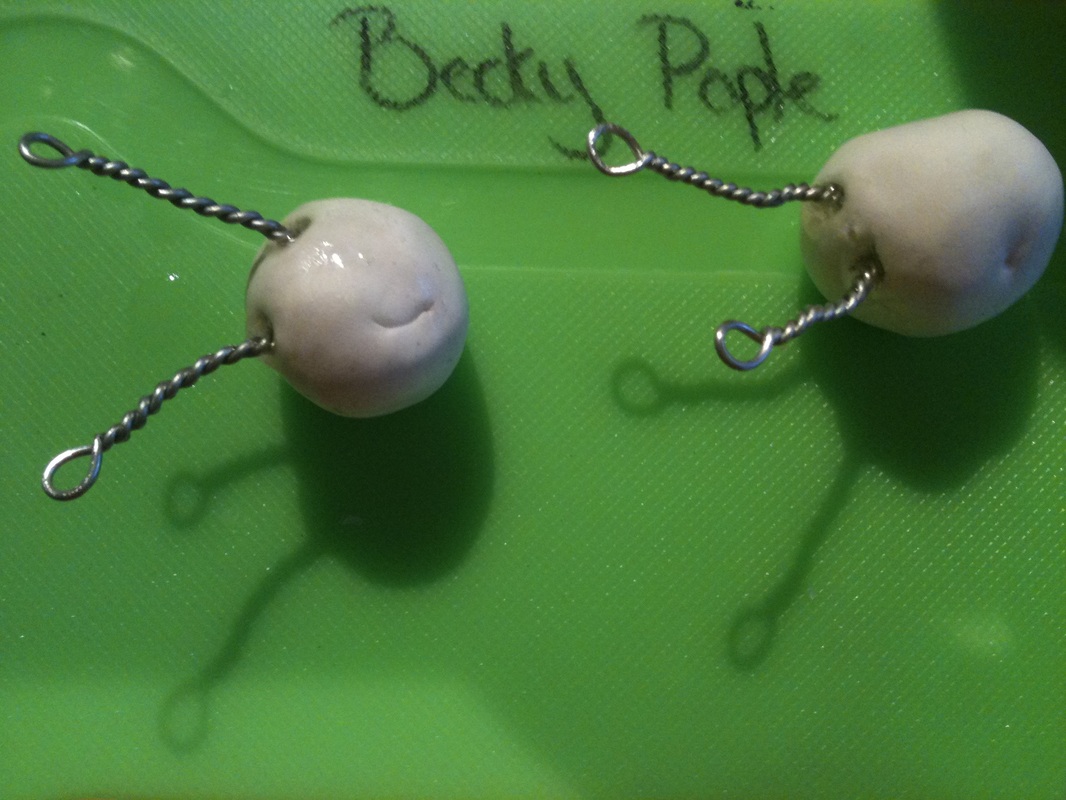
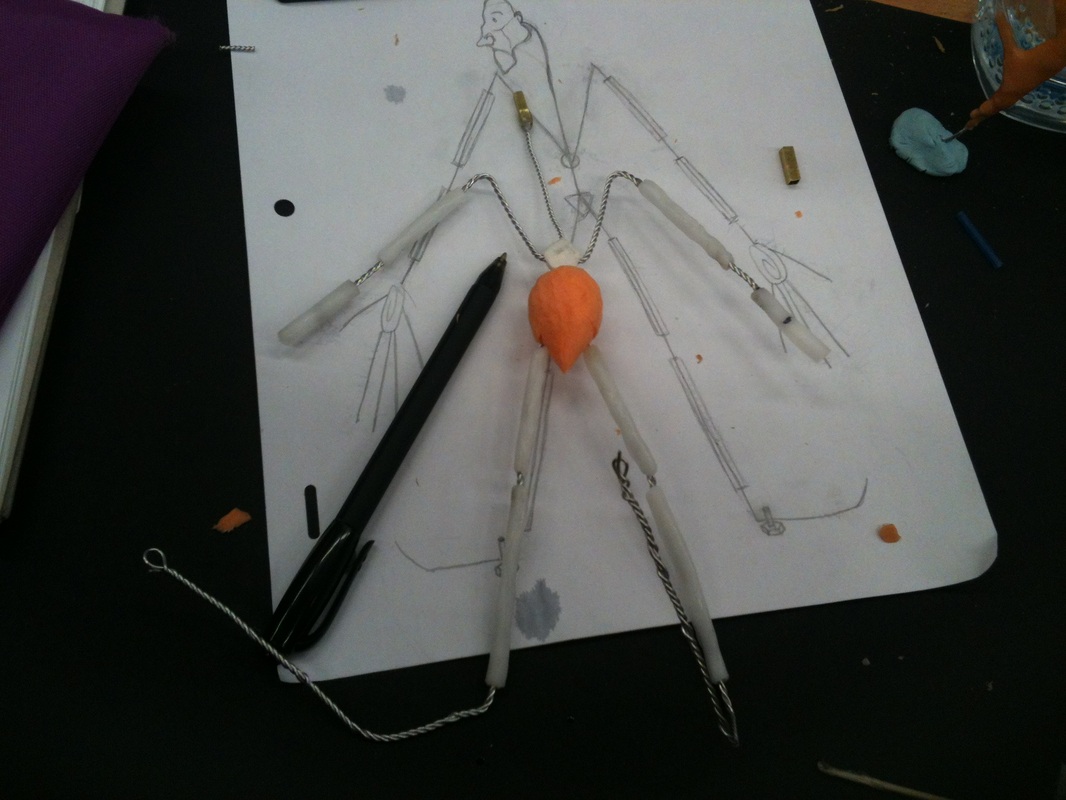
(I decided to make the hands slightly bigger for better screen presence and for ease of holding the books.)
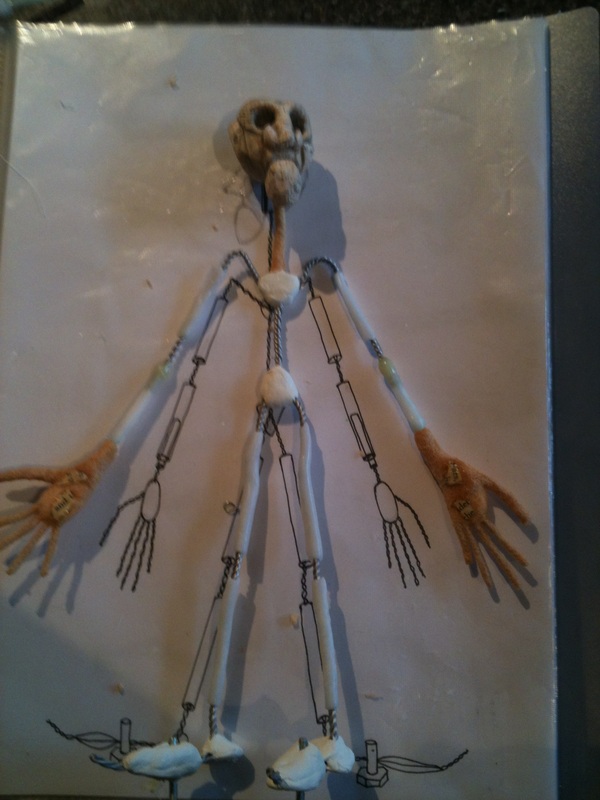
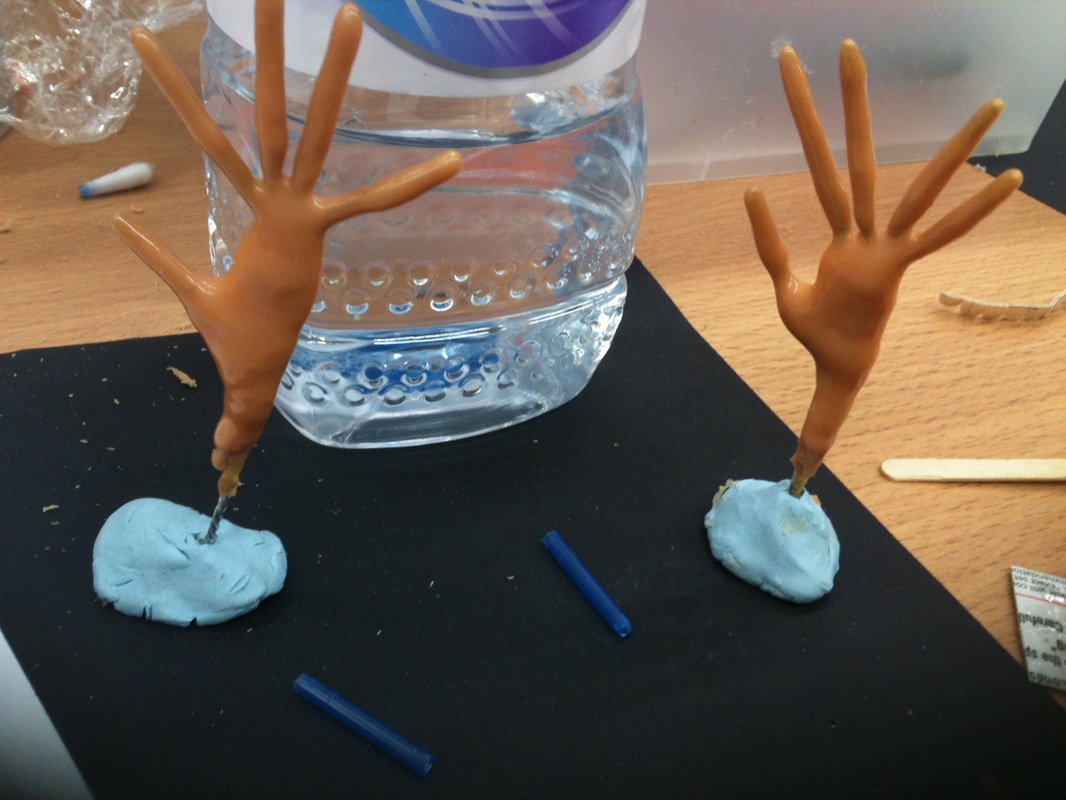
With skinned hands:
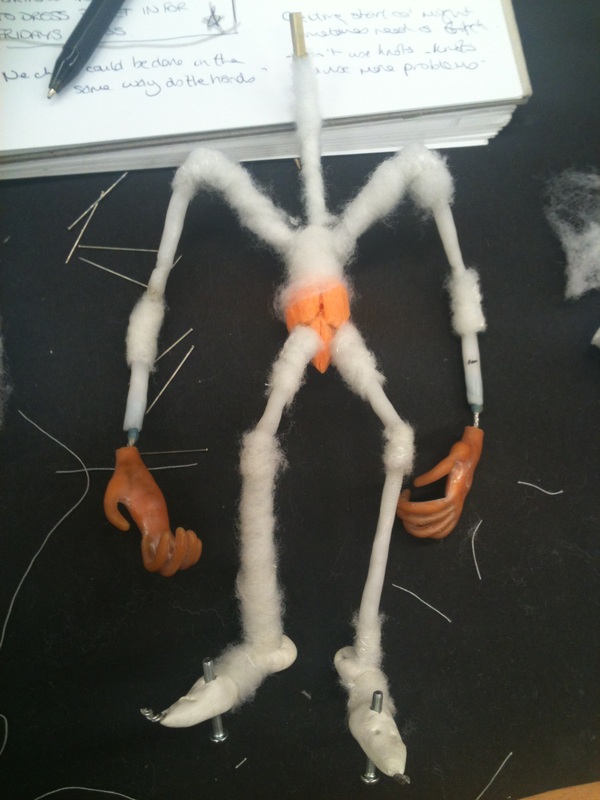
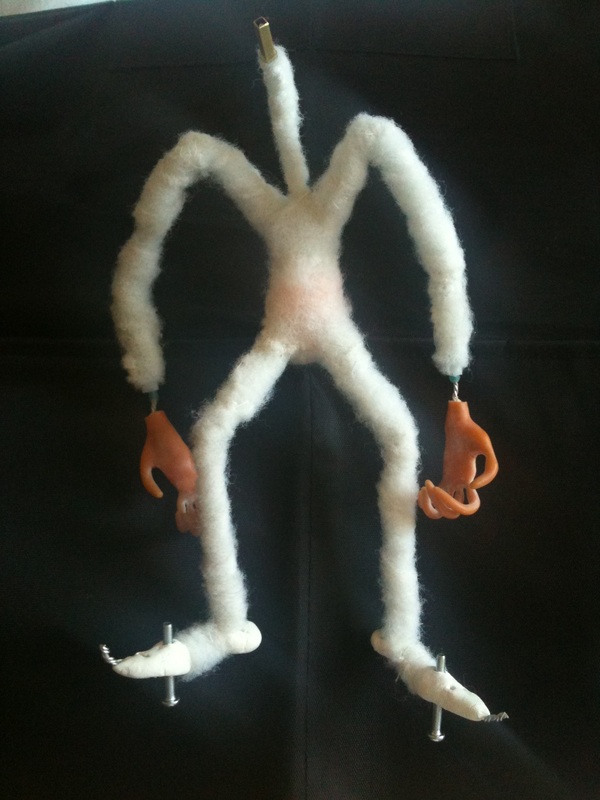
Wadding applied to the joints:
Hey presto! Time to start skinning...
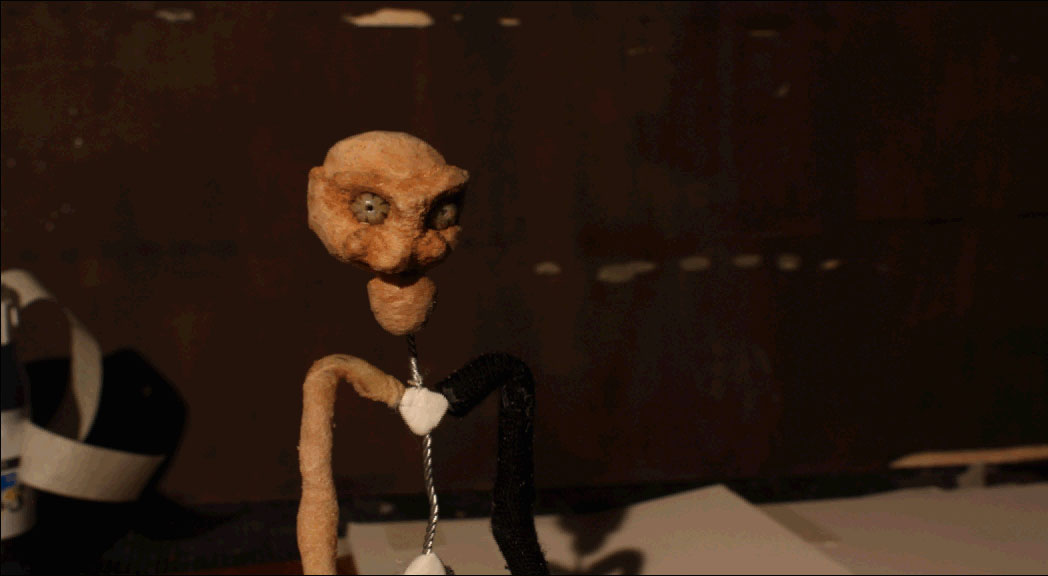
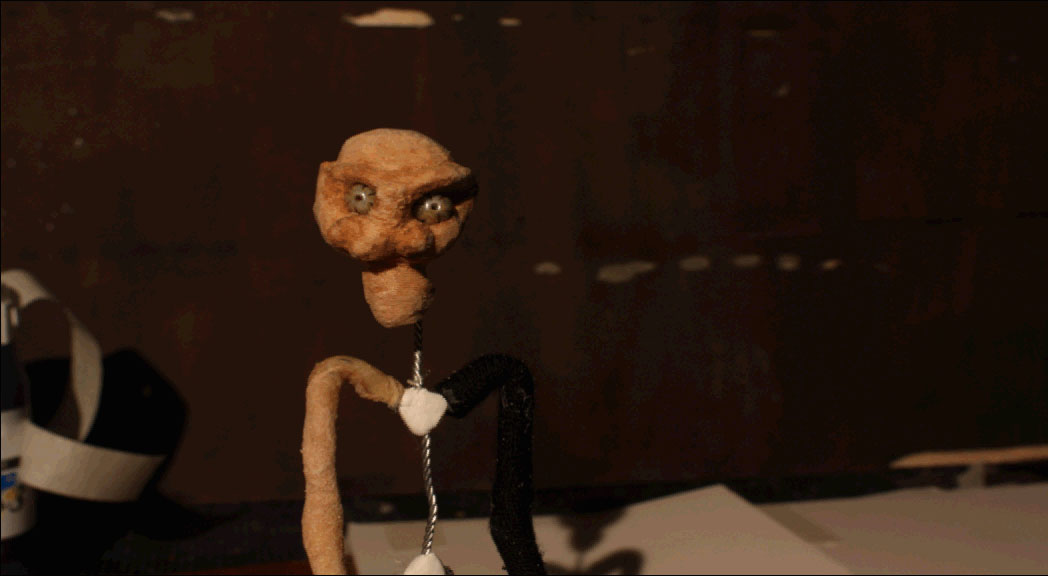
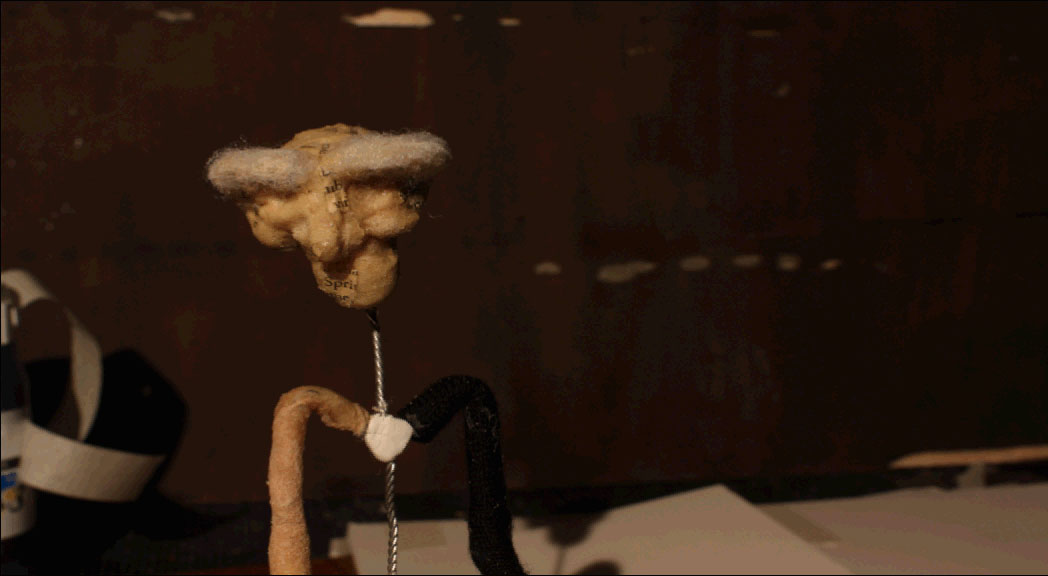
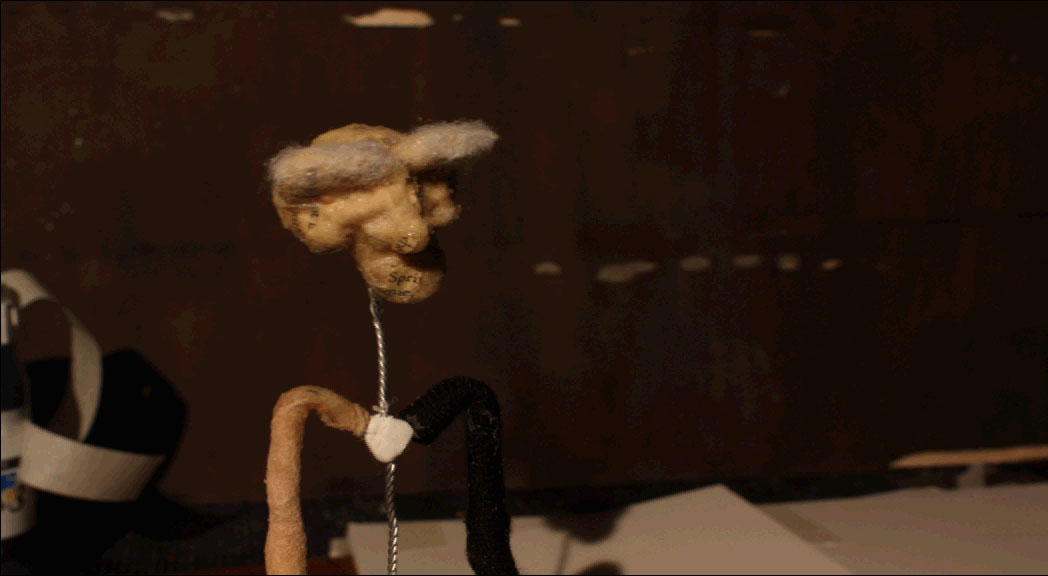
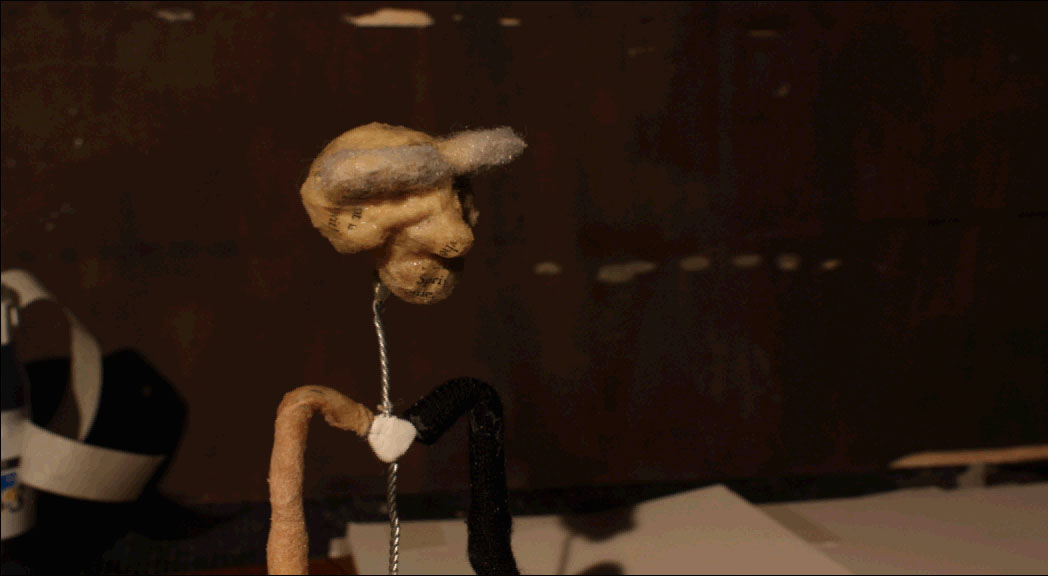
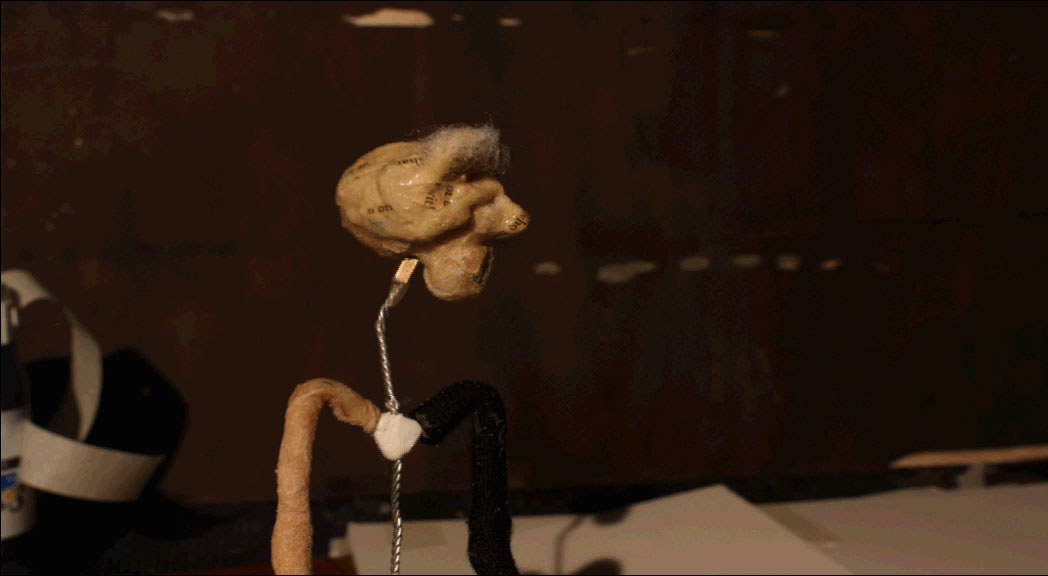
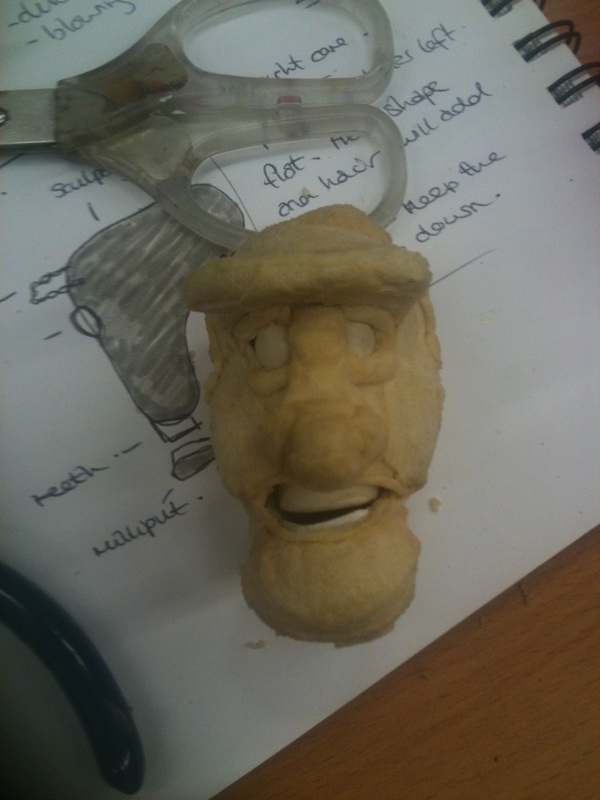
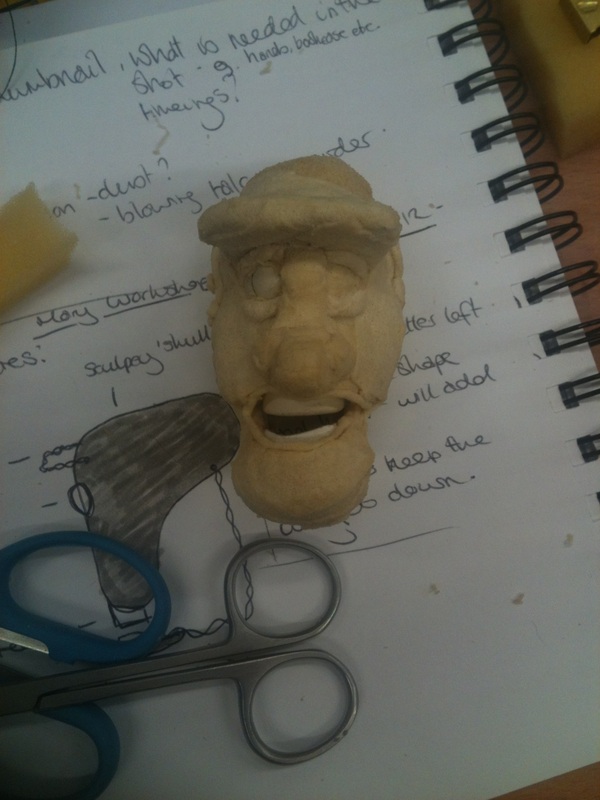
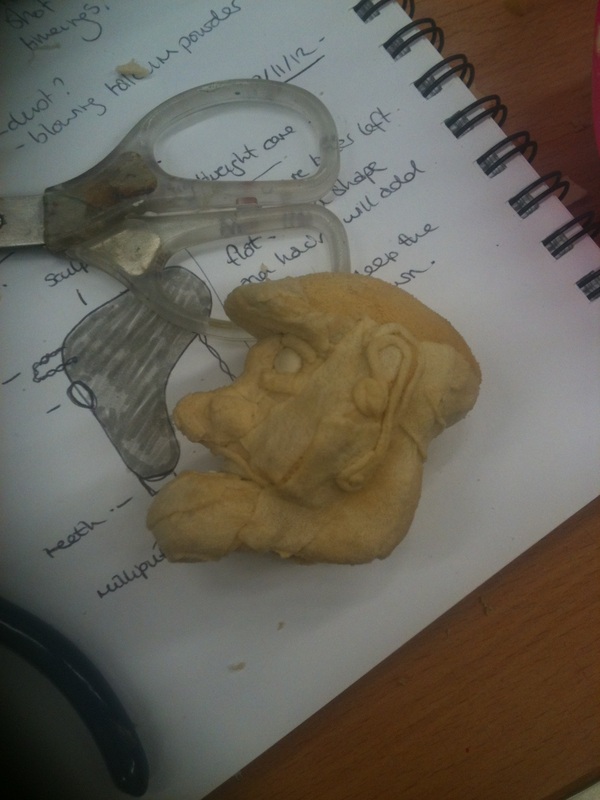
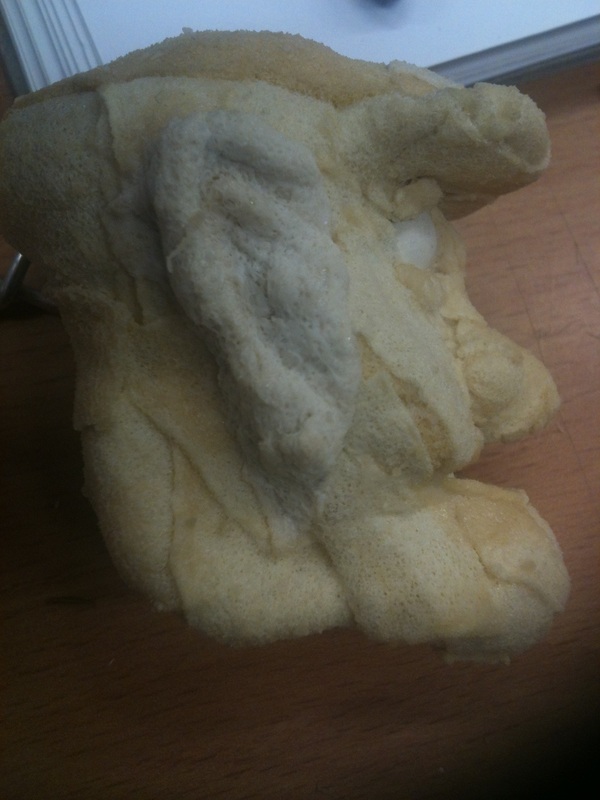
I tested the two head that worked well under camera and lighting to see how they looked on screen.
Balsa Wood:
Sculpey, foam and latex:
I thought they both worked well on screen. I do slightly prefer the balsa wood for a few reasons, the main one being that it is a really light material and doesn't affect the movement of the body armature. It is also really nice to work with and the definition of the face showed up a lot better than I thought it would. The sculpey, foam and latex head does look really visually nice, however it is really quite heavy and had an impact on the body armature. It was also shiney in places because of the latex and I want to try and avoid this.
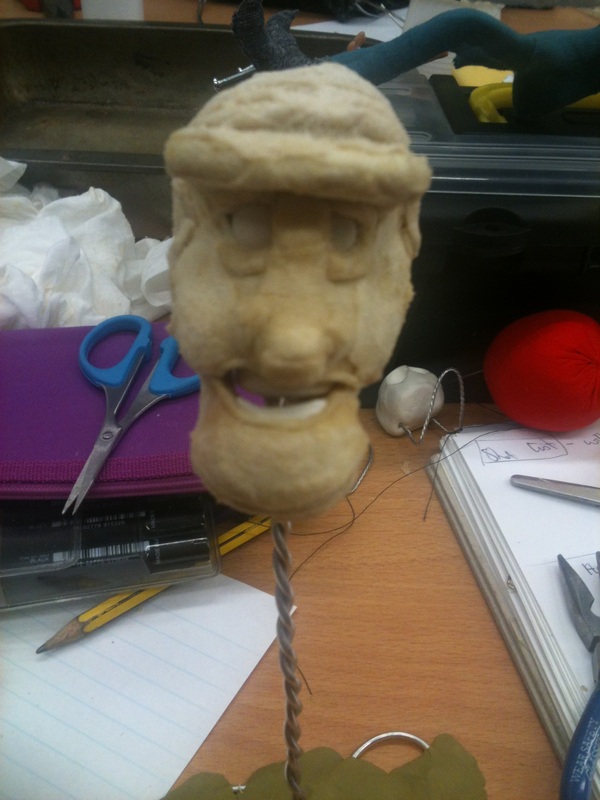
What I want to try next is adding book pages to the balsa wood, like I did to the foam and see if this adds the nice textural quality that the foam head has.
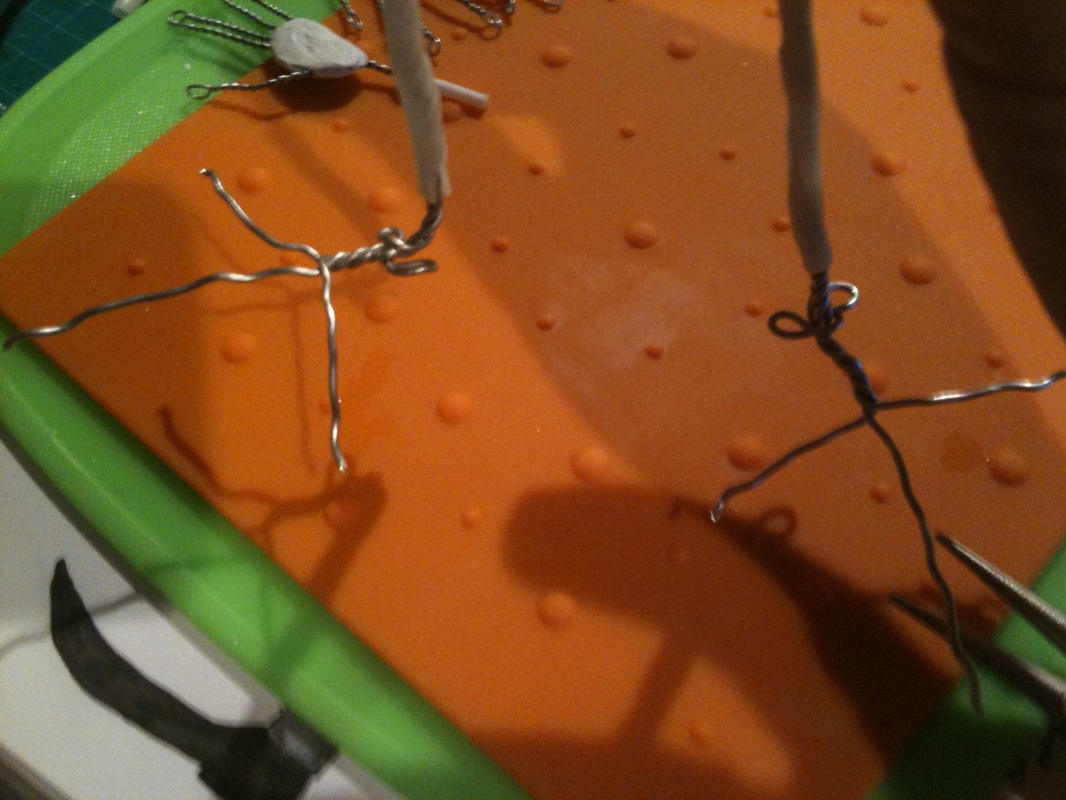
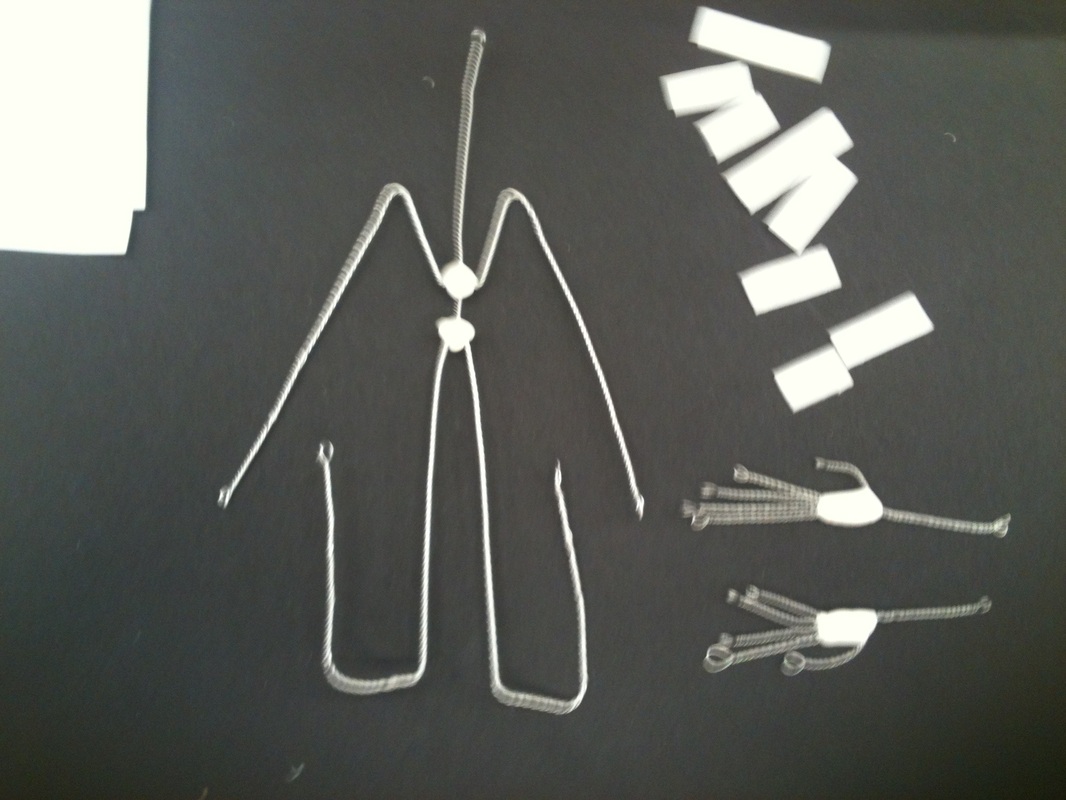
I have started making protypes following the last scale drawings that I posted up here. I have decided to make two, each out of different thickness wire so I can see which better suits my puppet.
Here are some images of the making of the armatures:
| | Above: twisting the wire
Left: applying milliput to the chest and pelvis
|
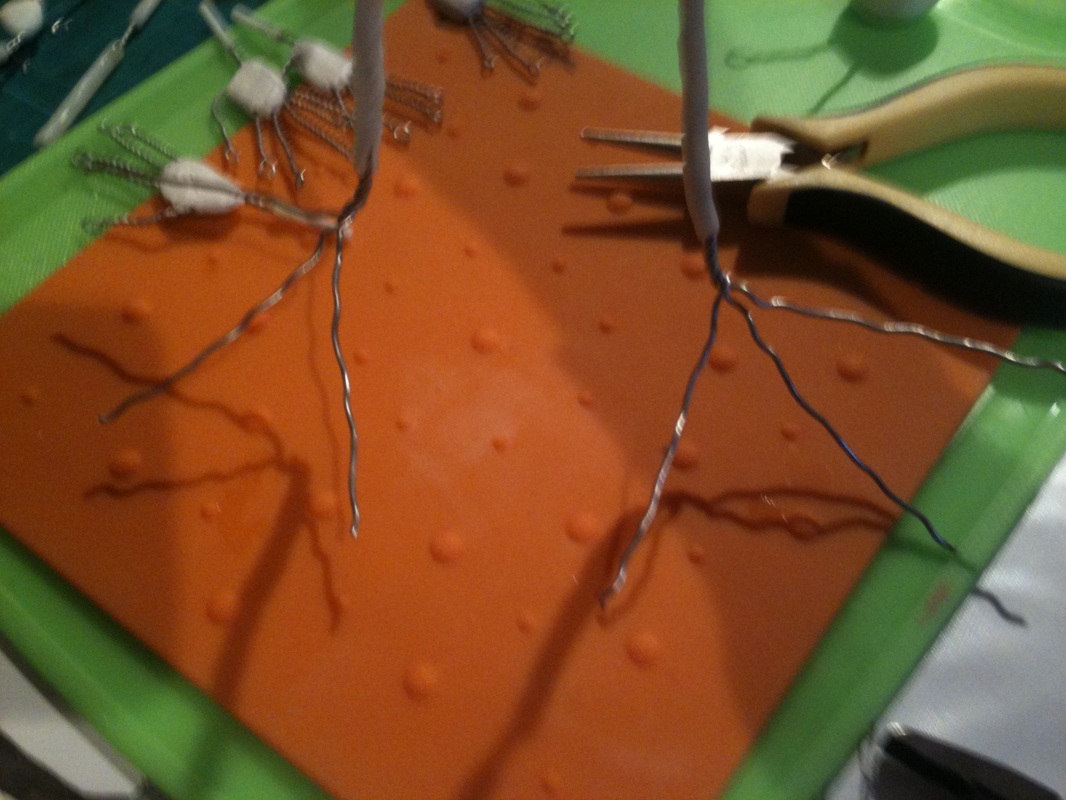
| | Left: measuring out the ploymorph bones
Above: measuring out the K&S in two different sizes
|
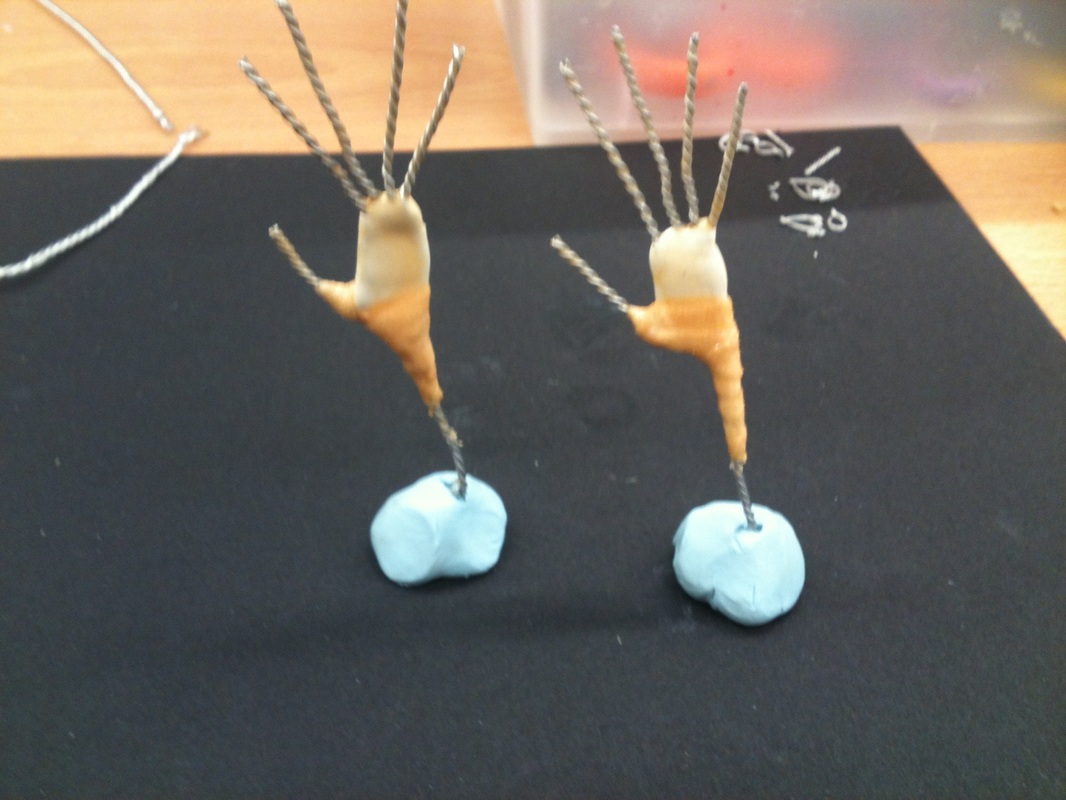
| | Left: the wire hand armature
Above: applying milliput to the palms
|
| Attaching the bones to the wire
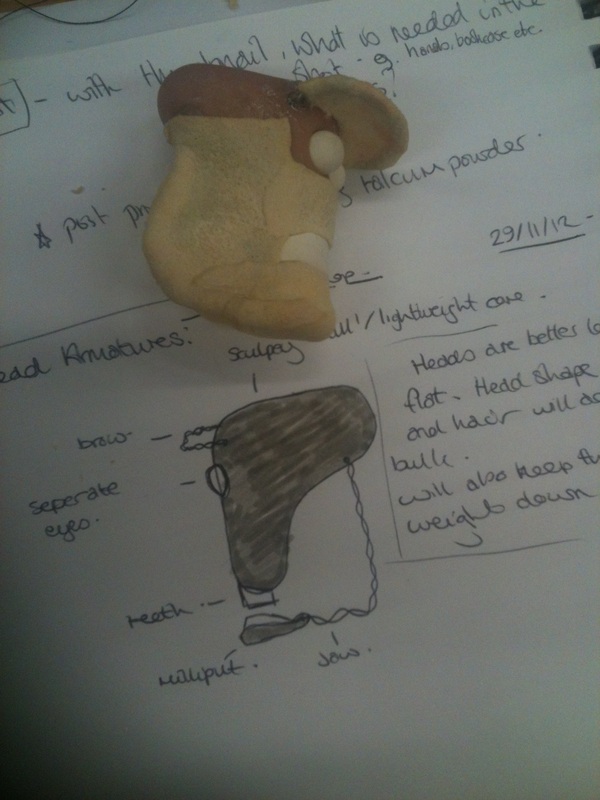
Lightweight head core and eyebrow armature
Above: making the tie-downs in the feet
Right: the finished product
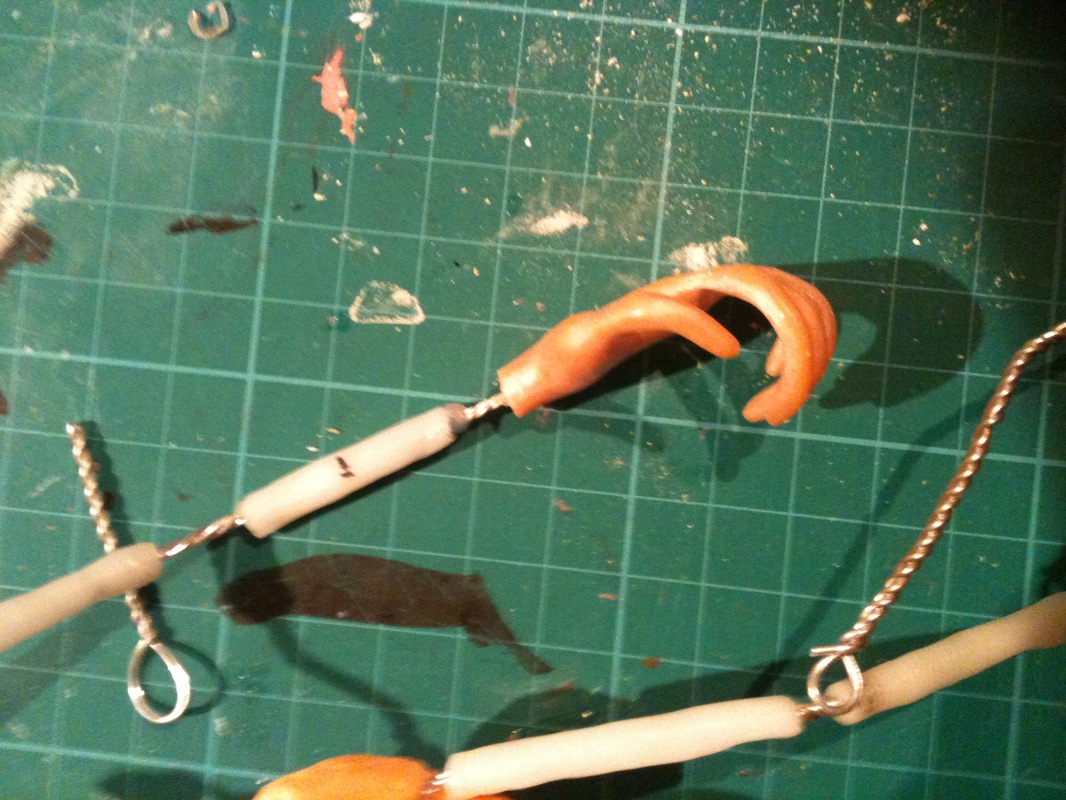
| Attaching K&S to the wrists Attaching wrist bones which contain slot for hands to attach
|
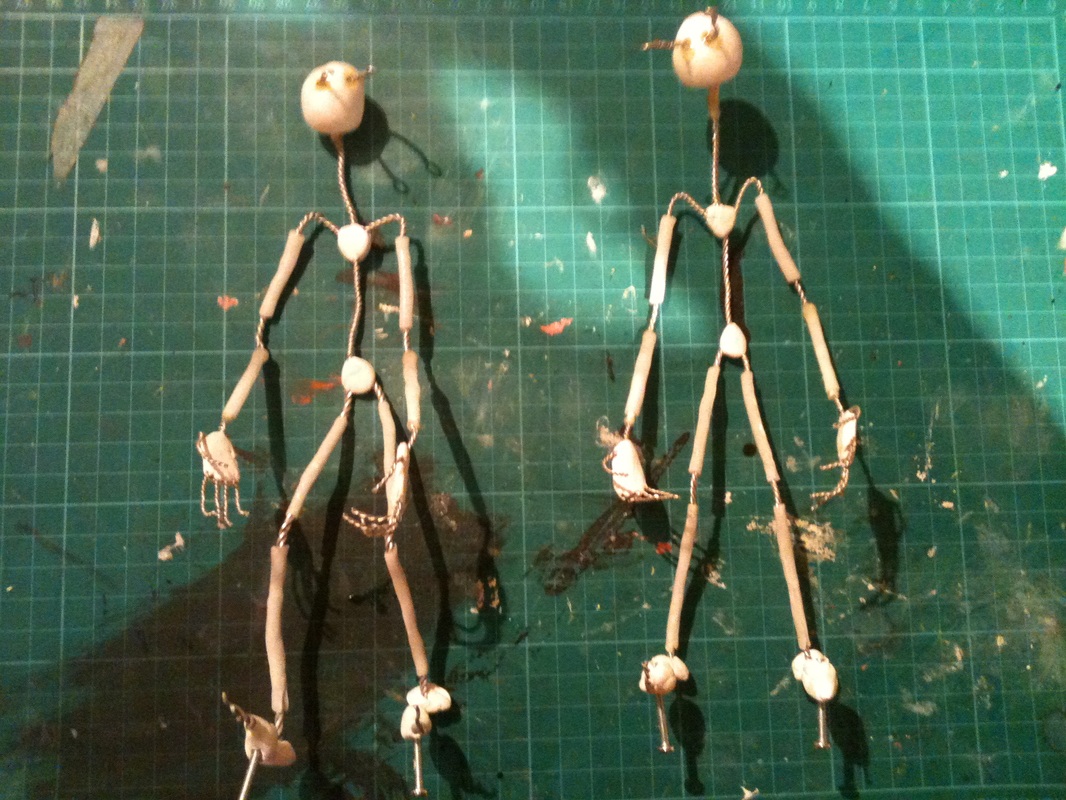
Left armature is made out of 1.2 mm wire, the right is 0.9mm.
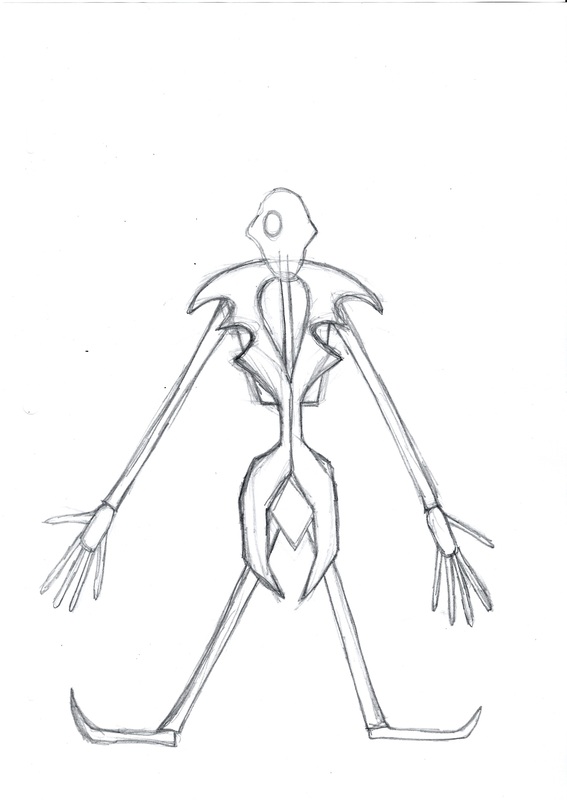
This is the product of my day today. I've been working on a new scale drawing of the librarian puppet along with a new design for the armature. Following my previous designs with the abnormally positioned shoulder joints and finding these didn't really work, I have re-worked my design back into a more 'normal' human body shape. I have also re-worked his outfit so that the coat tails are on the back as the main shot of his whole body is from behind him and will look better on screen.
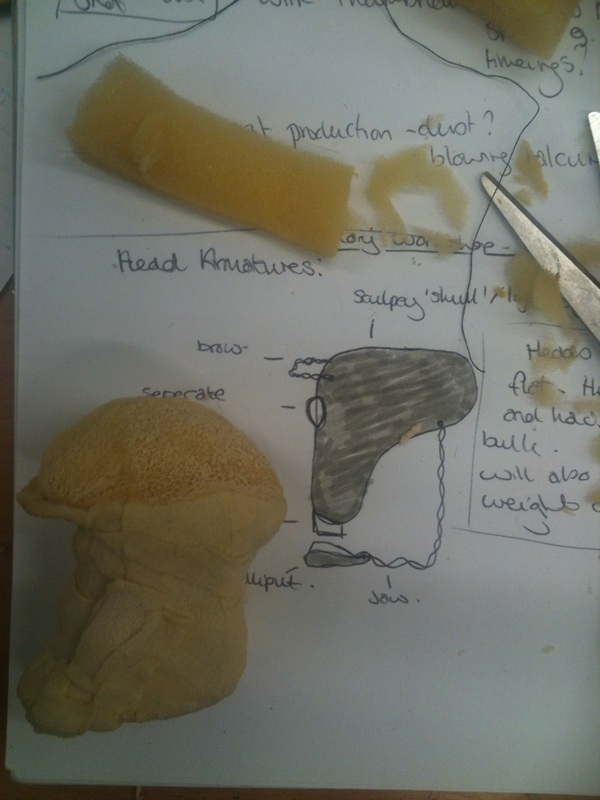
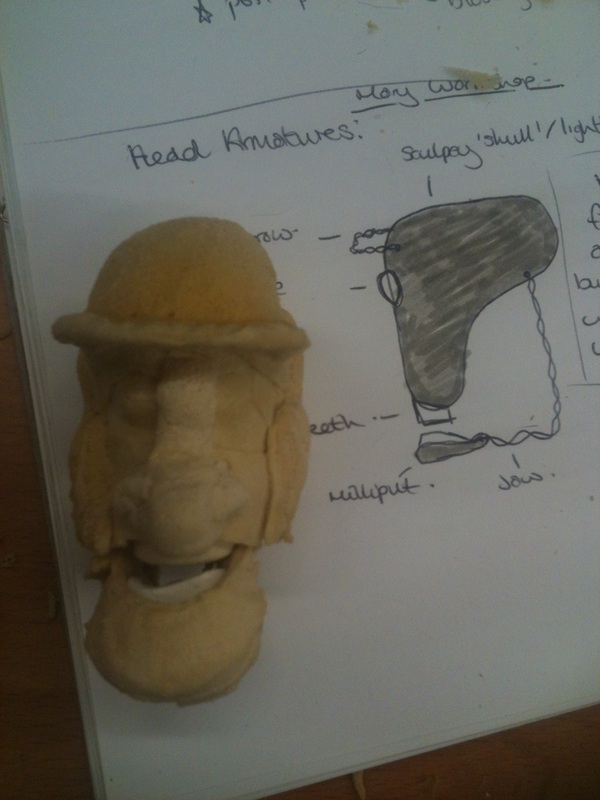
I'm still yet deciding on the design for his head armature, it depends on what materials I use to create it. If I carve his head out of balsa wood then he wont need a lightweigh core, the K and S will slot straight into this, however if it is made out of paper mache or mod roc then it will need a lightweight core for the K and S to sit in.
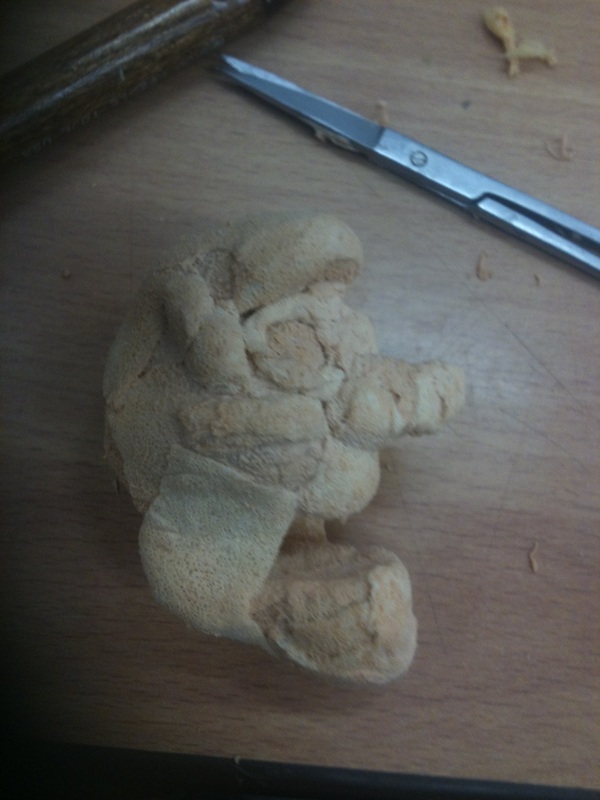
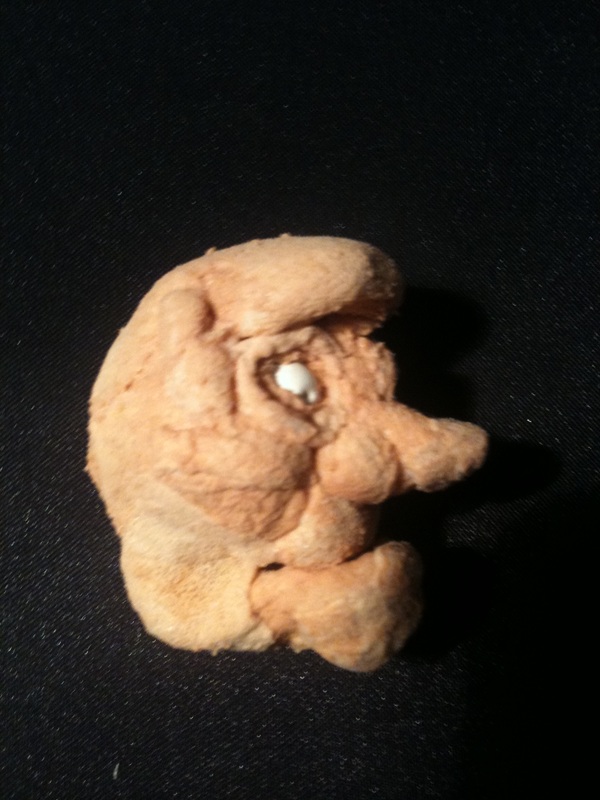
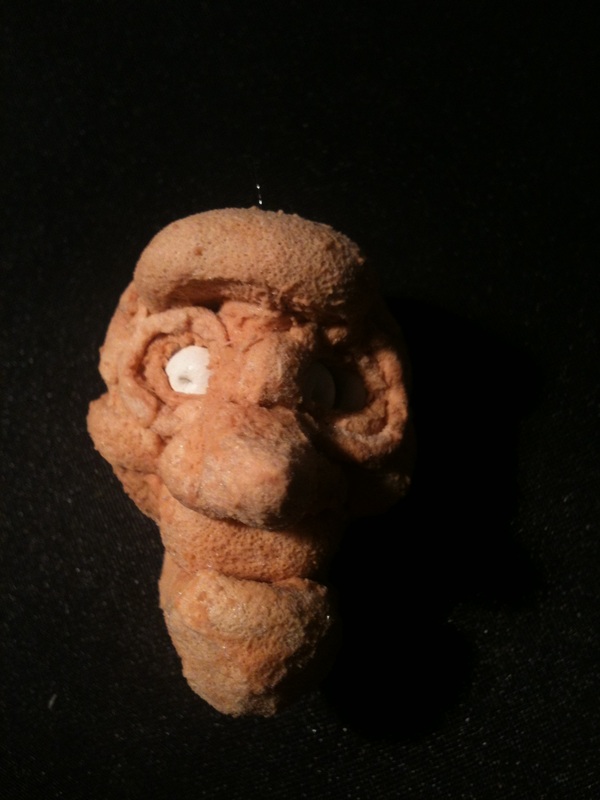
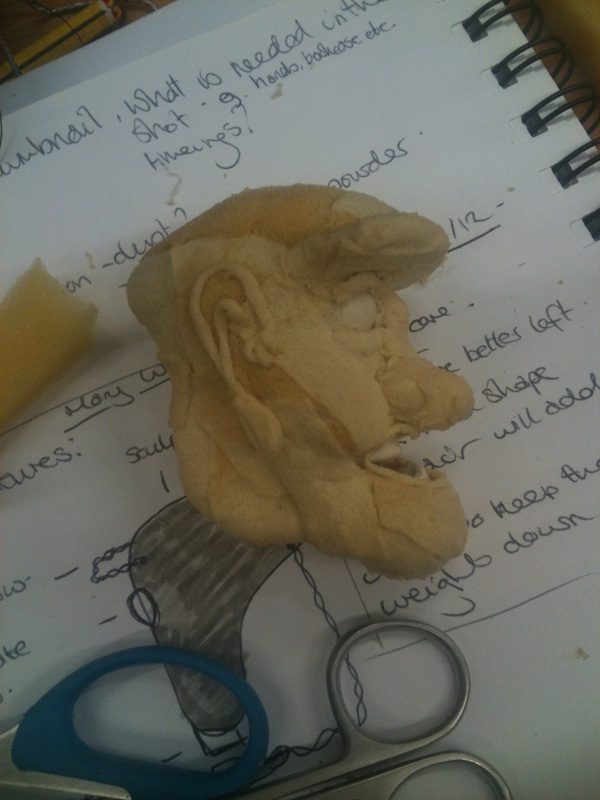
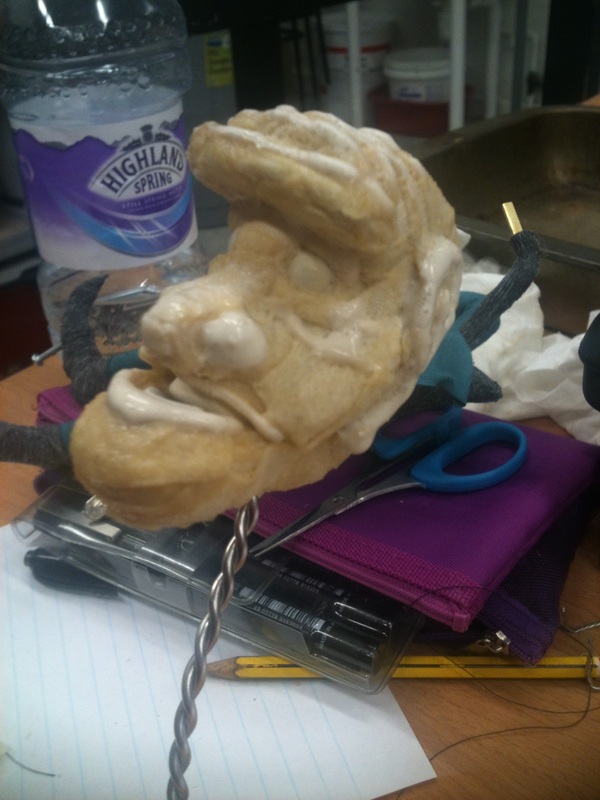
After making my prototype head armature in the workshop, I thought I would have a quick go at making one that was in an attempted style of my Librarian. This was handy as I got to have a go at making a VERY small head armature that would be around the size I would need to use in the actual final puppet. I had to admit this was a very rushed trial so the aesthetic quality isn't as much of a success as I would have hoped to achieve.
| |
However despite this fact I think I am coming to the realisation that in using foam and latex to create a moving head (brow and jaw) it is detracting from the look I am trying to achieve: angular and sharp. I need to explore other materials (but might give this another go in less rushed circumstance just to make sure)!
|
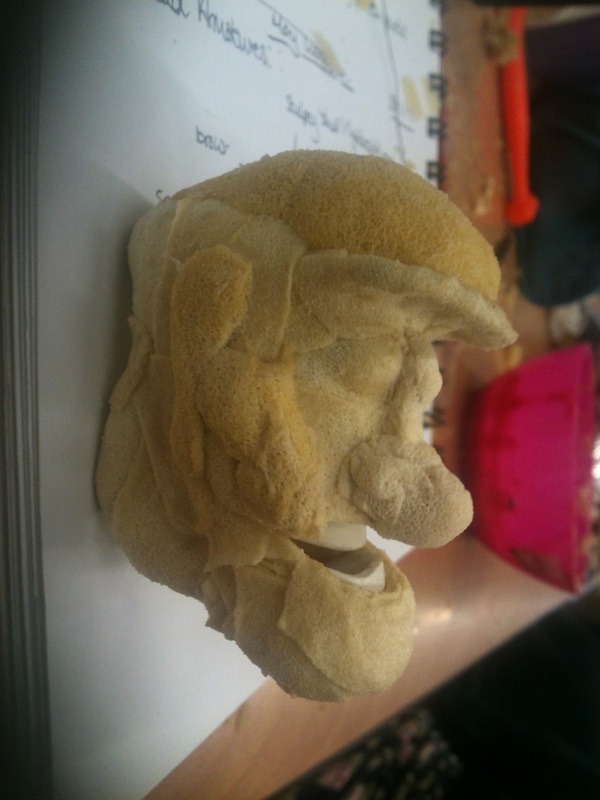
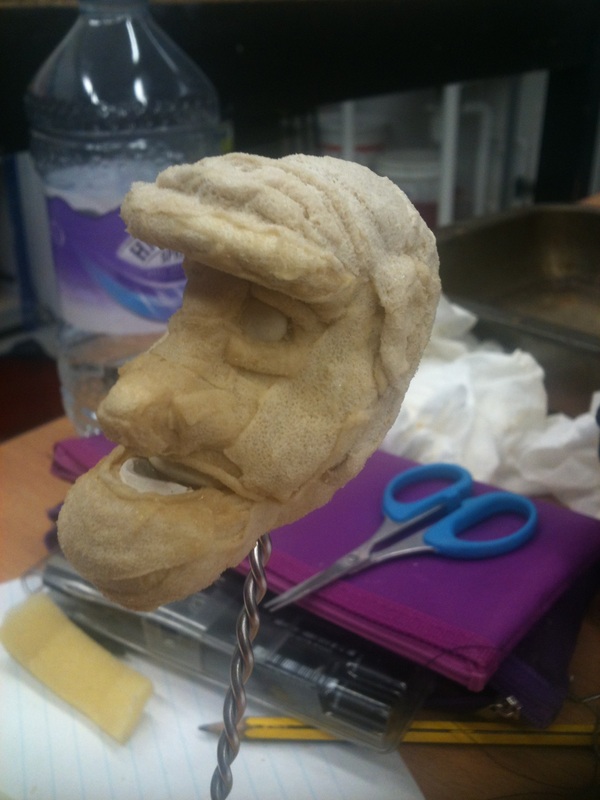
I have also attended another workshop to make a head with armature prototype. The design for this wasn't based on the Librarian, the idea was just to make a head in the time of the workshop so that we may apply it to our own character if we so wished. We were given a standard and basic lightweight head with a wire jaw and brow which we then built upon with foam and latex to create a face.
Here's how:
| Using fine foam dipped in latex, cover the armature and lightweight core with a single layer, including a whole piece of foam that covers the gap between the wire jaw and the 'skull' to create the 'flesh'.
Add foam in bulk where needed, for example the cheeks, using fine scissors you can cut them into shape once the latex has set.
Adding more layers to create facial shape.
Using fine bits of foam rolled into strips I have created detailing on each side of the head to look like the ears.
Basic facial shape in place.
| Once everything has been covered, including the eyes and the teeth, using a thicker piece of foam glue this to the top flat area of the head in a square block. Once the glue has set you can then shape the foam to look like a skull.
Cut a slit where the mouth should be to reveal the teeeth and then shape in a mouth.
Cut away the foam covering the eyes.
Ear detail.
Layer of fine foam onto of ear detail to create the appearance of the ear jutting out of the side of the head.
|
The finishing touches: using a coctail stick I applied latex straight onto the head in areas that needed building up further.
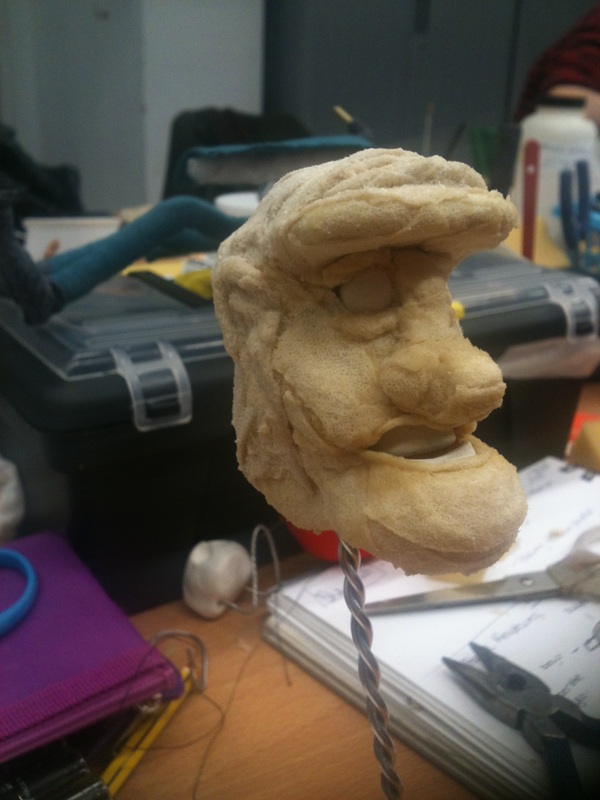
Although the prototype workshop was helpful in many aspects, the prototype that I produced from it is not the direction I want to go in for my film. Here are the two main reasons:
Aesthetic quality - The puppet looks spongey and cartoon-like which is not what I want the Librarian to look like. One cause of this is the use of fabric and wadding, he doesn't have the angular textured look that I would like him to have. Another is the latex hands, by using acrylic mixed in it gives the skin a block cartoonised look so I would like to try using latex mixed with gouache to see if this achieves a more realistic skin look. The third cause is the white round eyeballs in the head, also giving a cartoonised appearance.
Armature design - Although using the armature shape that I have experimented with in this prototype does give the puppet an elongated neck and unusual body shape, it won't lend itself well to movement. The sholders sit awkwardly hidden behind the collar so all camera work would have to be face on to the puppet. The neck itself is extremely weak as it is relatively unsupported holding the upper half of the puppets body weight. It may be best to try and make a prototype in a similar style that I did with the marquette - normal shoulders, better control of movement. However I do need to test animate this prototype still.
| | I have attended a series of workshops in order to get a prototype puppet finished with the guidance of a texhnician and in the process will learn a new form of skinning that I haven't tried before.
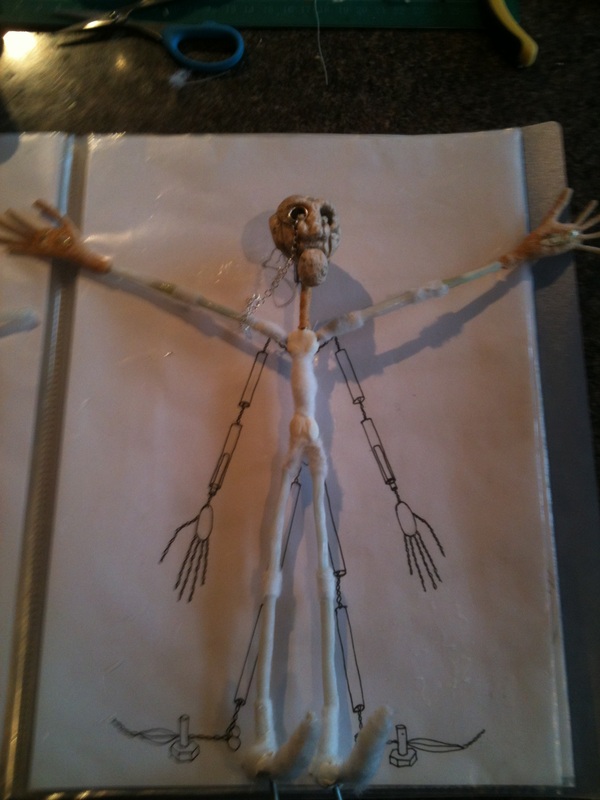
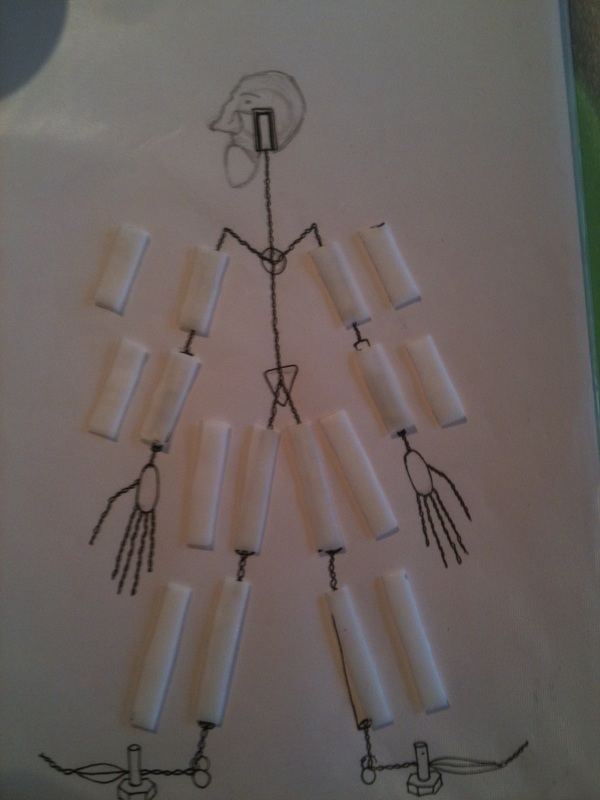
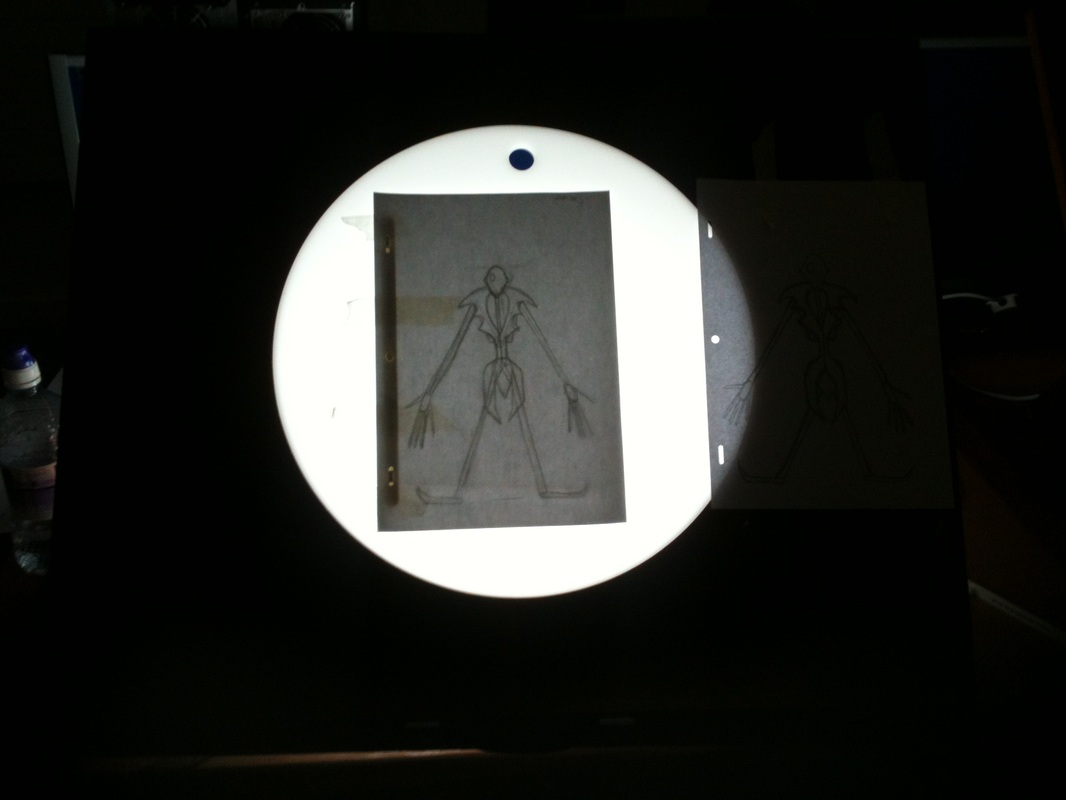
I was working to this scal drawing (left) throughout the workshop. As the scale of the puppets neck is so long compard to the waist I really had no idea whether this would be a success or not, but then that is the whole purpose for a prototype!
|
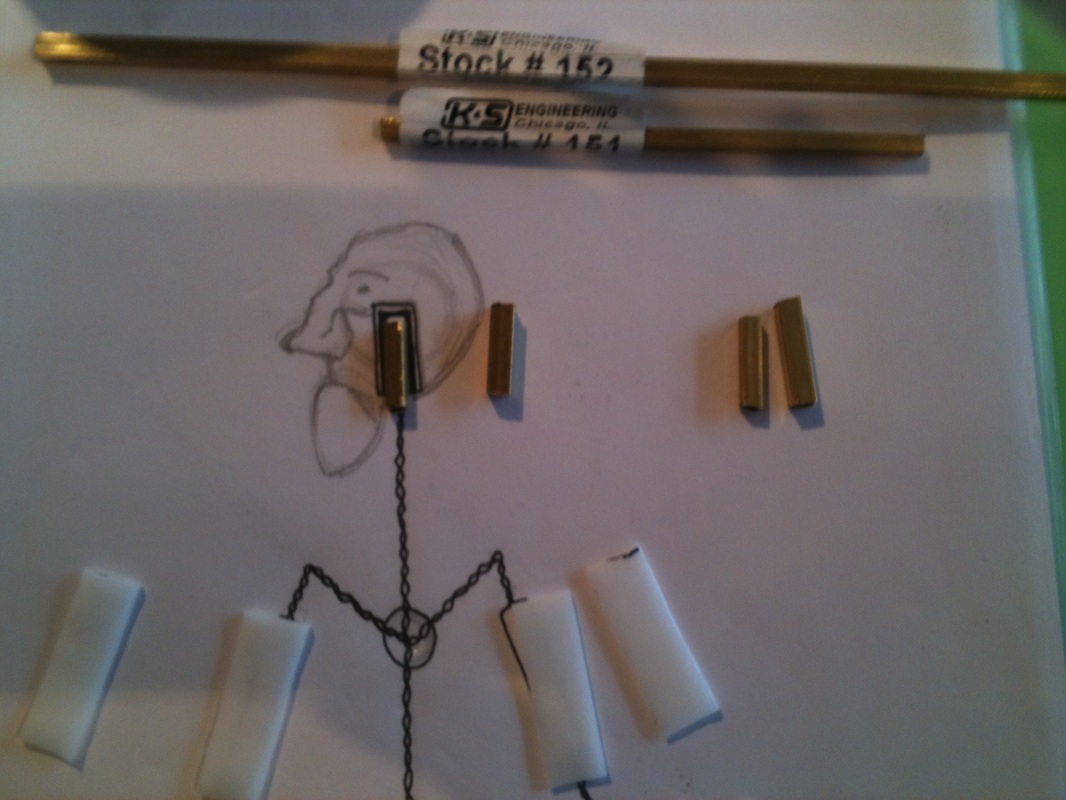
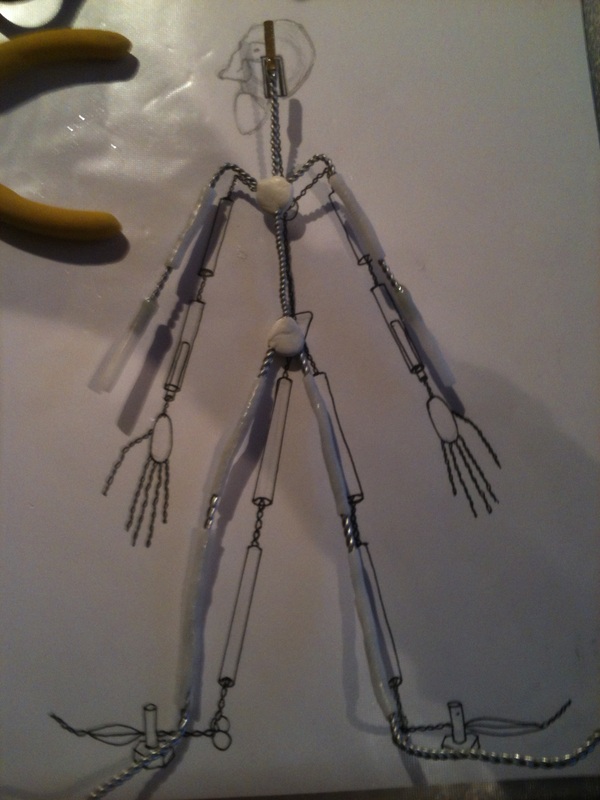
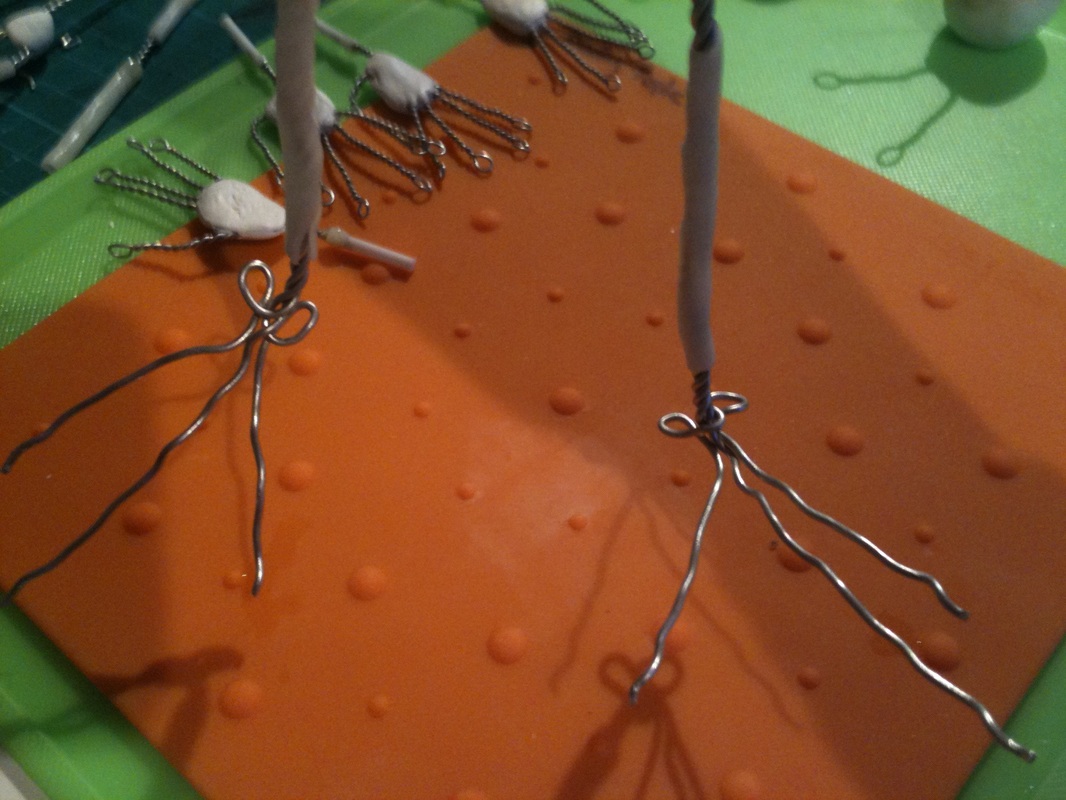
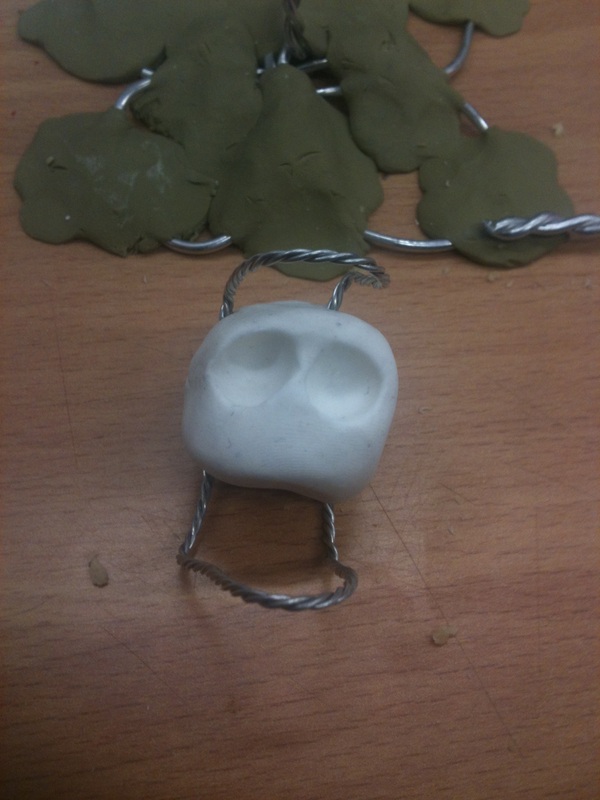
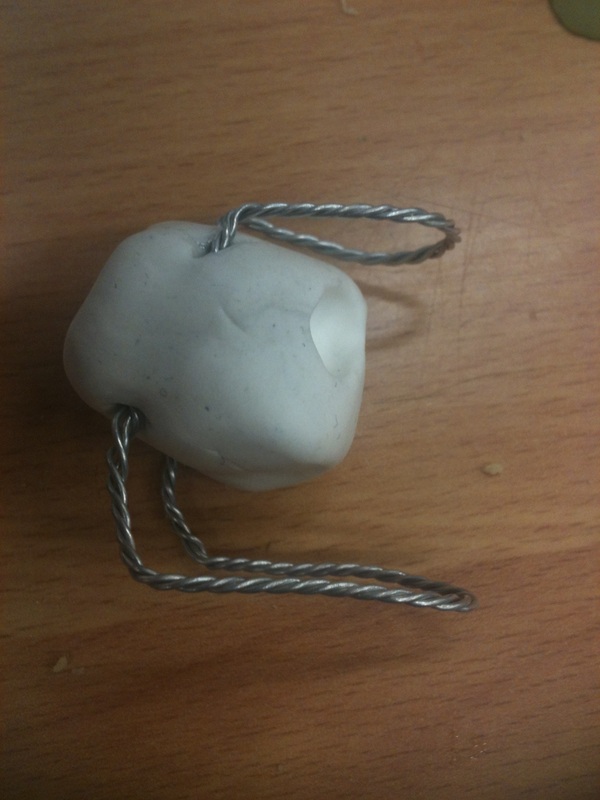
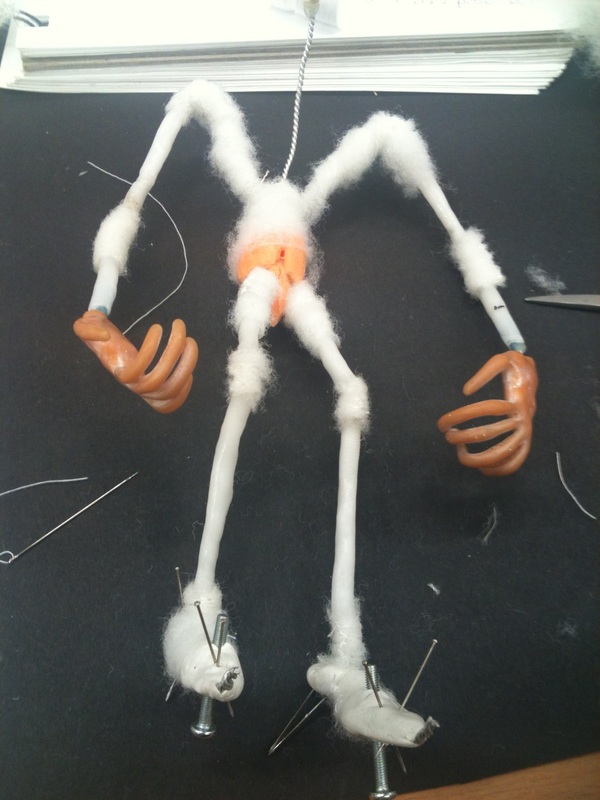
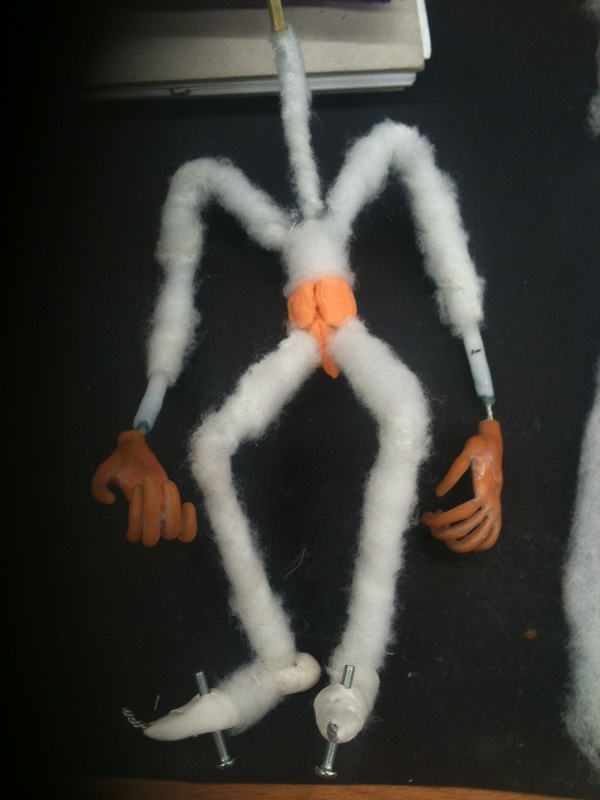
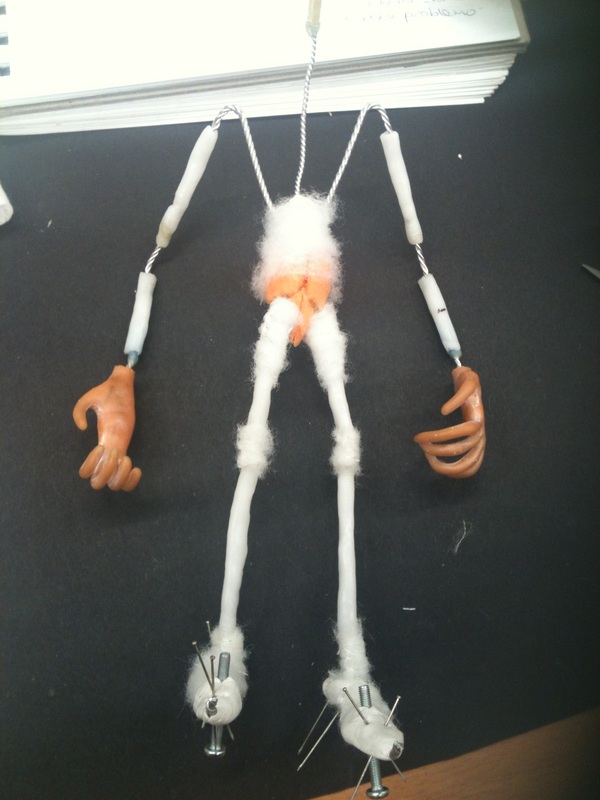
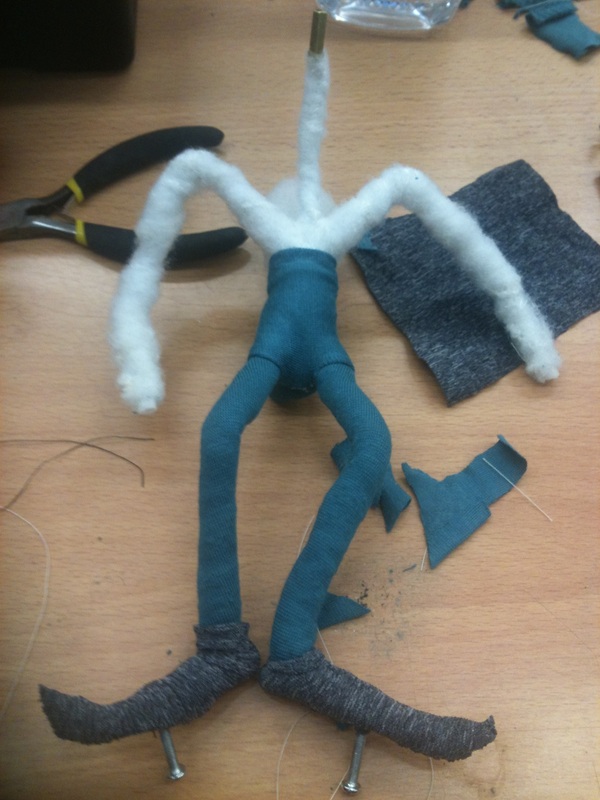
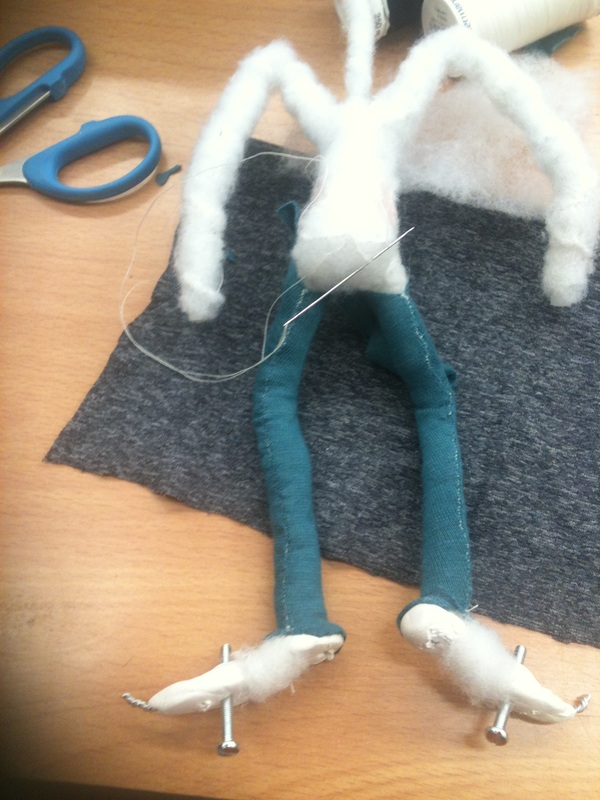
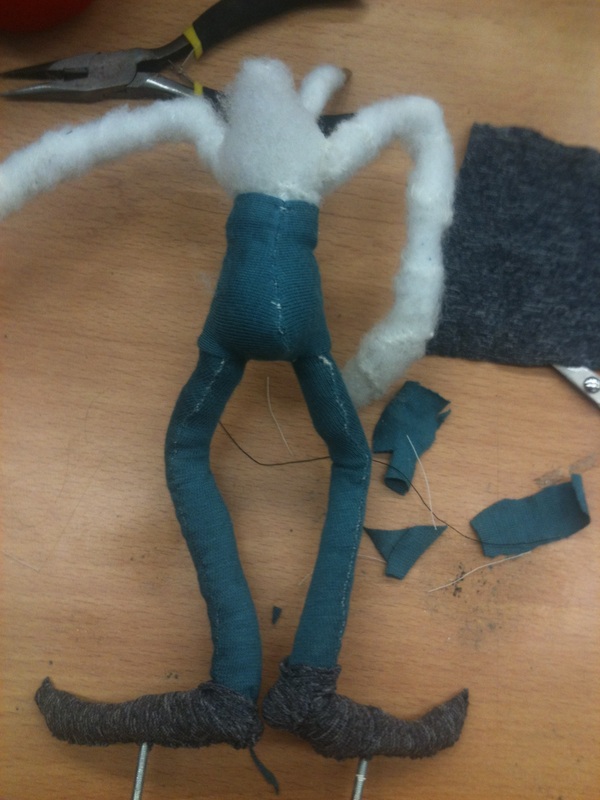
Armature:
| | (top left): wire armature made to size of scale drawing, including hands, with milliput set around chest and waist.
(right): polymorph bones measured to size on the scale drawing.
(bottom left): bones fixed to armature. Lightweight core is prepared and shaped from a bit of yoga mat. (Sorry yoga mat!)
|
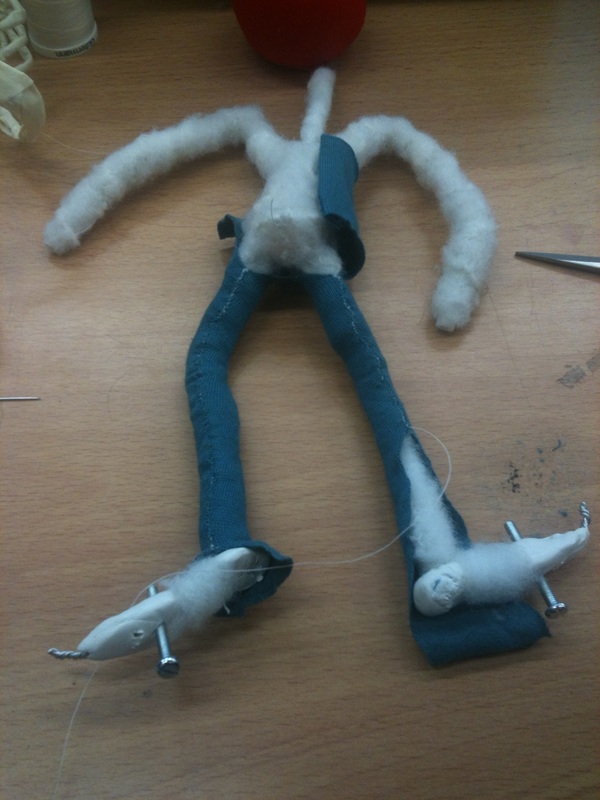
(below): soft layer is attached to armature and arm wire is trimed with makeshift K&S attached ready for hands as well as actual K&S attached on neck ready for head. All attached by araldite.
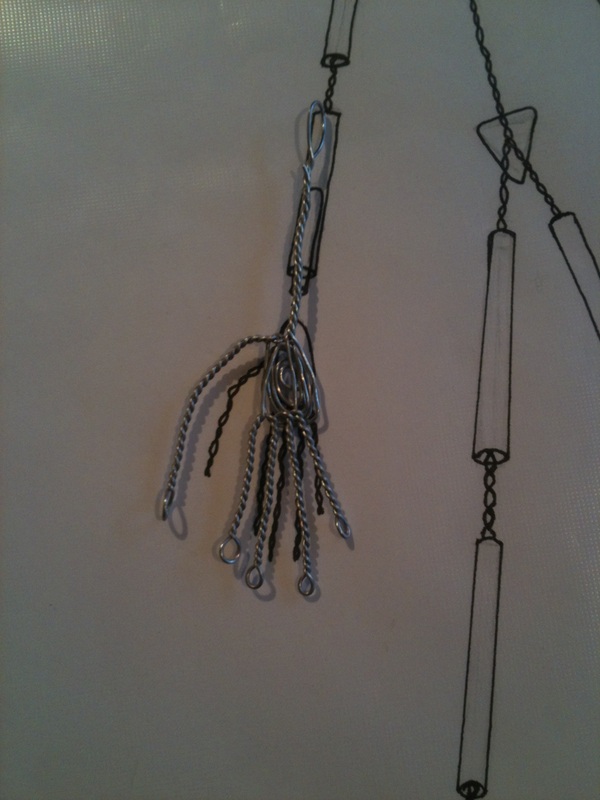
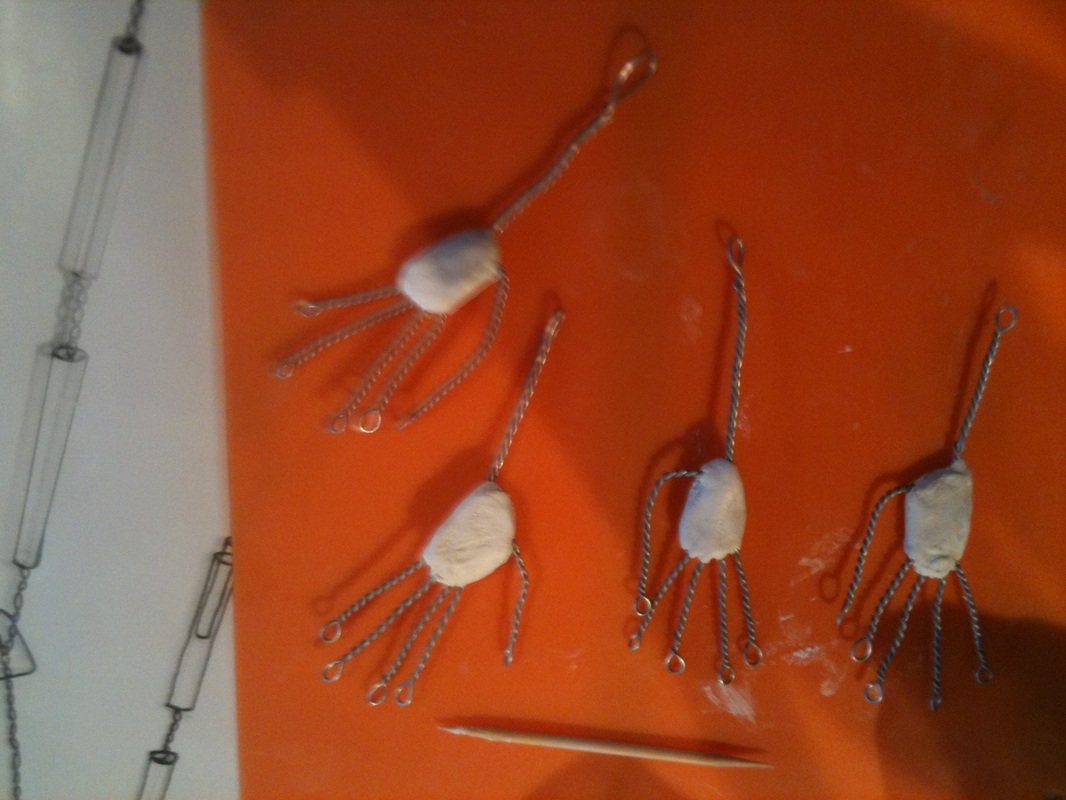
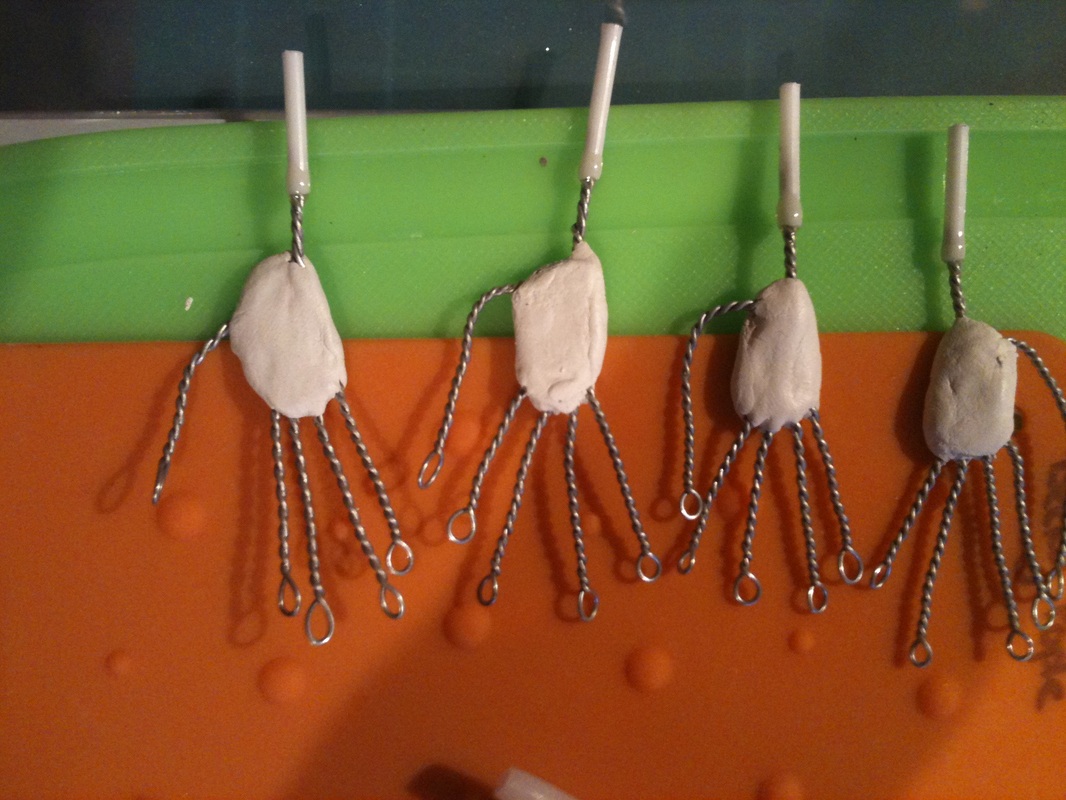
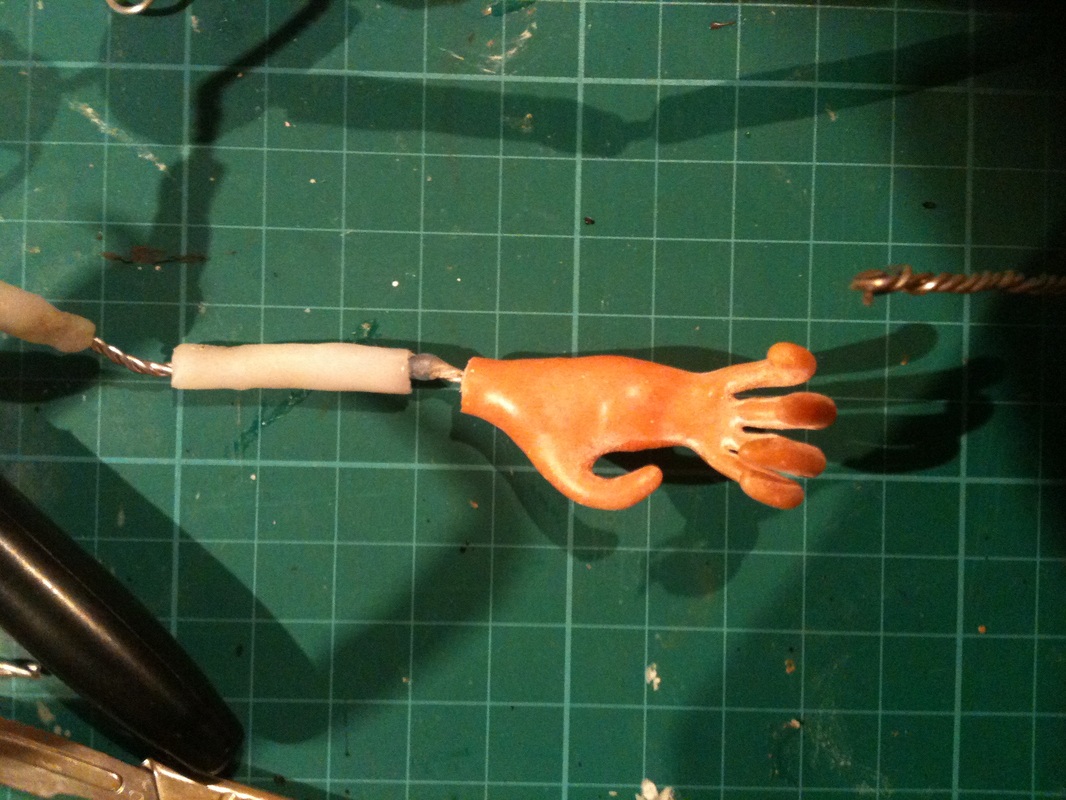
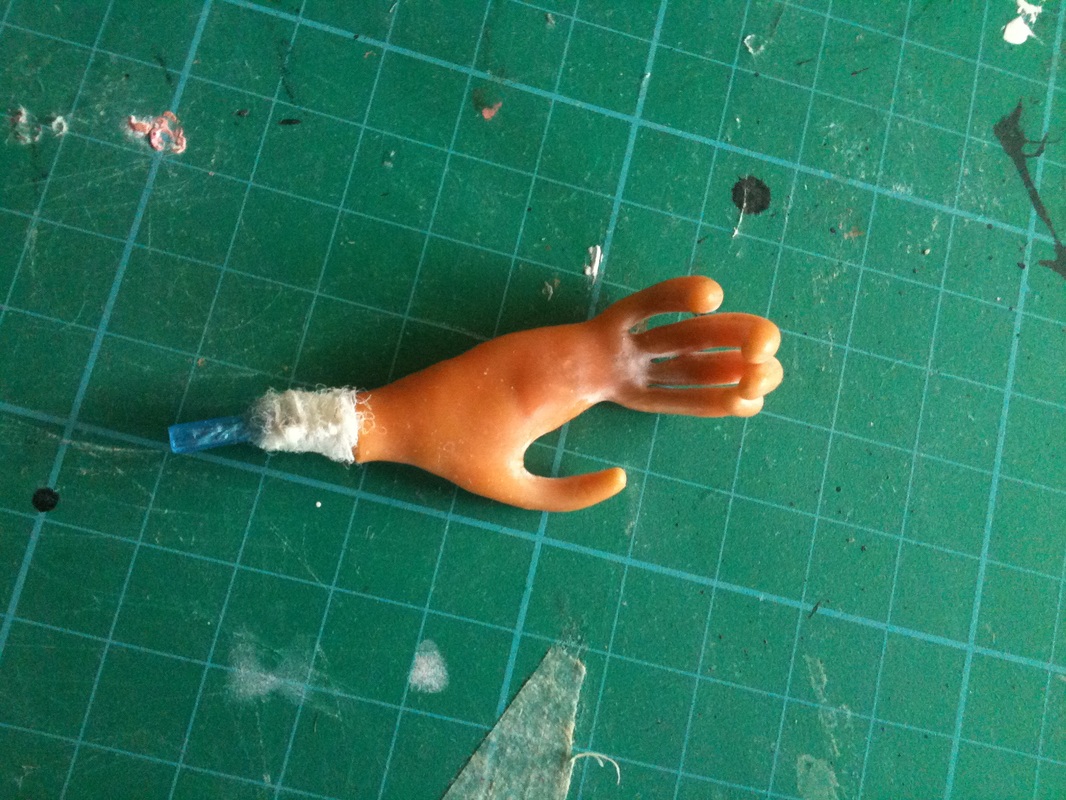
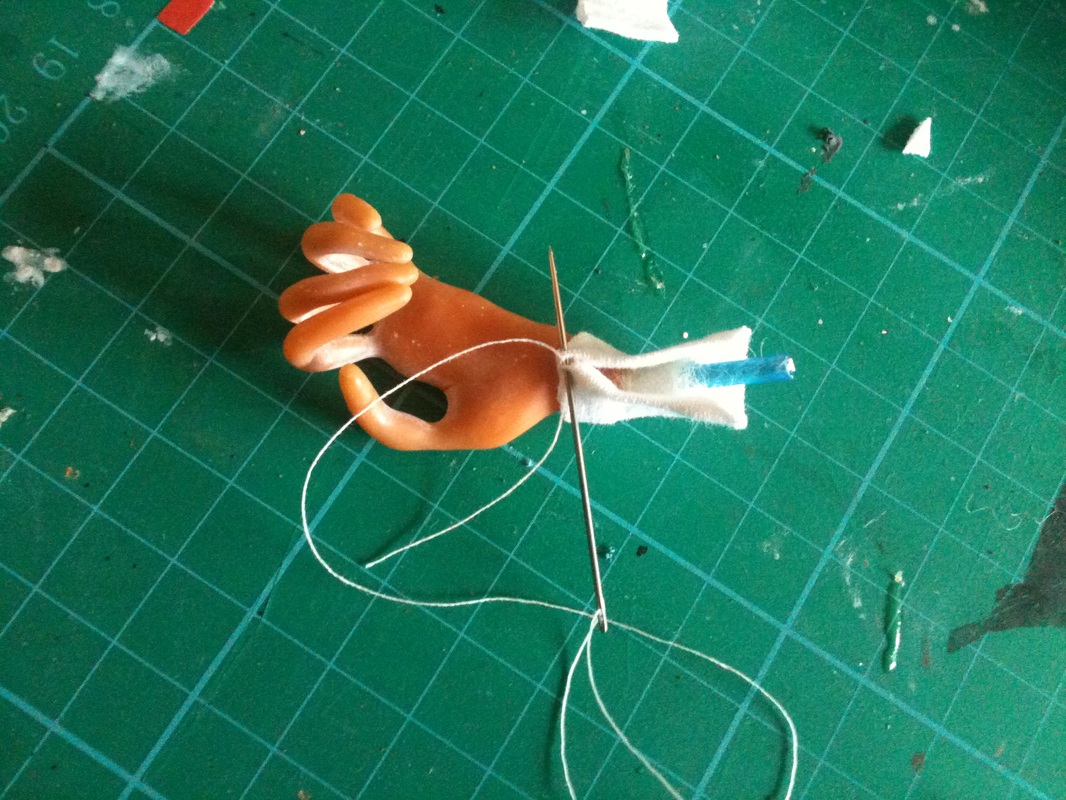
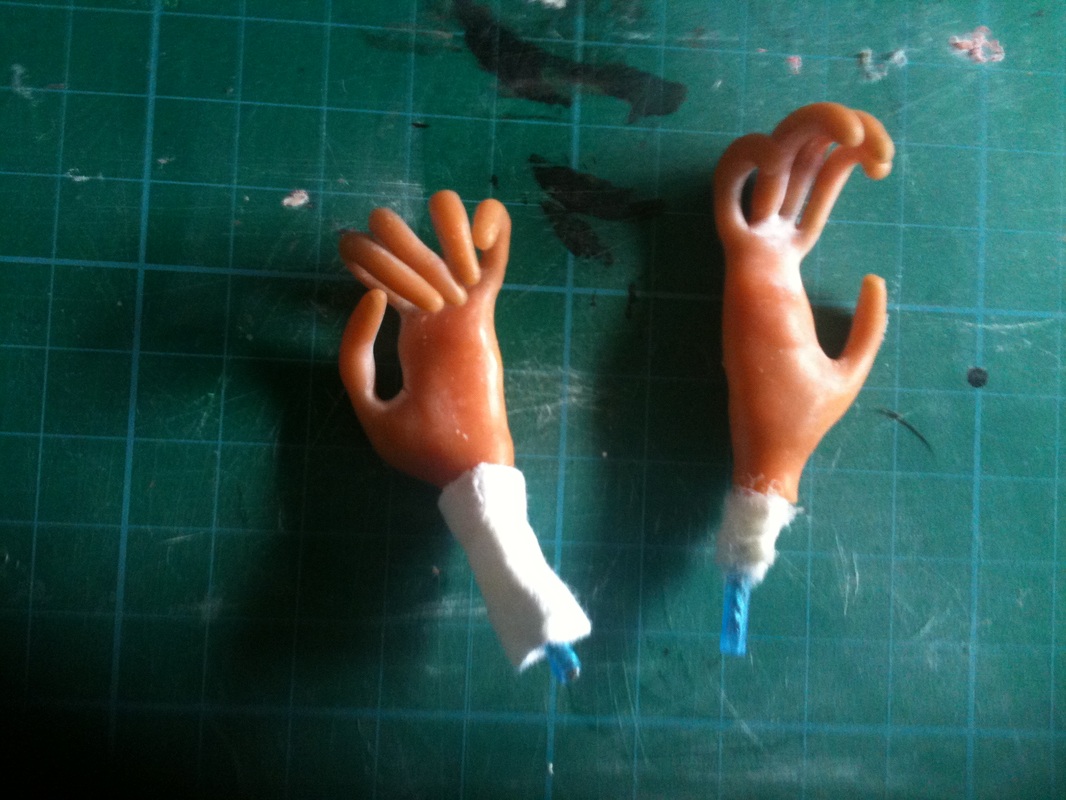
Hands:
A layer of very fine sporting injury foam is wrapped around the wrist to bulk it out to give hand a more realistic shape (the librarians hands are very elongated and exagerrated but you get what I mean). The hands are then dipped into skin coloured latex for a number a times, each time leaving that layer to dry first. Once an adequate amount of latex has been applied I then cut the excess off at the wrists to leave a neat seam for where the hand will join onto the arm.
These were then ready to slot into the wrist K&S:
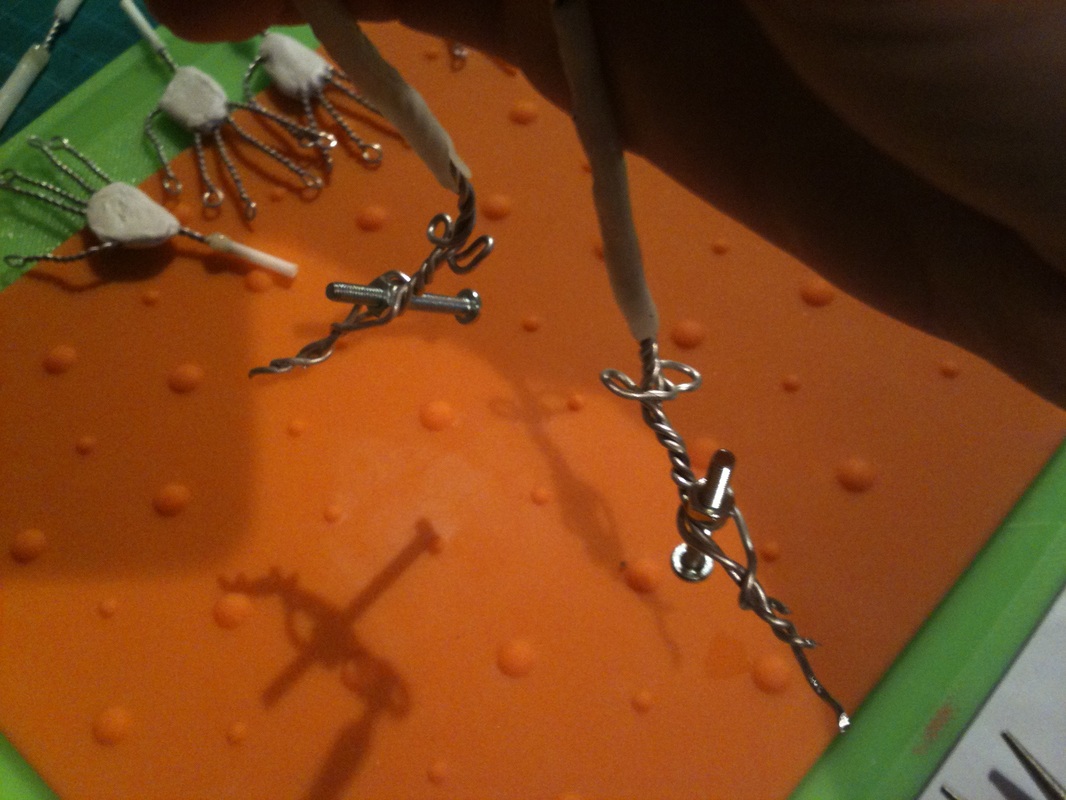
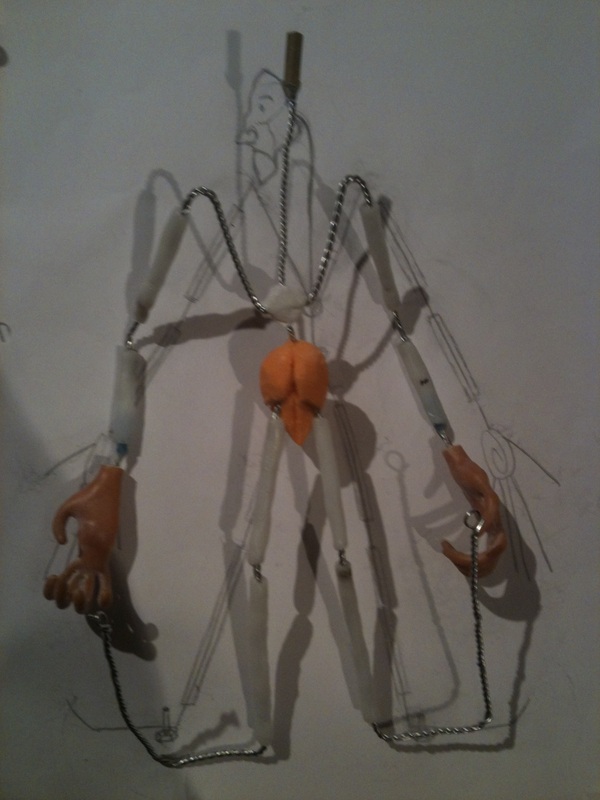
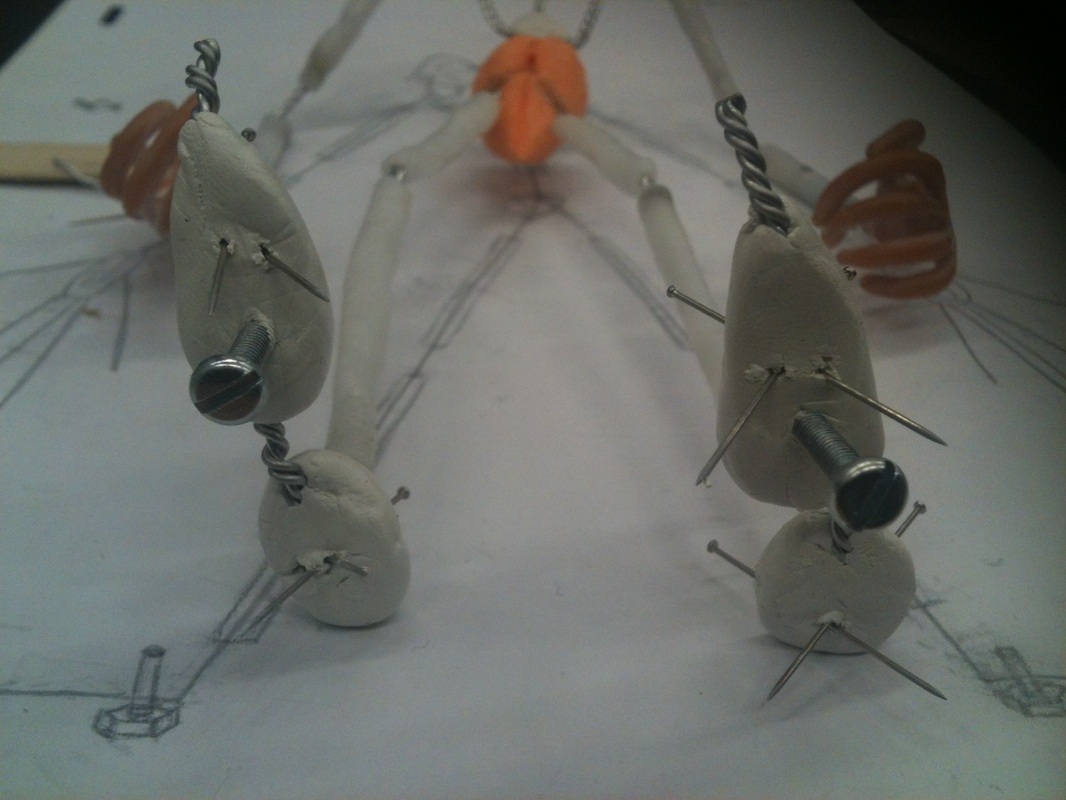
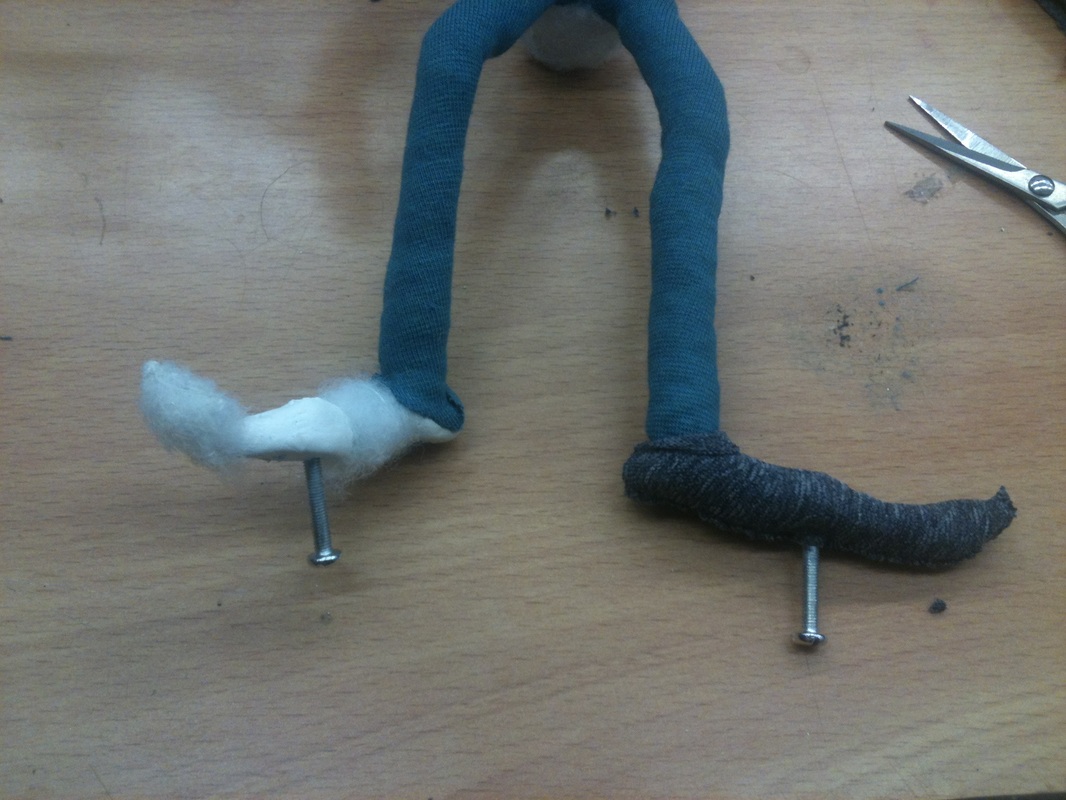
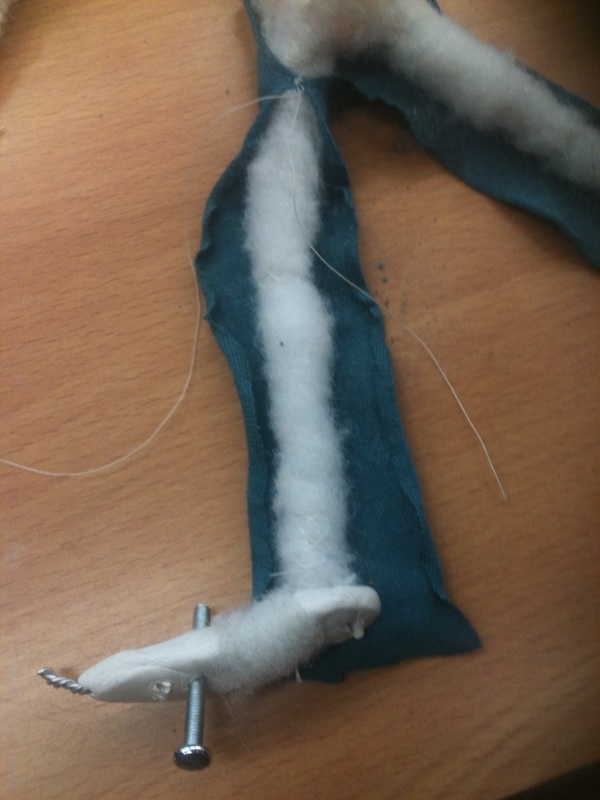
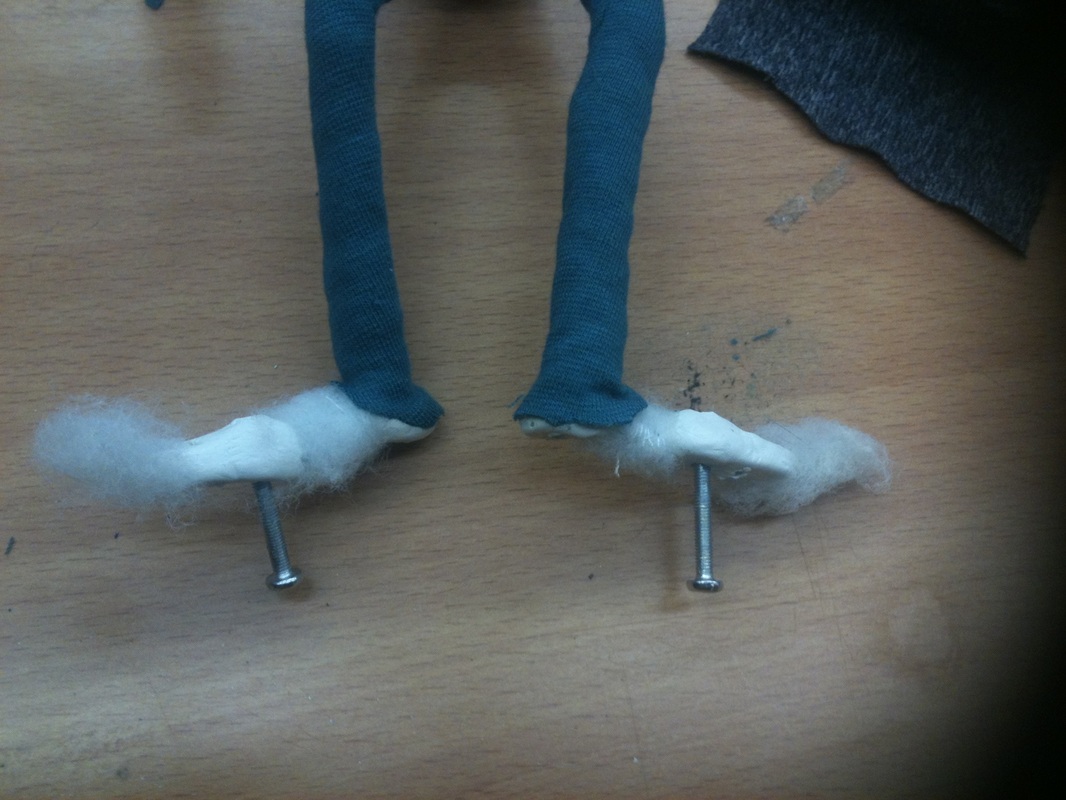
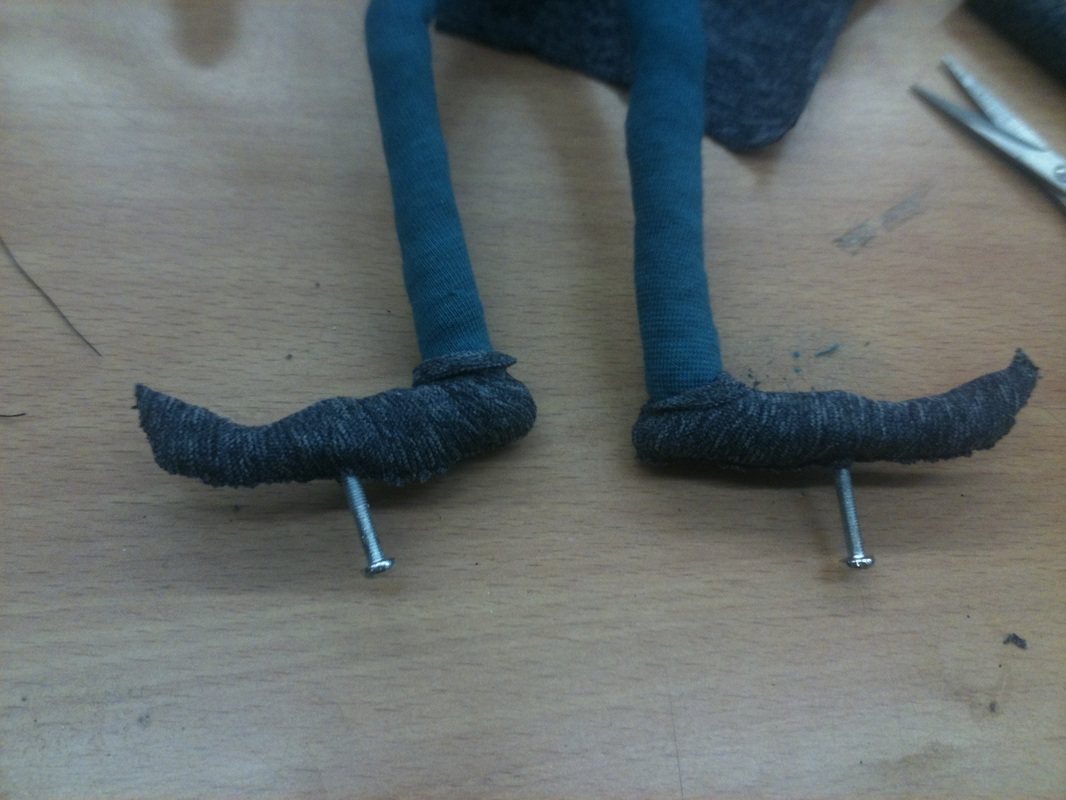
Tie-downs:
| I had made puppet tie-downs before, however with only one point of anchoring. These tie-downs were to have three. As the Librarians feet are very large this will be extremely useful when animating.
To begin with I cut the ends off of the twists of wire at the feet and carefully unwravelled the wire up to the ankle, leaving three strands on each foot.
| |
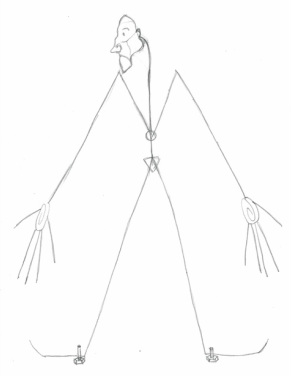
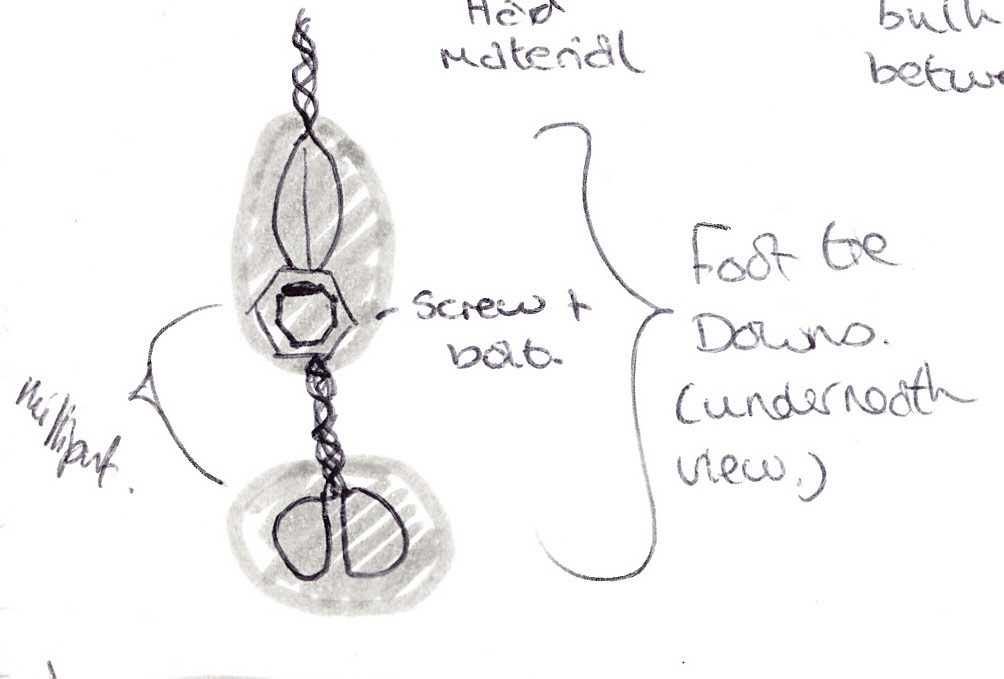
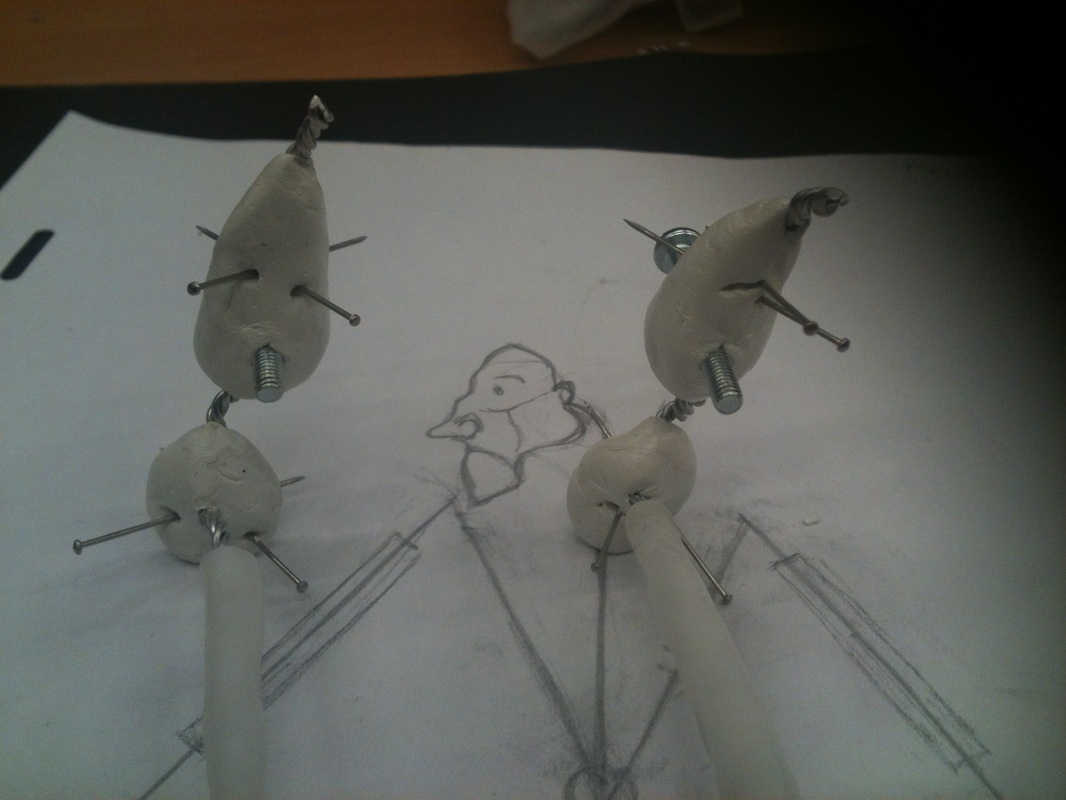
The next part is quite difficult to explain, but the diagram and photo below is basically what I did: creating an ankle it the back, holding the screw and bolt in the centre, with wire for an animatable section at the tip.
| I then set some milliput around the ankle and end of the foot with an open section in the middle to allow for movement. Whilst it was still setting I stuck two pins at a diagonal into the ankle and two at the front also at a diagonal. This will set the milliput with holes for pins to work as tie downs in the front and back of the foot when the screw is not needed or cannot reach the table with the extra foot animatable ability.
| |
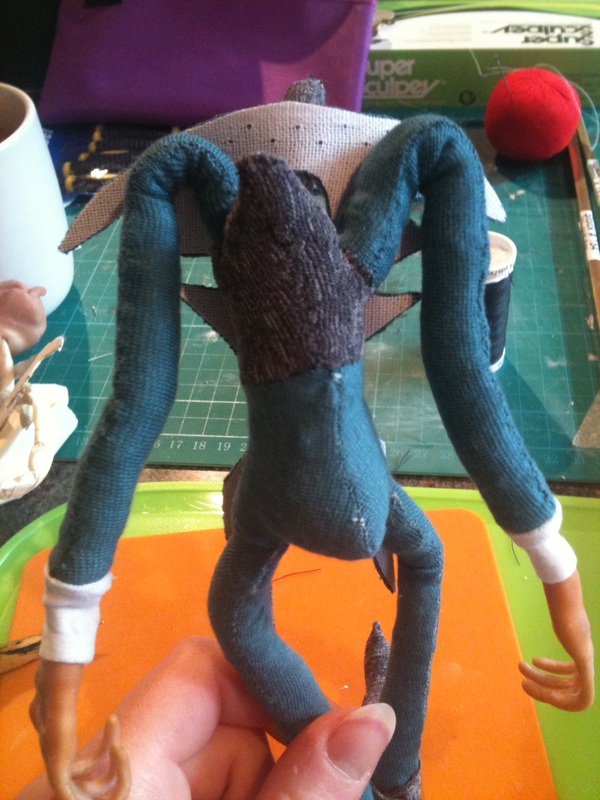
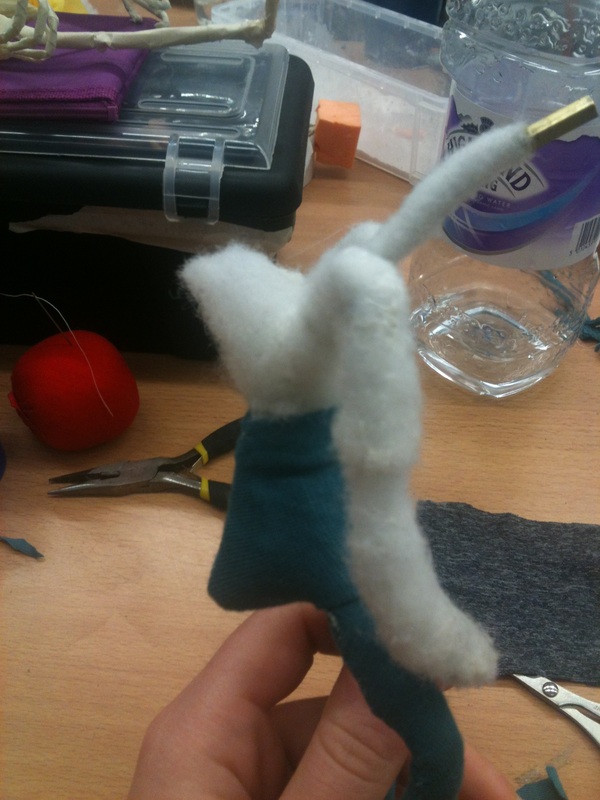
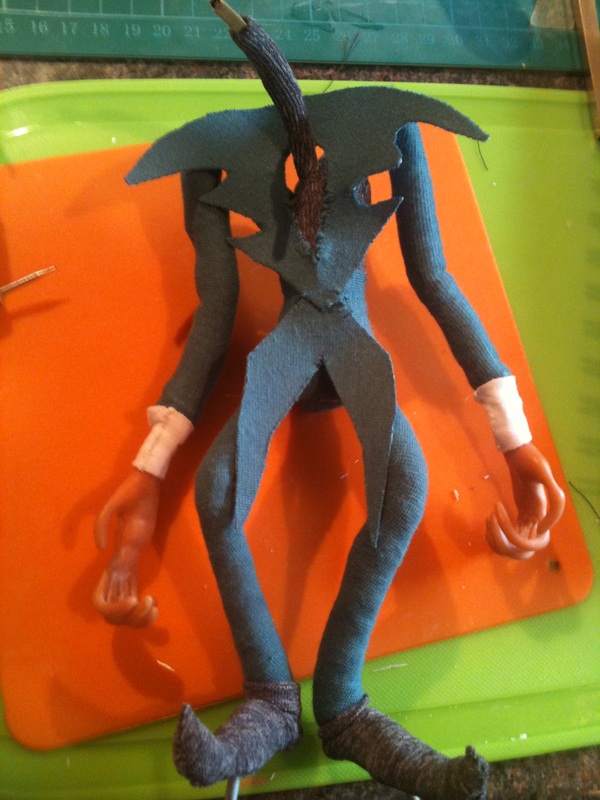
Soft layer:
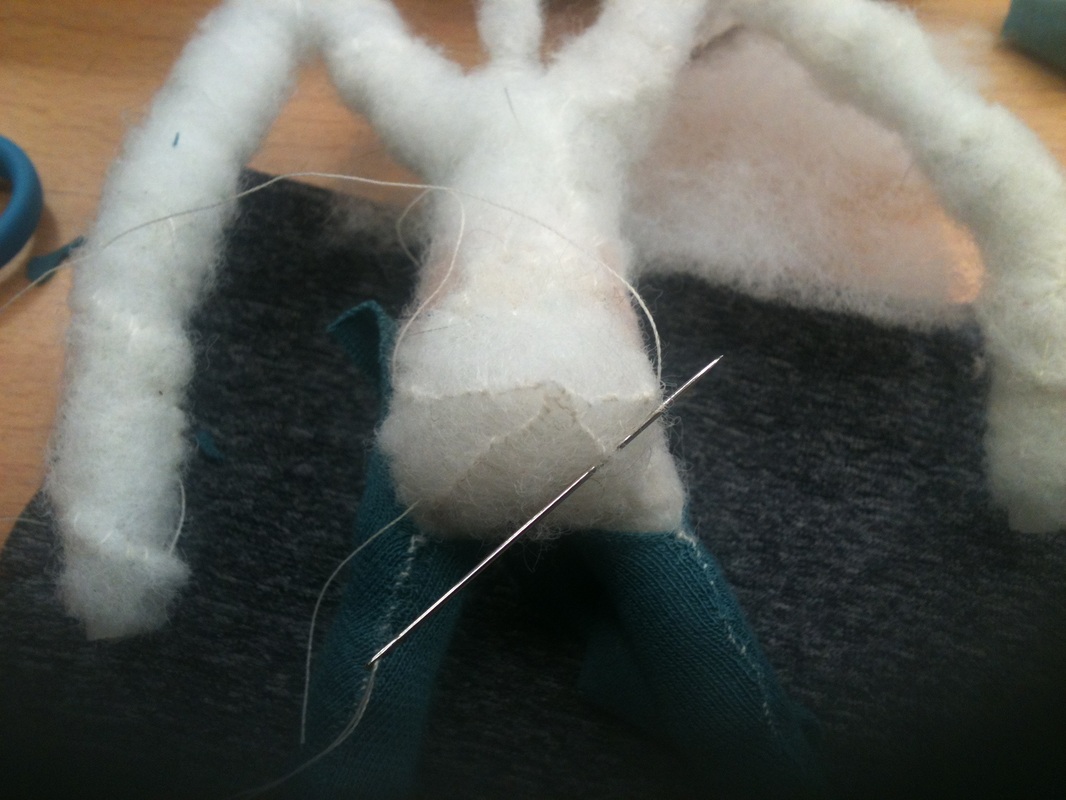
I have previously only work in latex and foam when skinning a puppet, so learnt a new way with wadding and fabric for this puppet.
Using wadding sprayed lightly in spray mount to help attach it to the body I stitched this into the necessary areas that needed thickening up (knee-caps, ankles, chest etc.). I then applied a very thin layer of this over the whole body.
| |
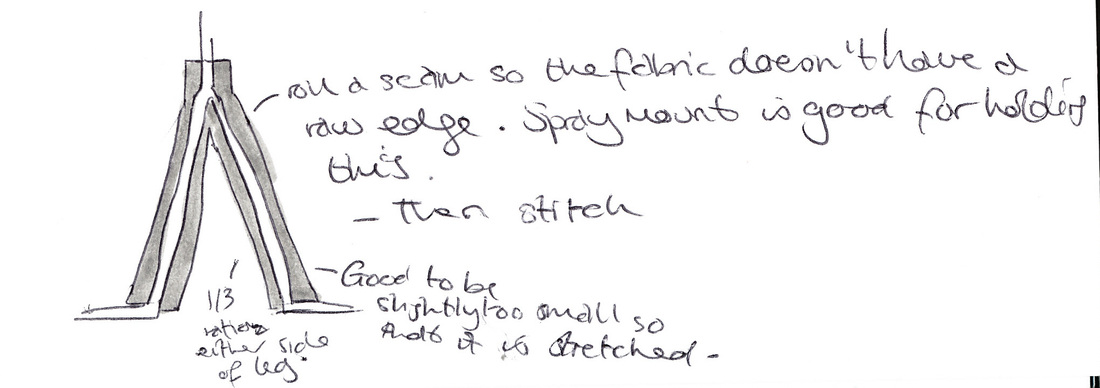
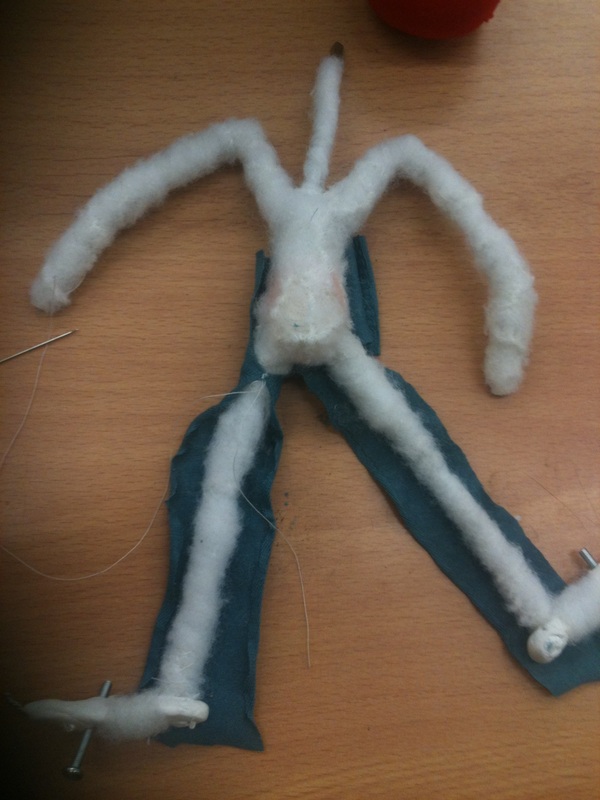
Skinning:
This was a case of stitching fabric (lightly coated in spray mount) tightly around the puppets limbs to give the impression that it is wearing clothes. The fabric I used was a mixture of leggins and tights which will allow the puppet good movement and not be restrictive. I have used a white thread so it's easier for everybody to see what I did.
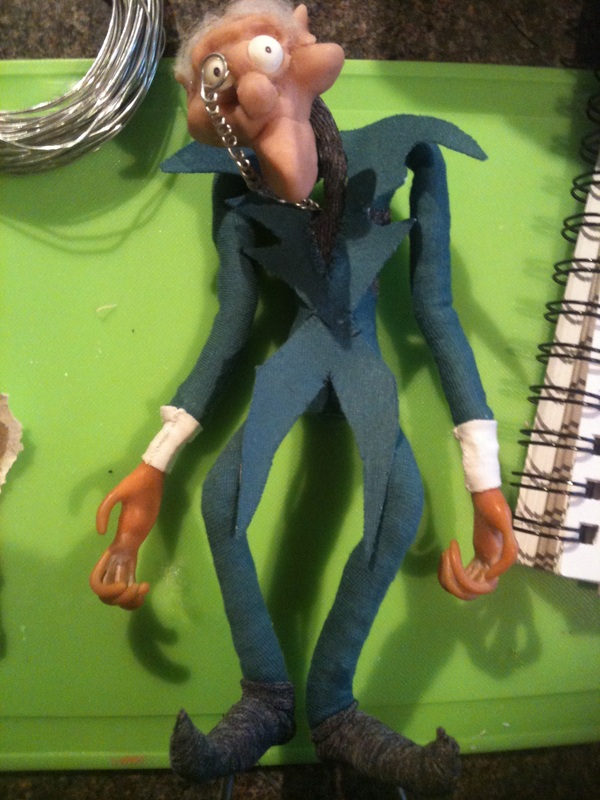
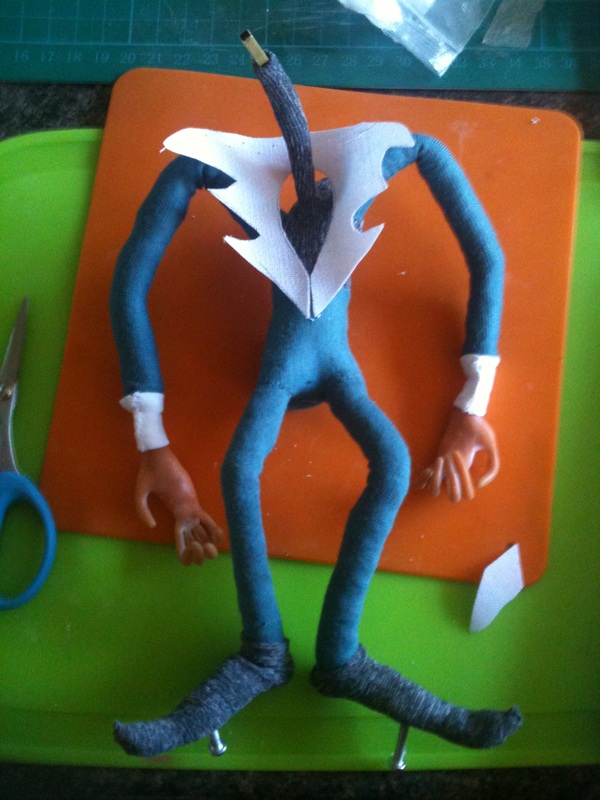
Finishing touches:
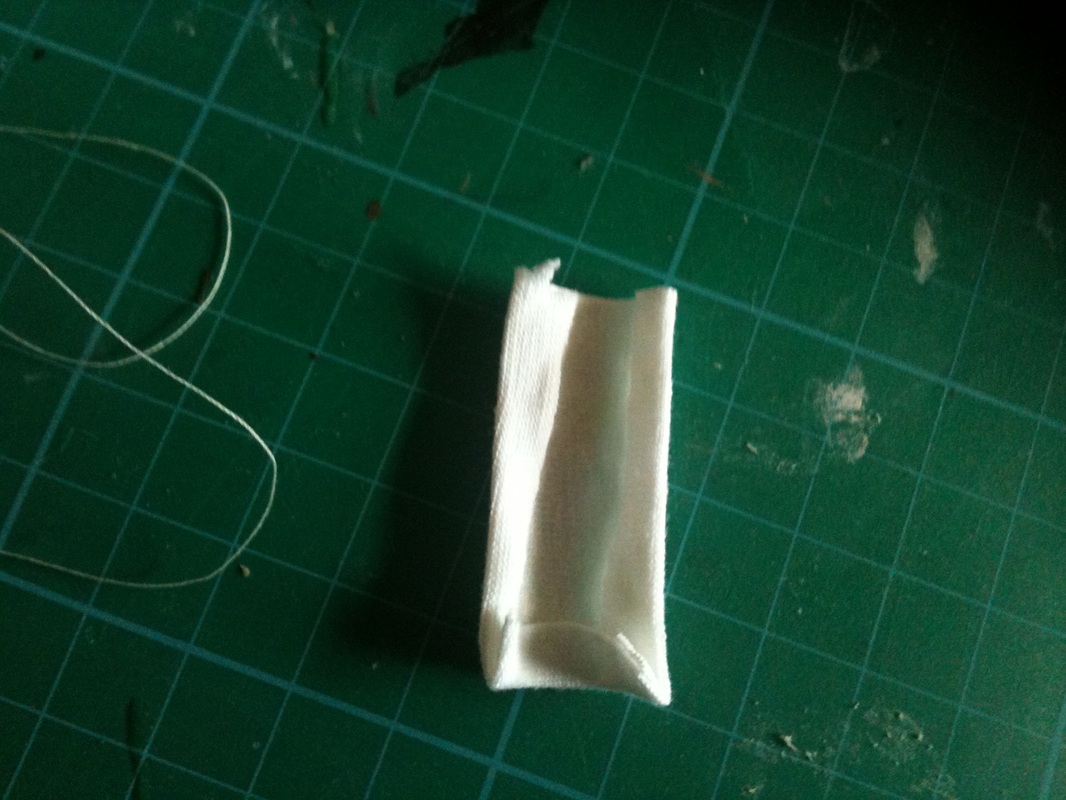
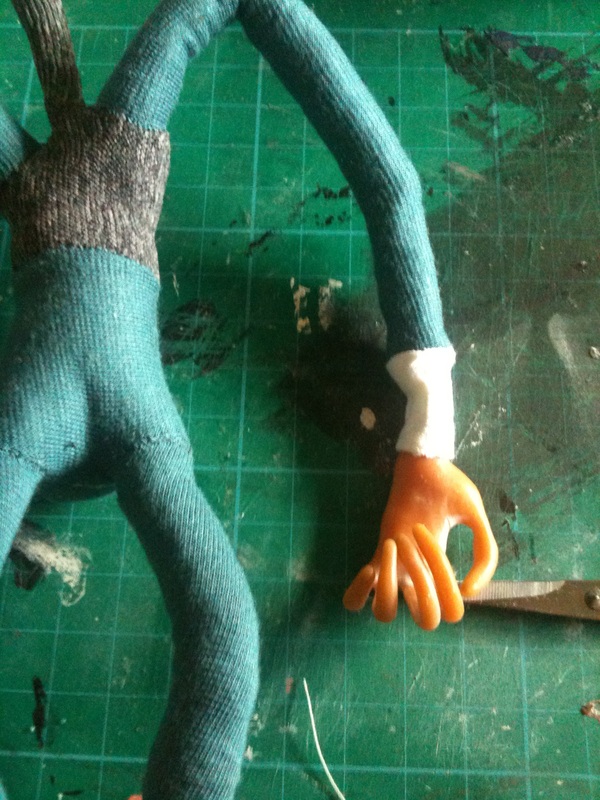
Creating cuffs to hide where the hand joins to the arm -
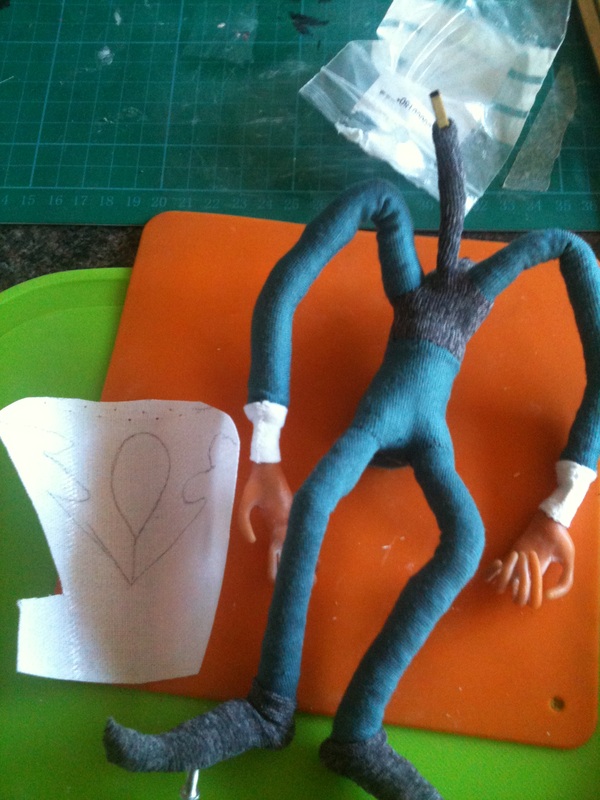
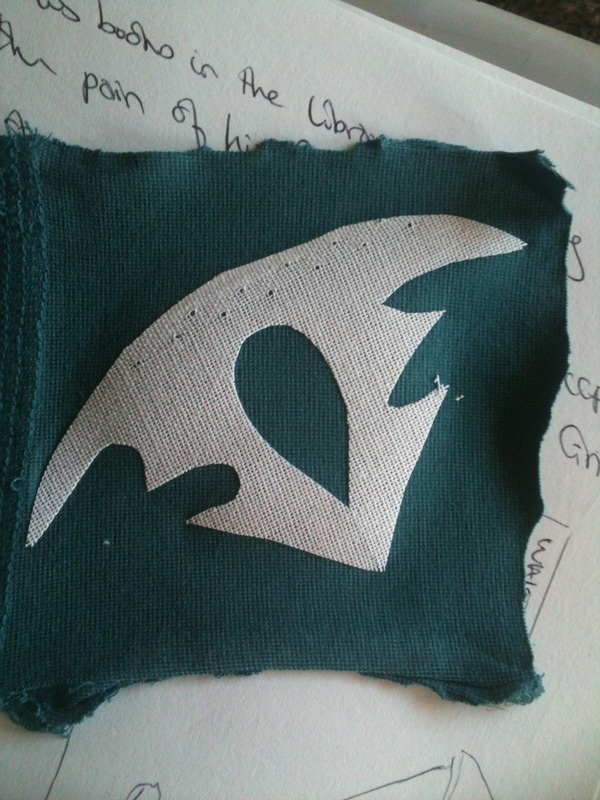
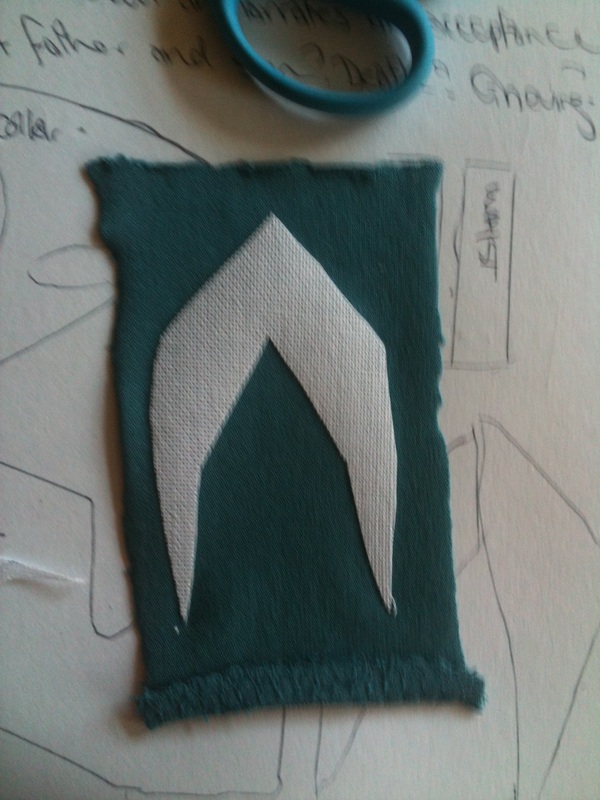
Creating the collar and coat tails of the jacket -
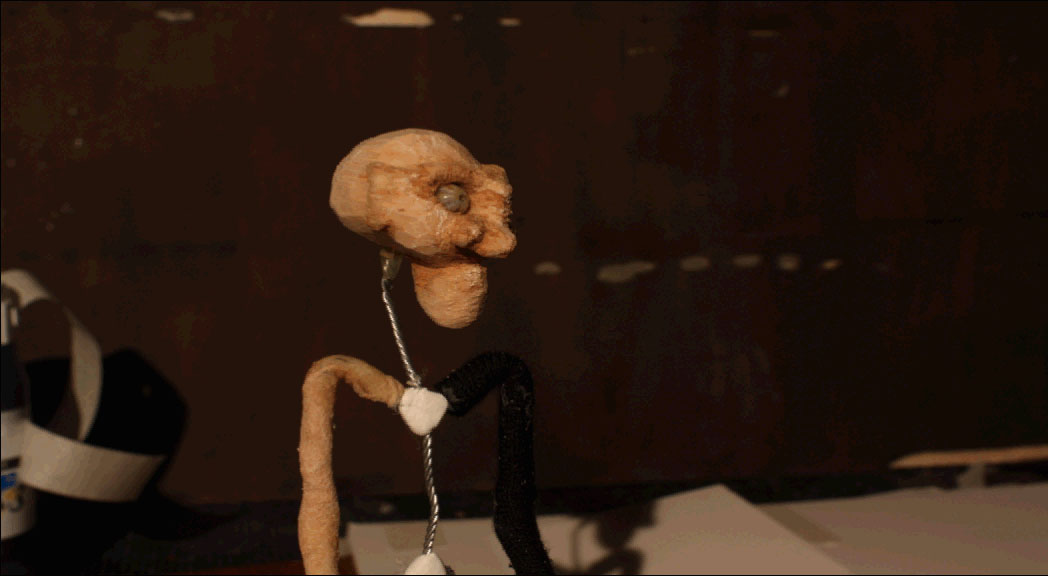
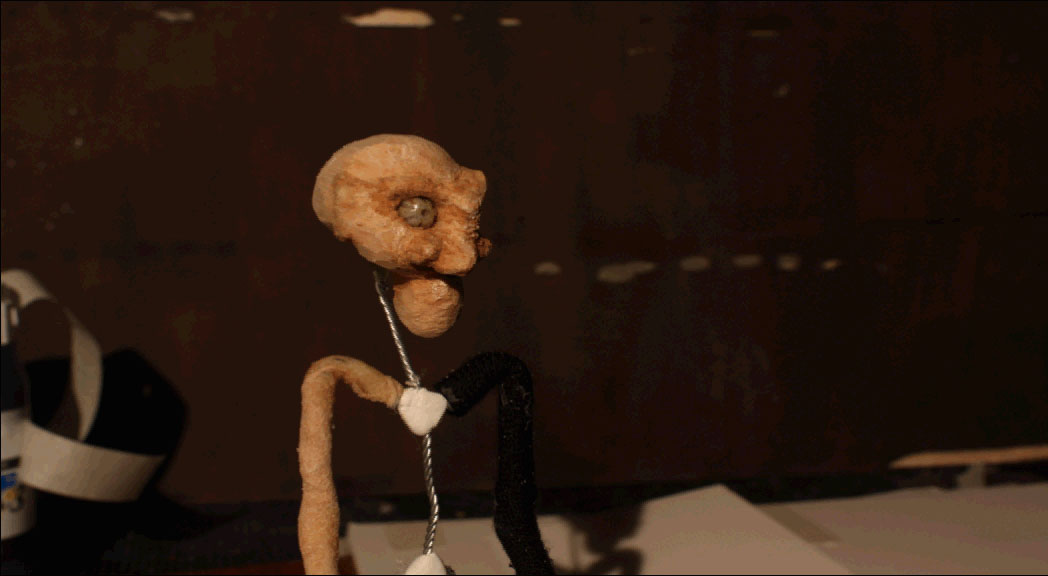
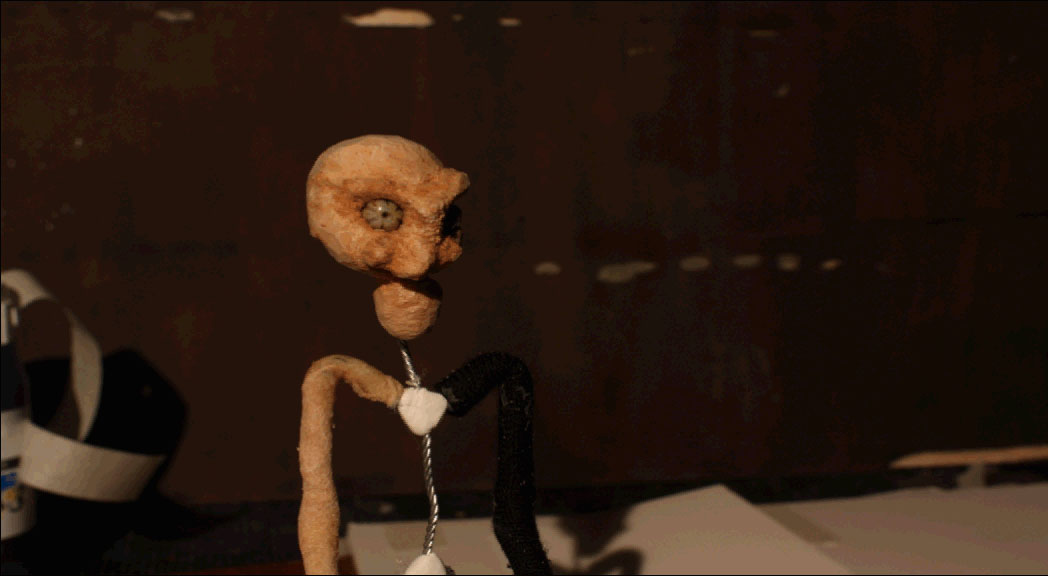
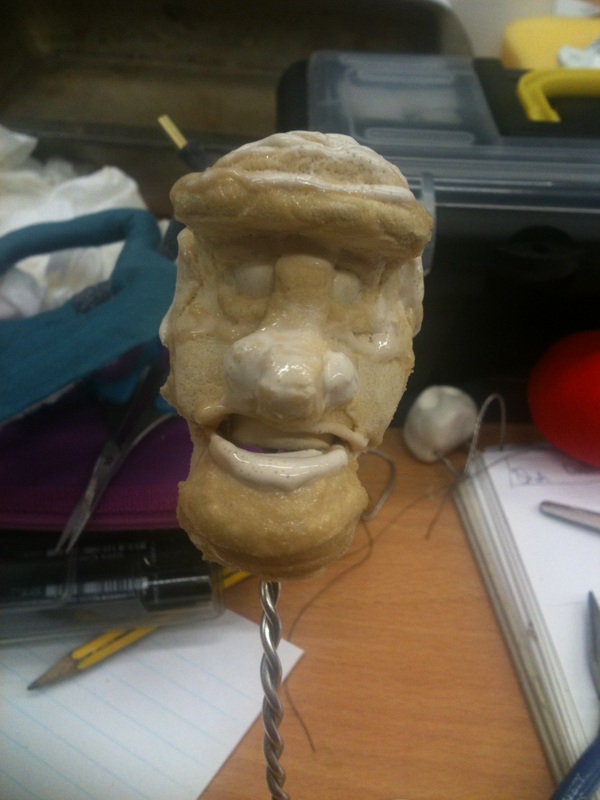
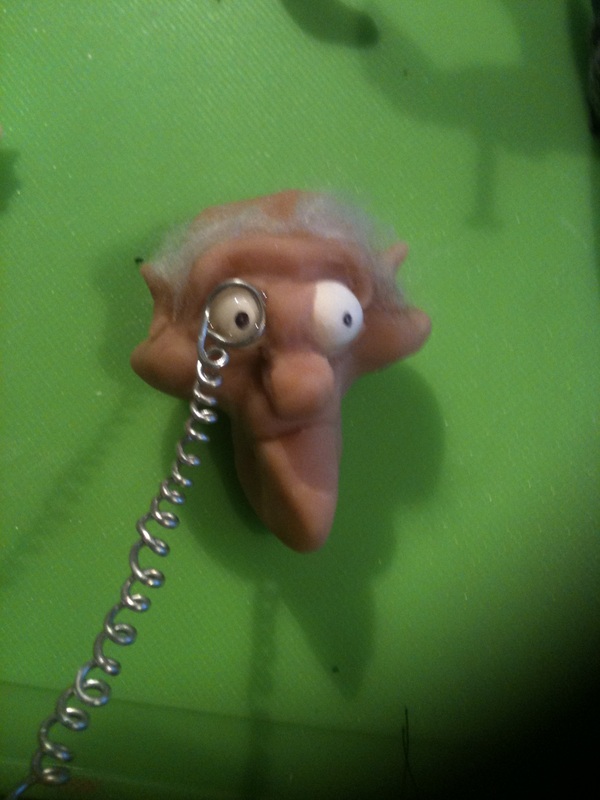
| | The head was made out of Sculpey whilst the monocle was twisted wire -
|
Finished prototype -
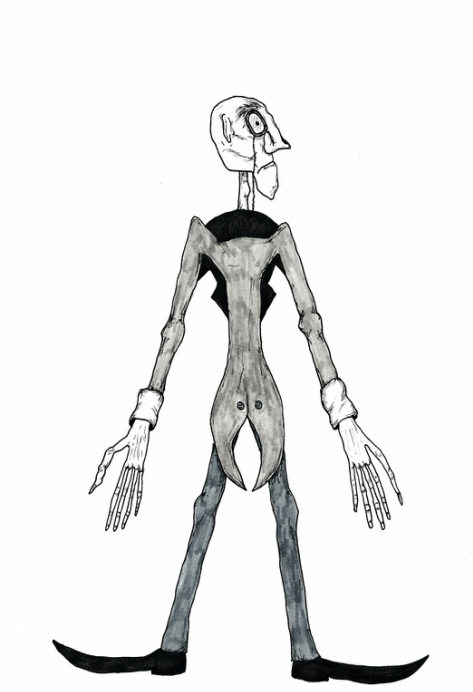
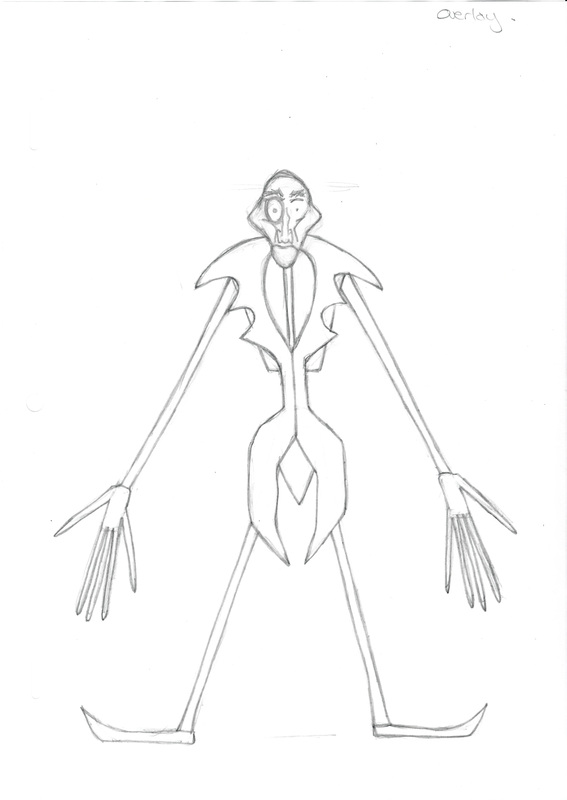
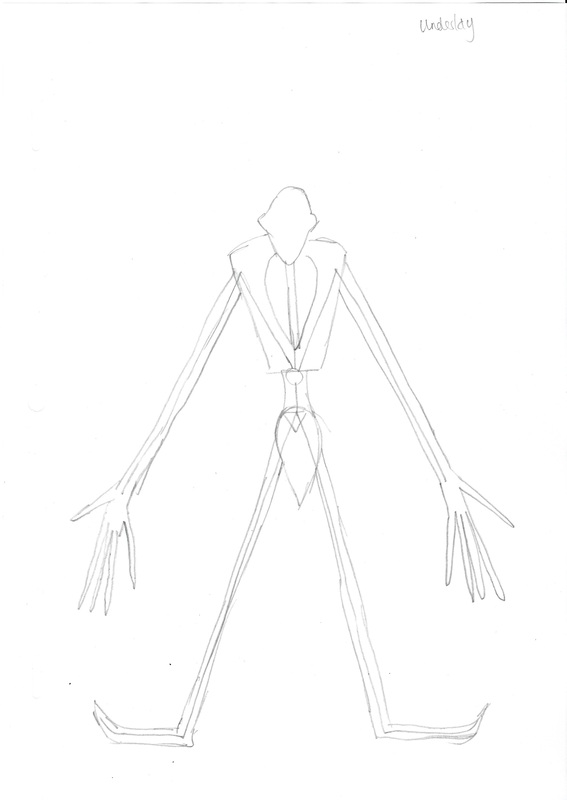
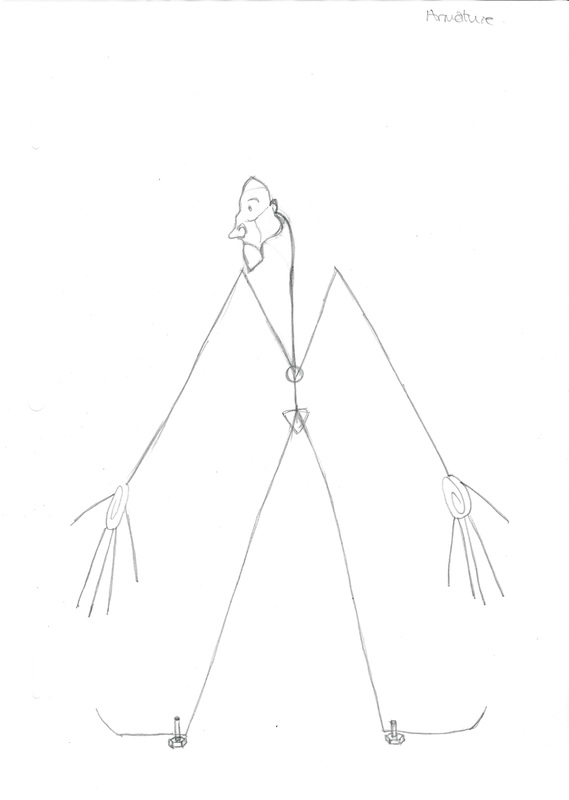
I am now doing a series of workshops to build the first prototype puppet for the Librarian. In order to do this I had to draw a scale drawing of the puppet and armature, this would in no way be the final design but just a starting point so that I can start to prototype and then build back into these drawings to improve them.
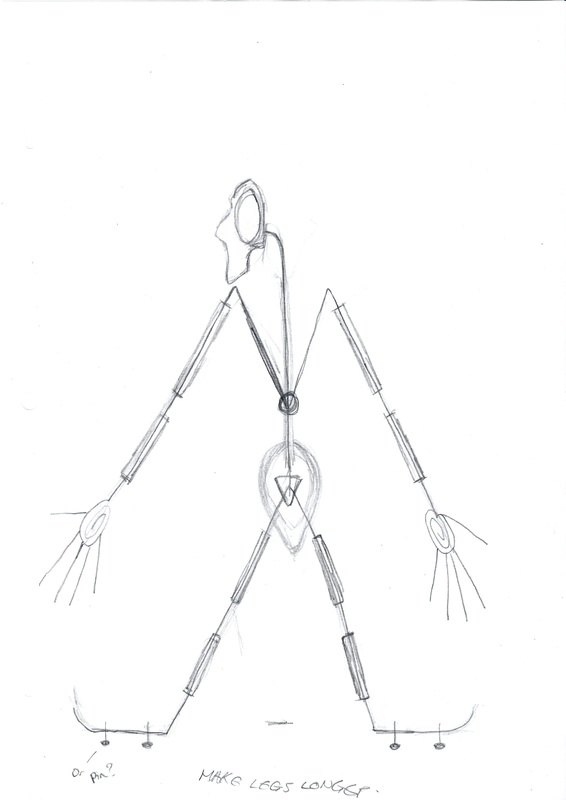
For the workshops my scale drawing needed to be under 20cm, this proved difficult as my puppet needs to be long and gangly, yet extremely skinny. The drawings below were the first attempt, however when finished I realised the legs needed to be alot longer so they would need to be redone.
| | These will be the drawings that I will be working in during the prototype workshops. The scale is just over 20cm.
(Top - scale drawing
middle - soft layer
bottom - armature)
I still need to add detail to the armature drawing such as where the bones will sit and if there will be K and S, however because my puppet is such an odd shape I will work on where these will go during the workshops.
|


 RSS Feed